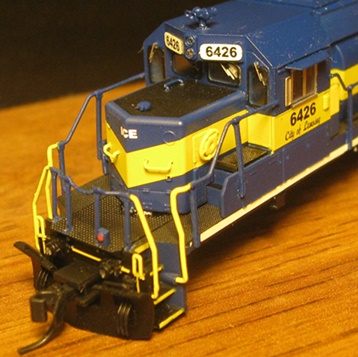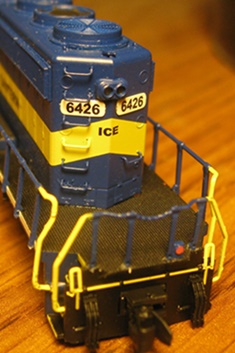


Introduced: 2017
These gorgeous looking and smooth running models are available with factory-installed ESU LokSound DCC decoders (the first IMRC diesel to come with DCC-Sound). They are also available with non-sound decoders or no decoder at all. They come in numerous prototype-specific detailing packages (variations include rotary beacons, ditch lights, dynamic brakes, cab antennae style and location, horn style and location, high or low hood, etc).
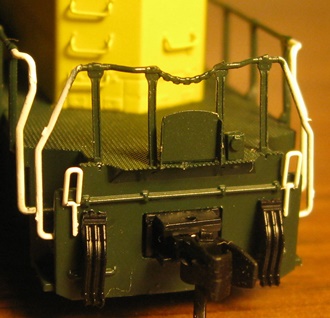
All models come with a couple of ala carte cab sunshades (to be installed by the modeler), and at least some of them come with four "drop step" details for the end platforms. Two of the drop steps are designed to be installed in the raised position, whereas the other two are designed to be in the lowered position (allowing you to set them up however you like) -

The paint and fine detailing on the shell are a wonder to behold (with numerous separately applied etched metal parts). On the downside, I find the handrail stanchions to be a bit flimsy (as far as how they plug into the sidesill), so you do have to be pretty careful how you handle these things.


Internally, these models are quite a departure from previous IMRC diesels. They do still seem to share a number of common parts with Atlas diesels of similar vintage (motor, trucks, etc), but the screwless (and wireless) chassis design is all-new. The fuel tank, motor saddle, and two plastic clips (one on the nose and one underneath the rear end of the PCB or decoder) serve to hold the whole assembly together -

The DCC-Ready chassis is all-metal and split-frame. The "slow speed" motor is 5-pole and skew-wound. Each motorshaft is equipped with a brass flywheel. The plastic driveshafts have hex ends that plug into the flywheels. The other ends have notched cups that click onto ball-and-pin connectors on the wormshafts. The worms seat inside of bearing blocks that are slotted into notches in the chassis -

Metal contacts for motor and speaker current are part of the plastic motor saddle assembly (lined up with metal contact pads on the PCB or decoder). A long plastic shield is clipped to the top of the chassis (dunno why - maybe to prevent short circuits between the decoder and chassis?)

For the sound-equipped models, the speaker is mounted inside of a plastic shroud that seats inside of a rectangular cutout in the bottom of the chassis. Metal tabs on the speaker butt up against the speaker current contacts that run down from the top of the motor saddle -

Although speaker holes are provided in the plastic fuel tank detail, IMRC states that these are superfluous and that the sound is actually designed to project upwards through the locomotive. All twelve wheels provide pickup (via low-friction axle cup wipers that contact long bendy metal contacts attached to the chassis). All six axles are geared and all gearing is plastic. Wheels are blackened and low-profile (no problems on Atlas C55 rails). There are no traction tires. MTL couplers are mounted to the shell.

Separate tubes of light-conducting plastic extend downward from the headlight/numberboard area to provide lighting for the ditch lights (for models so equipped). For the decoder-equipped models, F0 turns on the directional headlights, numberboards and ditch lights. The LED lighting is blue/white (and somewhat dim, at least to my eye). One can turn on the ditch lights independantly of F0 by using F6. However, they are much dimmer than when F0 is also turned on (to the point of being nigh undetectable in a brightly lit room).
A secondary LED on the back end of the decoder board provides lighting for rear ditch lights (although AFAIK IMRC has yet to release any models that are so equipped). There is also an LED on top of the decoder board for illumating a rotary beacon (activated by F5). Unfortunately, IMRC did not build any sort of "light pipe" support into any of their beacon-equipped models, so it's a bit of a do-it-yourself project if you want to have a rotary beacon that actually lights up. There is no provision for flashing ditch lights.

Note that the default state of the ESU decoder is for the sound to be turned off (you have to hit F8 to turn on the "prime mover"). Also note that all sorts of automated behavior is built into the throttle. IE, when you apply some throttle the locomotive will take a few seconds to rev up before actually moving. Similarly, when decelerating you will hear some braking sounds before the locomotive actually starts to slow down. If you want your SD40-2 to respond more quickly to throttle changes, set CV 124 to 16.
Performance on the sound-equipped models is quite impressive, although a lengthy break-in period seems to be a requirement. For whatever reason, sound-equipped models tend to be a bit finicky when it comes to dirty wheels and track. So, an hour or two of roundy-rounding is the general rule of the day when it comes to wearing all the wheel blackening crud off the wheel surfaces (followed up by track cleaning, since that's generally where the crud winds up once it leaves the wheels). Additionally, it may be necessary to clean excess lubrication off of the truck contacts and wipers.
Another potential issue relates to the dimpled axle wipers. After running mine around for many hours, I noticed that it had started getting very balky again. And since the wheels and track were all clean, I decided to check out the dimples in the wipers (a common source of trouble with this otherwise reliable pickup scheme). And what I found kind of blew me away - the axles and axle wipers are blackened just like the wheels! I mean, seriously. WTF? Well, long story short, I used a small screwdriver to clean the gunk out of the dimples and everything was hunky dorey once again.
Note that the above only applies to the sound-equipped versions. The analog version that I tested ran great right out of the box and didn't require any extra efforts vis'a'vis wheel cleaning.
Overall performance is outstanding. Mine run smoothly and relatively quietly at all throttle levels (maybe just a bit "buzzy" as compared to a Kato diesel, but not overly or annoyingly noisy). Slow speed creep is one-tie-at-a-time and the top-end speed is quite realistic. Pickup is flawless, with mine able to smoothly creep through insulated-frog turnouts at yard speeds. Pulling power is exceptional, with mine having no problems hauling 50+ assorted freight cars through curves on level track. I didn't have any problems with any of the wheels derailing (even on 9.75"-radius curves).
The sound is nicely robust (although a bit overly loud as delivered, so most people will probably want to turn it down a bit by lowering the master volume setting in CV63). One very nice feature with this ESU decoder is the way that it deals with unexpected current drops (y'know, like when you hit a spot of dirty track or whatever). Rather than shutting down and then restarting from scratch (revving up, etc), it simply cuts out briefly and then resumes from where it left off. A very welcome innovation!
Overall, these are beautiful looking models that run extremely well. And given the plethora of available roadnames, they provide some very nice alternatives to Kato's sparse (and infrequent) SD40-2 releases.
Note - IMRC does not recommend that their decoder-equipped models be operated on analog layouts (evidently they're not "dual mode" like most DCC-equipped models).
Prototype -
The EMD SD40-2 is a 3,000-horsepower (2,200 kW) C-C diesel-electric locomotive built by EMD from 1972 to 1989. The reliability and versatility of the 3,000-horsepower (2,200 kW) SD40-2 made it the best-selling model in EMD's history and the standard of the industry for several decades after its introduction. The SD40-2 was an improvement over the SD40, with modular electronic control systems.
Features -
- All-new tooling
- Finely molded parts designed to reproduce railroad-specific details
- Laser-sharp painting and etched metal details
- Available with ESU LokSound "Select Micro" DCC-Sound decoder
Shell removal is a bit tricky as the fit between the shell and chassis is very tight (made even more so by the four nubs inside the shell that plug into four dimples in the chassis). What worked best for me was to grab ahold of the fuel tank with one hand, the rear of the shell with the other, and then just gradually wiggle the rear end of the shell up and off. Once that end is free, the front end should pull off relatively easily.
Grade: A