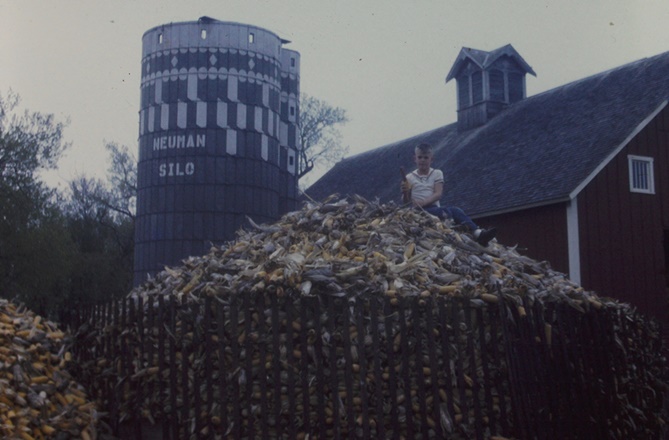
04/30/22 - A possible explanation for my corn obsession?
I don't remember where this picture was taken or what I was doing up there, but that's definitely me circa 1967 -
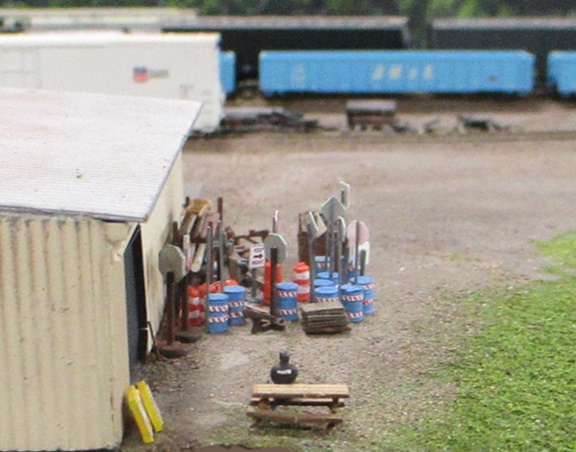
05/02/22 - Finished detailing the WPW
I think I was able to replicate just about all of the prototypical junk piled up at this end of the building (mainly just a lot of traffic signs and barrels) -

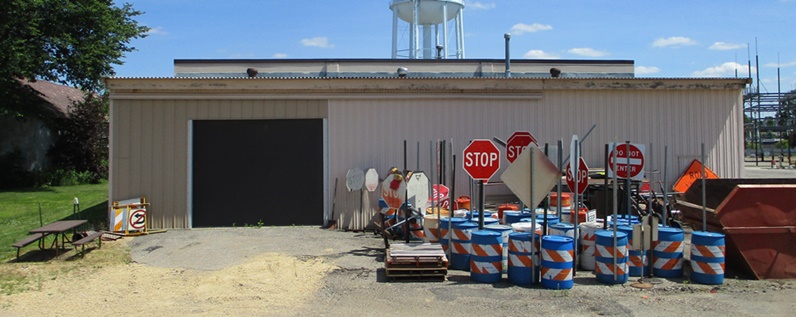
I found out too late that someone (Modellbahn Union) actually makes an angular dumpster like the pictured prototype. Ah well, better luck next time.

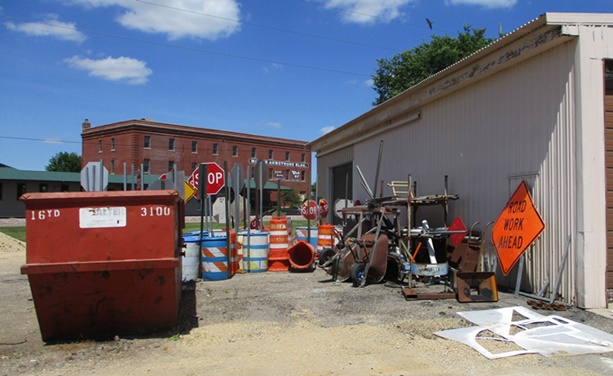
I tell ya, this would've been whole a lot simpler if it weren't for all of those annoying little stripe decals on the barrels 
That's it for the WPW, so now I guess it's time to finish up the electrical substation. And thanks to Woodland Scenics, about all I have left to do there is build a shed (ala the one pictured below) and wire it to the WS prebuilt -

I still haven't quite decided what I want to do about poles and wires. Prototypically speaking, the wires should run out of the yard and then on down the strip of land between the road and the mains. Vis -

Of course the big problem with that plan is that the poles and wires would then become giant obstacles when it comes to track cleaning. So, it's practicality vs fidelity and aesthetics. Oy, what to do??
05/10/22 - Revisiting Miller farm
Back when I was re-doing the fence at Miller farm I finally noticed these hitherto unnoticed utility poles -
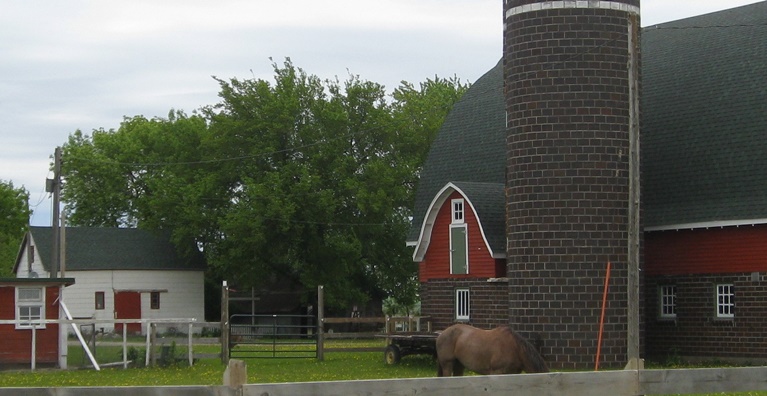
And so... of course I had to go ahead and model them -

And of course once I'd started down that road I started looking around for other stuff that I'd missed. Can you see it?


Aha! Big sheets of wood leaning up against the back of the shed!
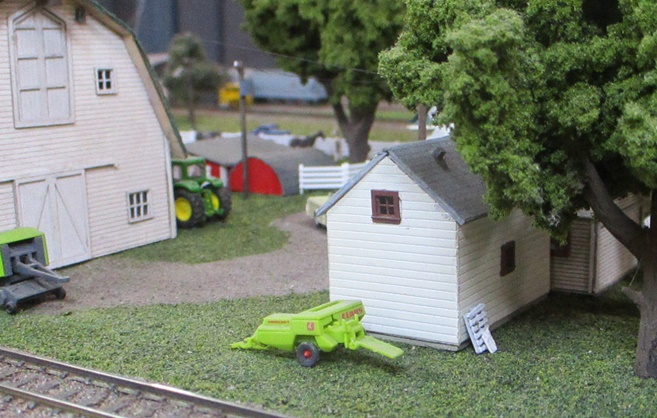
Aha! A clothesline, an air-conditioner, and an LP tank!

So yay, I think that just about wraps it up for the Millers (again).
In other news, I finally pitched the unwieldy clip lamps that I've been using for auxilliary camera lighting lo these many years and got myself some nice Neewer standing LED light panels instead -
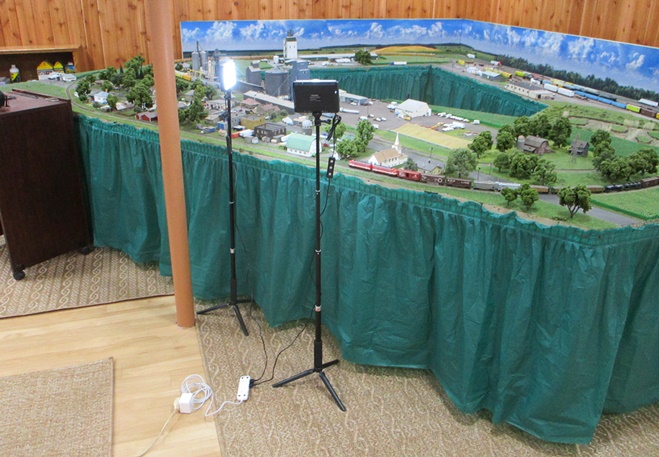
They were relatively cheap ($70 for the pair) and I'm happy to report that they work great!
07/27/22 - Lake Progress
I think I'm finally done sprigging in rushes around the shores of Lake No-Name - and it only took me two years! 

Now all that's left to do is trim them down to a more appropriate height and then paint them green. Once that's done, I'll be able to get on with the business of filling up the lake with water.
01/12/23 - A little more lake progress
I'm thinking I need to finally just embrace the irony and name this thing "Lake Progress". Anyway, still plugging away with the rushes. I did manage to get them trimmed and mostly painted, but making all the little cattails as I go has been a very slow project (not that I've been working at it all that hard, mind you).
In the meantime, hello Mr Fancy Pants. I ordered this Trainworx grain truck so long ago I'd completely forgotten it was coming!

Better late than never, I guess 
01/13/23 - I think it's finally time to retire the camera
As evidenced below, my phone seems to be doing a much better job these days, so adios Canon.

03/28/23 - Some (but nowhere near enough) water for Lake Progress
After finishing painting the last of the rushes I quickly decided that I didn't want to spend the rest of my life fabricating cattails, so I added six more and called it a day.
After that it was (finally) time to mix up some Deep Pour Water and fill in the lake, and so.... oops, it turns out I rather drastically underestimated how much of this stuff I actually need 

So, now I get to go sit in the dumb modeler corner and wait for two more boxes of the stuff to show up in the mail 
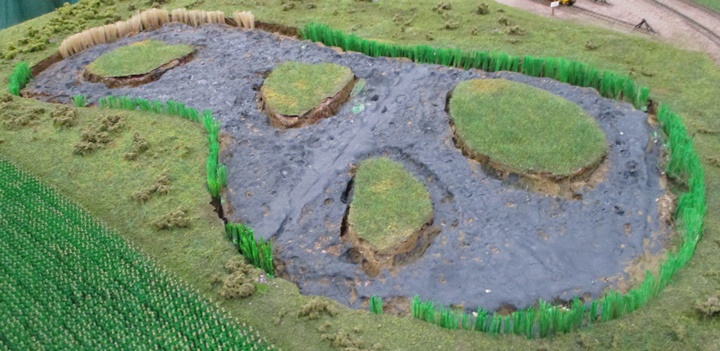
04/03/23 - Not exactly what I'd planned, but so it goes
Lots of improvisation involved here after I discovered that A) my layout base is no longer 100% level (no doubt owing to the teardown and reconstruction) and B) there were portions of the lake bed that I hadn't ground down quite far enough. The end result there is that the "water" wanted to flow west (left), leaving bits of lakebed sticking up high and dry on the east side.

My "wing it" solution was to push down on the sticky-uppy foam protrusions to get them as low as possible and then glue on fine turf to conceal them (creating islands of milfoil or algae or whatever other kind of disgusting biomass accumulates on the tops of ponds in "fertilizer runoff" country). Once the glue dried, I sprayed the turf with clear glosscoat to give it a bit of a watery shine.

Once I'd started down that road I figured I'd better go all in, so I added turf to areas that didn't actually wind up high and dry (just to sort of even things out).

On the plus side, I do like the way the Navy Blue pigment turned out. So, I at least got that one thing right
Next up, a whole buncha trees!

04/25/23 - Random Stuff
Another item (Kato Kobo Customs E8) ordered so long ago that I'd completely forgotten about it. But by golly, here it is at long last!

And from the department of "You've Gotta Be Kidding Me", I was recently contacted by a guy who wants to write an article about me and my website (Locomotive Encyclopedia, mainly)
for one of the model railroading mags.
Uh sure, sounds like the most boring article ever, but I guess that's not my worry. Anyway, as part of all that he sent over a photographer to take some pictures of me. And so,
here I am - niceta meetcha!

Article can be found here - TRAINS.COM
11/24/23 - Fixed the last bit of moving damage
These NJI signals got seriously messed up during the move to our new house (wires yanked right down to the bone) -

Given my soldering skills there was no way I was going to be able to re-wire them myself, so I figured I'd just wait for the next production run and simply replace them. Unfortunately,
NJI seems to be in limbo these days and hasn't produced anything new in years. And what signals do occasionally show up on eBay are going for ridiculous sums, so no luck there. Fortunately, I have ready access to a skilled pal (Peteski) who volunteered to repair them for me. And voila, all better! And only two years after the fact
11/30/23 - I guess somebody up there doesn't like me 
So, why am I showing you a picture of an exploded tree, you ask?

Well, it was 4:17 AM on September 29th when lightning decided to hate on one of our 100' white pines (I know the exact time because everything fell off all our walls, including an analog clock that then broke). The middle third of the tree detonated like a nuclear bomb and the top third dropped straight down (fortunately sparing our house). Unfortunately, all the shrapnel from the explosion swiss cheesed our roof and the lightning itself caused all sorts of weird electrical damage inside the house (you can see where this is headed, right?)
Yep, that lightning blew out the GFCI breaker on the circuit that all of my layout electronics plug into. And no, it didn't stop there. It then fried the power strips between the wall and my layout electronics (despite their surge protecters). Done yet? Nope! It then fried two of my low voltage lighting boards and then finished up by frying all 30 of my streetlights! Yikes!
So anyway, now I get to replace and rewire all that crap. Whee!
12/03/23 - Speaking of electricity...
I need to make room on my workbench for all these new street lights, so I finally finished up the electrical substation project that's been gathering dust there for a while -


OK, yes, it's about 50% science fiction. But the WS bits definitely saved me a lot of time and effort and I think they look great.


And now, on with the lights!
12/25/23 - Huzzah, Hope has streetlights once more


18 down, 16 to go.
01/19/24 - Finished replacing the last of the burned out lights
I really love my big ol' layouts4u yard lights, so I decided to go ahead and add a third set (even though the prototype only has two) -


I haven't re-added the EZ Line yet, and at this point I'm debating whether or not it's even worth the effort. As I've lamented in the past, it's virtually invisible, so all it's really good for is occasionally getting in the way. I dunno, I guess I'll just back-burner that decision for now and get going on the Waseca elevator instead -

02/24/24 - Wow!
I got a nice writeup in the April 2024 print issue of Model Railroader magazine (courtesy of Will Everitt) -

Unfortunately, they got my name wrong (Patterson instead of Peterson)

On the plus side, Eric White gave me a ridiculously nice shout out on the editorial page - and this time with my name spelled correctly

All in all, a very nice little tribute. My humble thanks to all concerned! 
06/01/24 - A quick visit to Hope
The major news is that the bank doesn't appear to be a bank anymore (or anything at all, really) -

The minor news is that the church got a new (ugly) metal roof and some additional parking out front. Also, the vestibule got some fancy new windows and a canopy over the entryway -

And the ongoing sad news is that Finch's Pub remains shuttered
06/10/24 - Lit vehicles for the highways
I've been wanting to populate my two stretches of highway with lit vehicles for years now, but the fact that my Trainworx semis don't light up has always been a stumbling block. Fortunately, it was my buddy Peteski to the rescue once again as I finally managed to coax him into tackling that job for me. And wow, do they ever look sensational!

For Waseca, I added two semis along with some Evemodel BMW's, a Rapido "New Look" bus, a Busch Sprinter panel van and a Busch VW Passat (which basically wraps it up for the roster of currently available pre-lit modern vehicles) -

New Richland got a semi and a beemer -

So, that's that. Now, back to the elevator.
06/26/24 - Giving SuperTrees a try
I've always felt that my lake was going to need a "nonstop foliage from ground to tree top" look to do the prototype any kind of justice -

Trouble is, when it comes to trees, my previous modus operendi (Woodland Scenics) just wasn't going to fly. Those things work great as stand-alone shade trees in a field or someone's front yard, but don't really cut it in a wild/untended "one tree on top of the next" type of setting. So, high time to try out Scenic Express's "SuperTree" product methoughts -

There's no question that SuperTrees look way more realistic than WS's plastic trunk trees, and they're actually pretty simple to make (albeit a bit time consuming). So, now I just need to make about 100 more of them and I'll be done.
FYI, here's a youtube "how to" video that I found helpful - Making SuperTrees
I couldn't find the specific hairspray that he recommends, but Suave "Max Hold 8" seems to do the job just fine for me. Also, I opted for Rust-Oleum brown paint for the trunks instead of the gray he recommends. The trees in my prototype photos appear more brown than gray to me, so that's the way I went. YMMV.
07/11/24 - Oh bestill my heart, more grain bins!
I finally got going on the (presumably) last structures that I will ever build, and with the starting honors going to these three storage bins -

Same procedure as in years past (cast resin bin tops glued to PVC pipe wrapped in Campbell corrugated foil). Ala the prototype I added doors, ladders, "Butler" graphics, cinder blocks and lots and lots of rust -

Now I guess I take a whack at one of the buildings.
07/22/24 - More progress on the no-name elevator
The only real challenge here was getting that little cupola up top to fit the roof snugly, and I guess I came pretty close. Well, close enough anyway -


As you will see shortly, I needed another smallish auger like the ones I got from Walt's Trains and Things (Shapeways) back in 2016, but given the recent demise of Shapeways that was no longer an option.

Fortunately for me, my other source for augers (Baldylox) has set up shop on Etsy now and is generating his own 3D printed models sans Shapeways. Unfortunately for me, his are the really big ones and not really suited to this particular elevator. But not having any other options (beyond, ugh, scratchbuilding) I decided to go ahead and get one anyway (swapping it for one of the smaller augers I had parked at Sunrich).

The only real challenge here was extracting the thing from its insane spiderweb of supports. And suffice it to say, it's a good thing that I had the foresight to order two of them because I wound up mangling the first one real good.

I probably won't leave it parked in the shed ala the picture below, but at least for now it does make for a good photo match -


08/05/24 - I finished up the long shed for the no-name elevator
Pretty basic stuff here -


I did try something a little different with the roof this time around. Instead of butting the two roof halves together and hoping for a tight seam that didn't sag, I glued a styrene stick "crown" between the end walls and then butted the roof halves up against that. It worked out great and also had the added benefit of giving me something flat and stable to which to glue the vents.
01/10/25 - Still plugging away
I've been adding SuperTrees to the lake area at a pace that would best be described as "glacial". But that's fine, I am in absolutely no hurry to finish this layout. Shoot, I gotta have something to do when I retire in four years, right?

Don't worry about me though, I have plenty of other interests to keep me occupied. For example, I just recently started working on a new "fine art" collection, which has always been a fun distraction for me

05/22/25 - Proof of life
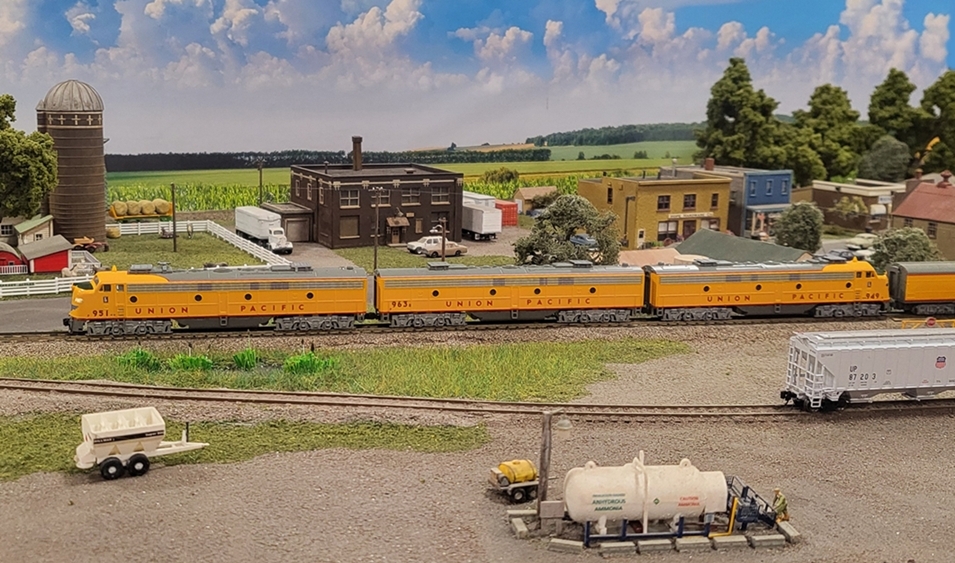
Yes, I'm still here. This week I killed a little time by decoderizing my fleet of Kato/Kobo UP excursion E9's, one of which received a Tsunami2 TSU-KN1 sound decoder and speaker -
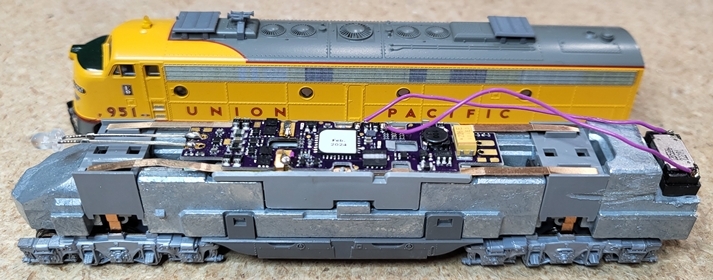
A few notes to myself - CV123 (Prime Mover) is set to 2 (EMD 645E 12 Cylinder Turbo) and CV120 (Airhorn) is set to 24 (Leslie RS-5T). Also, I had to disable BEMF to get better slow speed creep (CV217 set to 0).
So, ding ding, toot toot, and off we go!
To be continued...