07/12/20 - More yard work
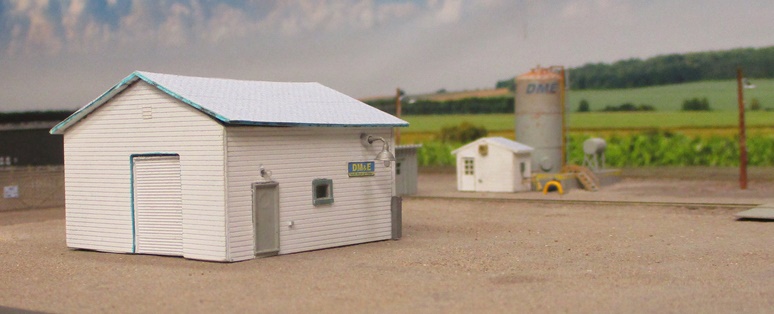
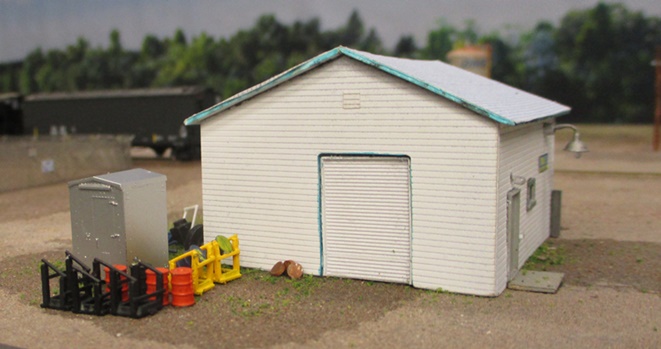
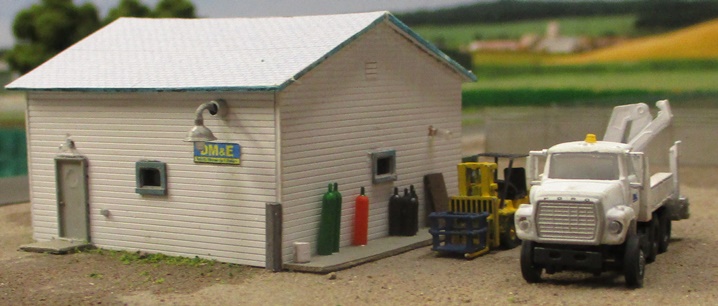
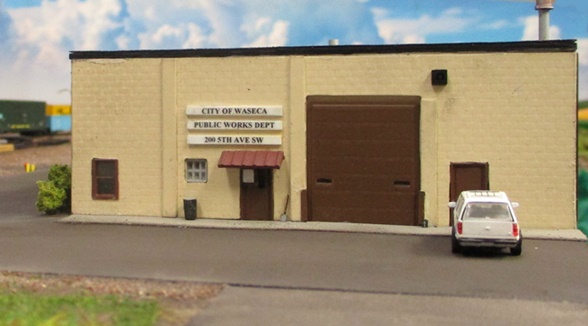
I finished up this shop/storage building. And as pictured below, I did them a favor by restoring their DM&E sign to legibility -
There's a ton of other stuff going on outside of this thing in terms of detailing, but for now my goal is to just finish up all the basic stuctures so I can get them situated in their final positions. Then I'll worry about all the detailing.

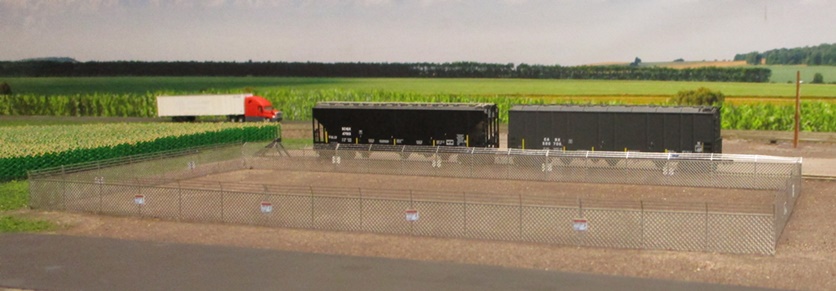
In aid of that, I also built the fence for the eventual electrical substation -
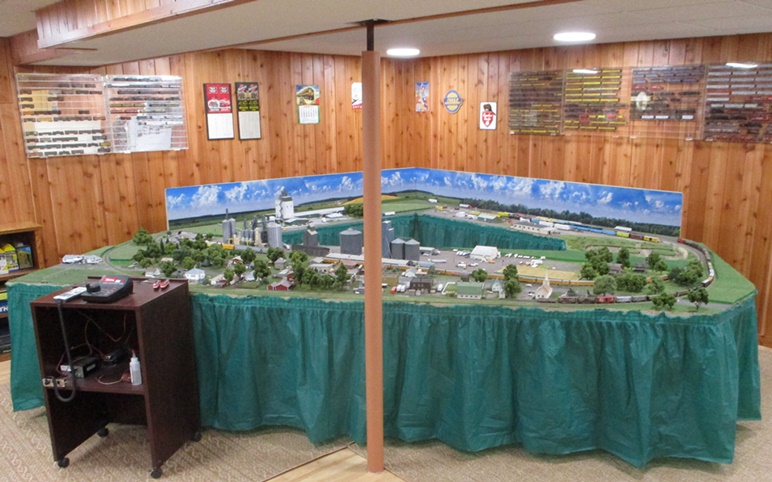
As a side project, I also picked up some cheapie plastic table skirting for my layout -

If you can't see the rat's nest of wiring under the layout, then it's not there, amirite? 
07/16/20 - MOWing the yard?
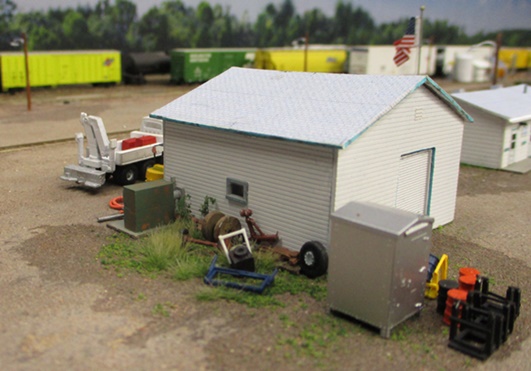
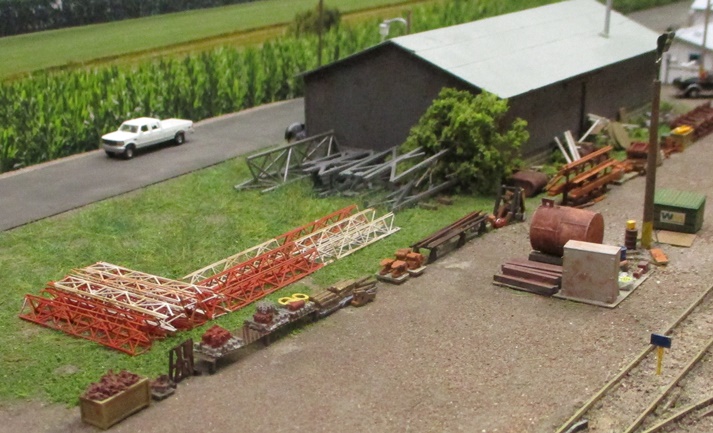
Ugh, sorry about that - I'll show myself out. But anyway, yes, I did finish up the two of pieces of MOW equipment parked next to the shop -

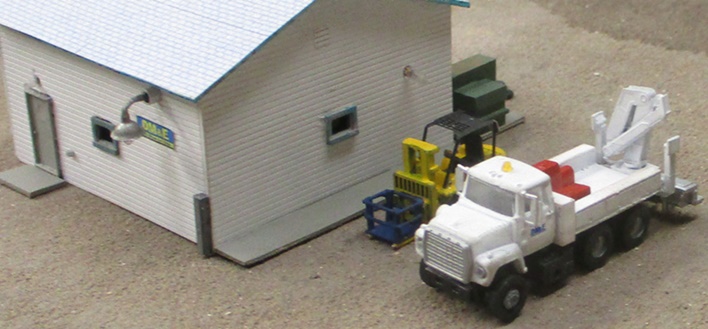
The forklift is a GHQ white metal kit that I gussied up with that blue lift cage thingy. I frankenbuilt the crane truck by taking the back end of a Showcase Miniatures "I Class Crew Cab" crane truck and sticking it onto an Atlas Ford LNT 9000 tractor chassis. Extra details include DME decals, a rotary beacon, and a pair of rearview mirrors (scavenged from an old Con-Cor tractor).
OK, yes, I said I was going to wait on all this detailing. But as it turns out I ran out of a certain kind of window, so the building building is on hold until I can score
some more. IE, bring on the details!
07/19/20 - Backdrop finagling
As things have played out, my backdrop mission has evolved significantly over the last month. First off, that trainjunkies "Florida Forest" backdrop was all wrong - the water looked out of place, the trees were way too tall, and the lack of clouds was kind of boring. So, I asked William (my guy at trainjunkies) if he couldn't make a custom version of that backdrop that addressed all those issues. And when I saw how quickly and easily he was able to do just that (remove the water, shrink the trees and add some "Just Corn" style clouds), I started embiggening my ambitions.
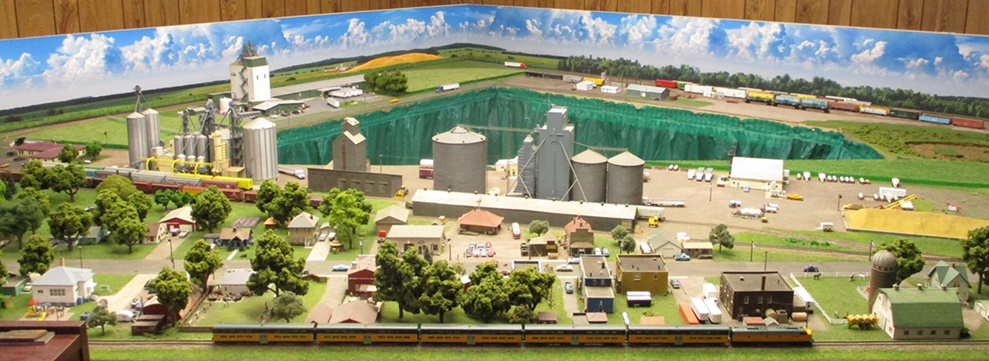
Up to now, I've never really considered adding a more permanent backdrop (figuring that my portable backdrop would suffice when it came to picture taking). However, after seeing the possibilities, I began to wonder if it wouldn't be do-able to have a backdrop that ran along the entire back side of the layout. The only problem there is that permanent backdrops tend to become a big pain in the posterior when it came to blocking access to the layout (or at least they would on this layout). However, after a bit of cogitation I came up with a plan for a semi-permanent backdrop that looks workable. Vis -

I started off by adding some "L" support brackets (which slide nicely into the cracks between the layout base and the support tables). Then I got myself some cheapie white foam insulation sheets and glued them together to form two long backdrops (108" wide for the Waseca section and 99" for the Cargill section). Then, I had William make one giant backdrop that placed the revised Florida Forest behind the yard and Just Corn everywhere else -

The brackets (once pushed in) hold the backdrop nice and snug. Better still, they can be pulled right back out should I ever need to remove the backdrop. So, pretty good for a first stab, however there are a few issues that need to be addressed. First off, William sent me a paper backdrop instead of the self-adhesive vinyl that I normally get (communication snafu). Also, the forest wound up being 7" wider than specified (thus bleeding into the non-yard portion of the back side of the layout). Well, no big deal there - a replacement is already on its way. One other problem is that the white foam turned out to be too lumpy and striated to function as backing (what with said irregularities clearly showing through the backdrop). So, it looks like I'm going to have to find something smoother to use when my replacement backdrop arrives (probably the pink stuff, which is what I used on my portable backdrop). It's really too bad about that white stuff because it was absolutely perfect as far as size went (IE just the right height and thickness).
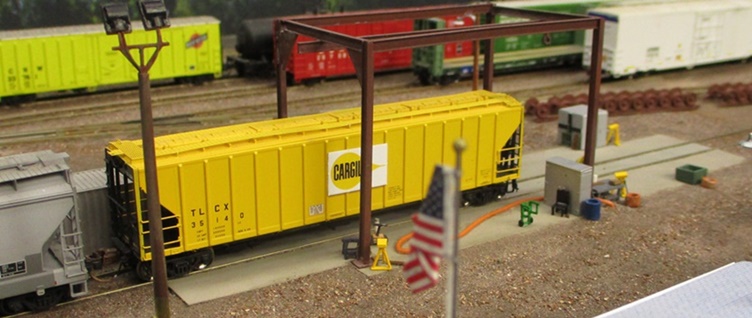
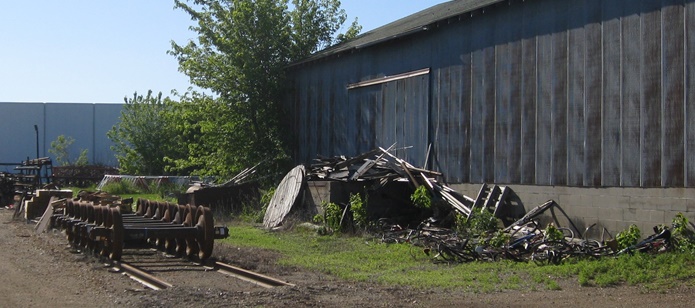
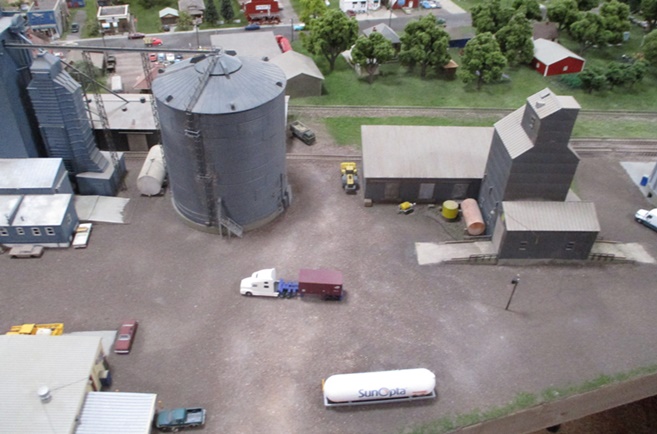
07/19/20 - Getting back to my core competency - modeling piles of generic junk
Yep, they have junk -

And now I do too -
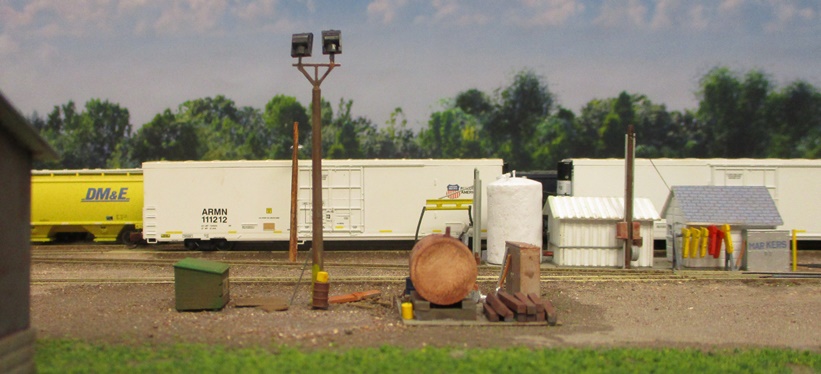
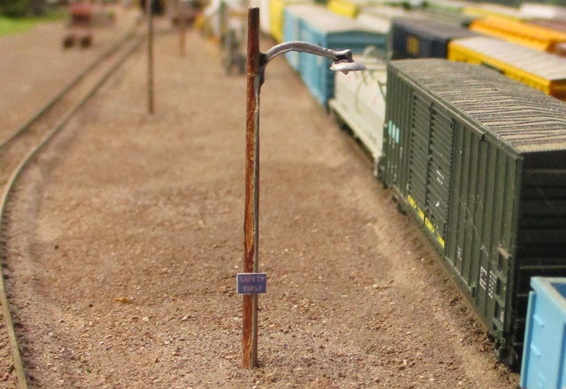
The major news here is that awesome yard light. I had to search high and low to find just the right kind of light (wooden pole with two boxes up top) and eventually scrounged this one up from an outfit called "Layouts4u" in the UK. It was ridiculously cheap (less than $5 US) and got here faster than stuff I've ordered from North American dealers, so 10 out of 10 for those guys.
It's rated for 3 volts, so it plugged right into my streetlight circuit (they also include a resistor should you want to run it on a 12 volt circuit). As delivered, it comes unpainted (gray). And given the rather elaborate base, I'm assuming it's actually supposed to represent a metal pole. However, for mine I went ahead and painted it brown and then simply buried the base in the dirt. Et voila, instant wooden pole.
There's only one lightpole of this type in the prototypical Waseca yard, but since I ordered two of these (just to be on the safe side), I'm definitely going to have to find a spot for another one. They're just that cool!
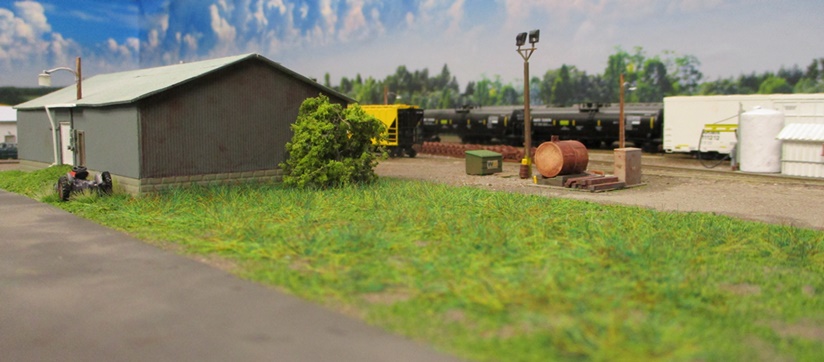
07/24/20 - Finished detailing the yard shop/storage building
This side is barrel themed (barrels, barrel lids and barrel cradles) -

Meanwhile, just a lot of random junk over here (weeds, tires, pallets, cable coil, Atlas/BLMA electrical box, random pieces of metal) -

This side is all about tanks and hoses. The little air compressor came serendipitously included with my Showcase Miniatures crane truck. And yes, I did briefly consider trying to make a little "Comet" decal for it, but fortunately sanity wound up ruling the day.
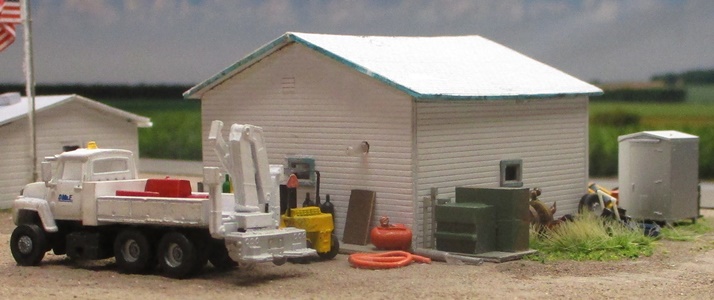

The gas cylinders came from Shapeways (Ngineer, as usual) -

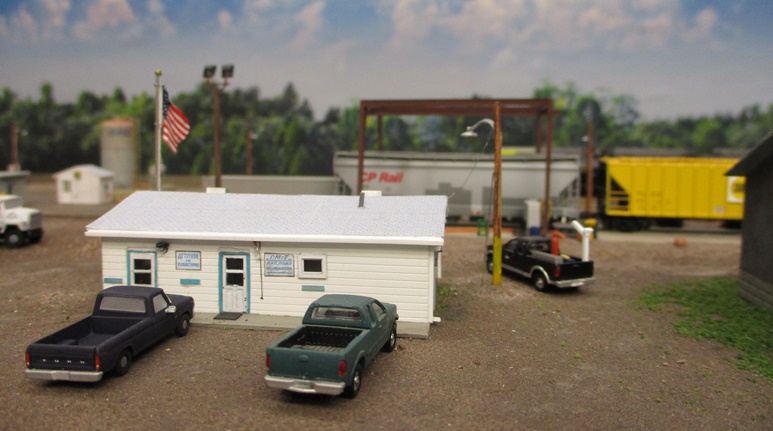
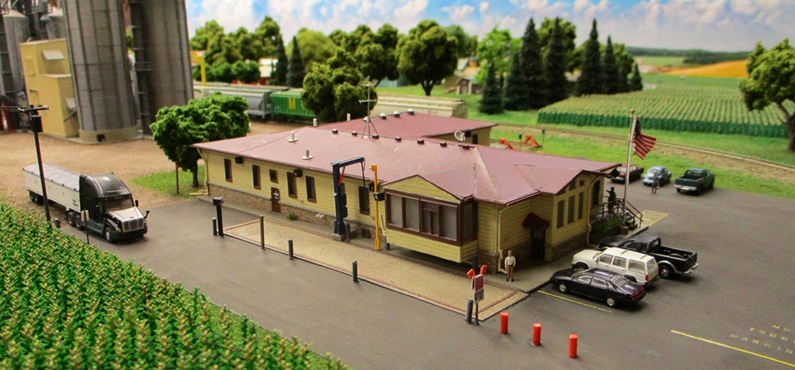
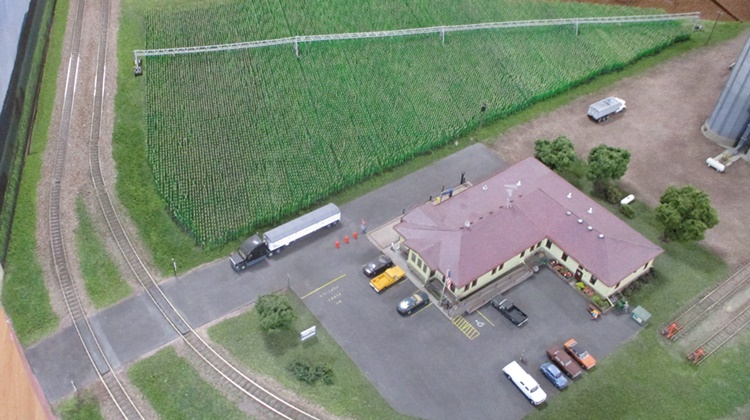
07/24/20 - Finished the yard office
I'm really falling in love with these Woodland Scenics flagpoles - they look so much better than the flat ones I had to use back in Hope. I just wish they made a slightly smaller version that I could use to replace all of those old flatties (something in the 10-12' range with an appropriately downsized flag would be perfect)....


OK, if you guessed that that tan smoker's station next to the back door is the top of a folded umbrella... well, wow, you have a very good eye!


Next up, the RIP track -

It's mainly just a bunch of detailing, so lots and lots of little side projects to keep me busy for the next little while.
07/30/20 - Backdrop II
Yep, I got my replacement backdrop from trainjunkies.com -
This time around I tried using 1/2" pink foam sheeting for the mounting - worked out great. And major kudos to William at trainjunkies for being so helpful throughout this process. I had
no idea that getting exactly the right backdrop for my layout was going to be so easy, and suffice it to say, I am one super happy camper at the moment
08/04/20 - Finished the RIP track
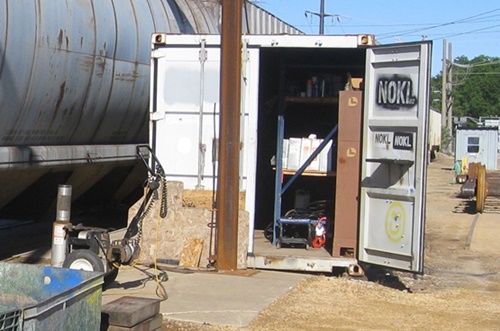
It looks kind of complicated, but basically it's just a concrete apron, a fall arrest structure, a repurposed container, a couple of cabinets, a workbench, and various bits of junk -
Making an open door for the container was pretty simple - just pop the top off the container and then slice the door off with a razor saw. Then it was just a matter of adding some details to the inside of the door -

And yes, anything worth doing is worth overdoing, amirite?

Remember back when I decided that putting down yard cork that was going to be 1/32" shorter than my Unitrack roadbed wasn't going to be any big deal? Well, I definitely had to pay the piper for that bit of laziness here (vis'a'vis getting that concrete apron snugged up to the rails and also sitting level) -

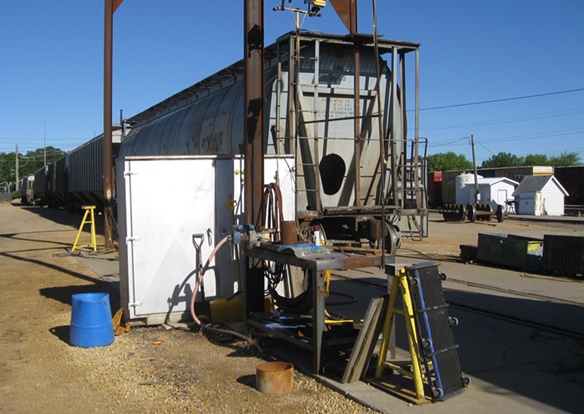
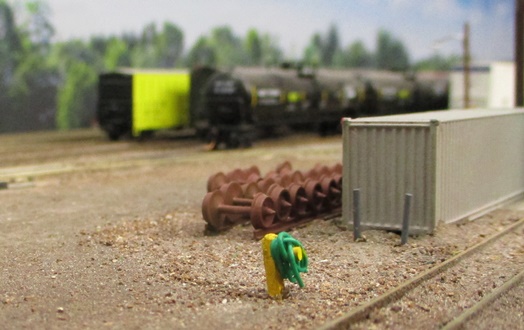
Yes, I actually scratchbuilt all the jacks and supports (not to mention whatever that green watchamacallit is). However, I wimped out on the cords and hoses (figuring that one wire "hose" was going to be sufficient) -

The cabinets are prefabs from Atlas/BLMA. And having amassed hundreds of spare wheelsets over the years, those were happily contributed to the cause as well -


And now, on to the WPW building.
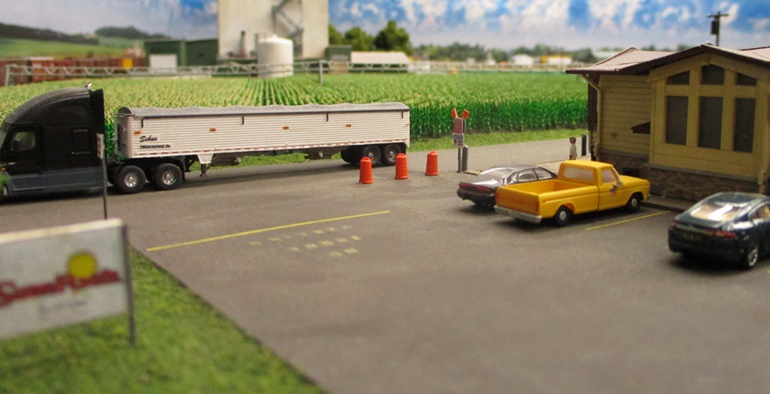
08/29/20 - Gas delivery day at Klecker's Garage
If buying a Trainworx tanker truck and plunking it down on my layout counts as modeling, then I guess I had a productive week 
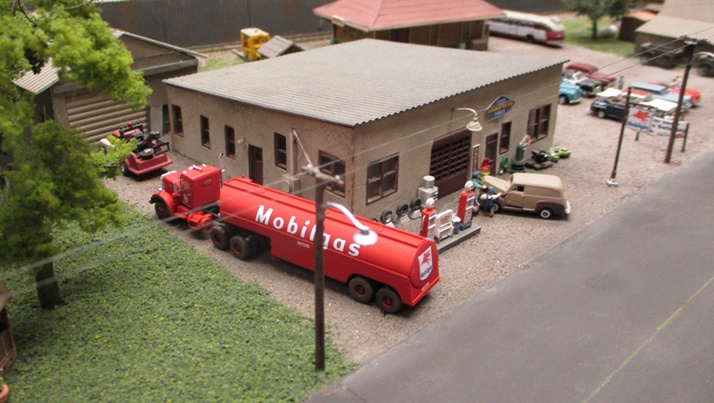
(10 minutes later after being advised that they always back in) -

04/13/21 - Back at it again! (albeit involuntarily, but whatever)
I've been preoccupied with other activities lately (coding computer games, mainly), so I haven't had a lot of time to devote to model railroading pursuits. And evidently my layout has
been feeling neglected because all of a sudden it has decided to start acting out. To wit, huge sections of my Berkshire Junction "EZ Line" have suddenly decided to go all brittle
on me! I mean, seriously? This is a thing? I dunno, maybe I got a bad batch or something. But in any case, I've had to spend a stupid amount of time over the past several weeks
replacing all of the newly crumbled sections. What an annoyance! 

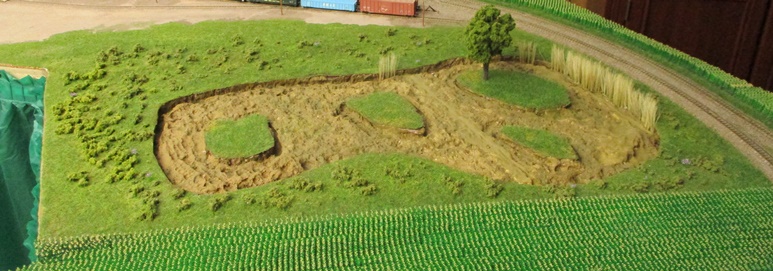
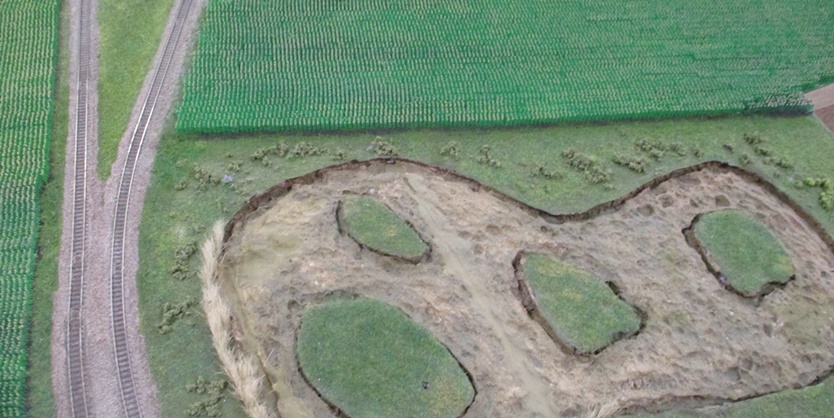
And of course, while dealing with all of that I somehow got sucked into spending time working on the scenery around my perpetually unfinished lake project (adding static grass, some wild flowers, more rushes, etc) -
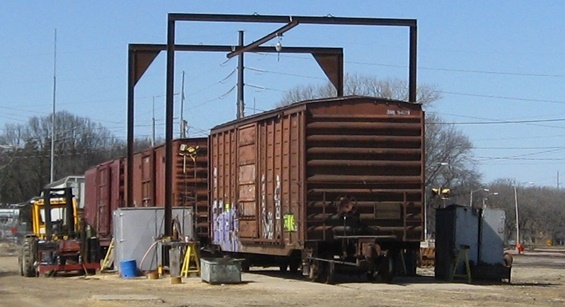
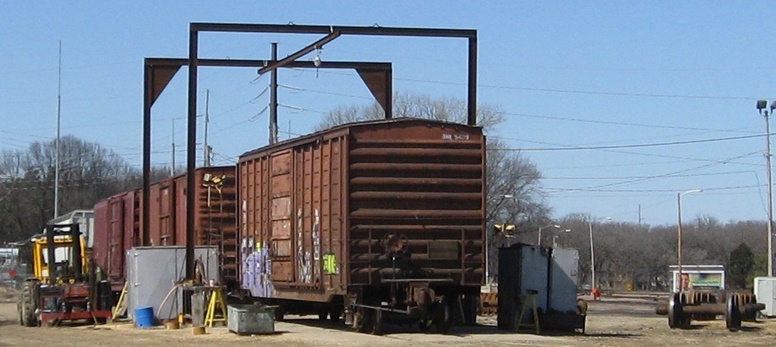
Well, while looking up my scouting pictures of lake scenery I stumbled across these pictures of a couple of cool old DME snow plows rusting away in Waseca.....
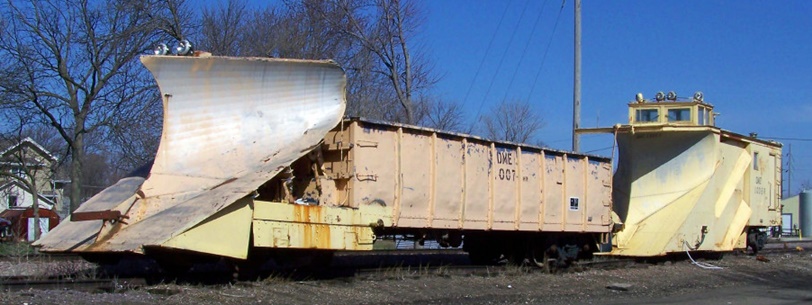

....and before you can "short attention span", I found myself building models of them -

The Russel plow is an Atlas (nee Walthers) with the C&NW graphics stripped off and DME decals in their place -

I tried to replicate as much of the prototypical detailing as possible (air horn, spotlights, brakewheels, roof vent, front coupler, roller bearing trucks, assorted pipes, etc) -

I was thinking I'd use an old Arnold gondola for the other plow (said gondola having a more or less correct panel scheme), but ultimately decided that an Atlas gondola was going to be easier to work with. The plow detail came from Shapeways designer "Keystone Details" (I built the extension upon which it sits out of a piece of discarded caboose chassis and various bits of styrene). I used ditchlight details for all the various spotlights (from eBay seller "cmrproducts_llc") -

And as if that all weren't enough, I also got around to (finally!) finishing yet another wall art project -

I swear, I have been trying to score a decent looking M&StL timetable off of eBay for years. Unfortunately, they just don't show up very often, and most of the ones that do
are either in terrible shape or are really boring looking. Well, blow me down if a pristine looking 1909 timetable didn't show up last year that was absolutely perfect. Not only did it
have some awesome looking graphics, it also featured the schedule for the newly launched North Star Limited (and with an accompanying ad for the NSL as well). I mean, GTFO, the stuff
of my dreams! So, not wanting to miss out, I bid like an absolute maniac. And I tell you, you could've knocked me over with a feather when my $500 bid turned out to be insufficient! 
The only upside to that whole situation was that the seller had taken some terrific looking photos (which I dutifully saved). So, fast forward to this year and I finally gave up
hope of ever finding anything even remotely as nice as that one and shipped said eBay photos off to my buddy Dave at wall-color.com to see if he
couldn't do something with them. And brother, did he ever come through! Thanks Dave, you da man!
So, there ya go. And now that I'm fully engaged once again, I guess it's high time I got back to that model of the Waseca Public Works. Bring on the window punches, I'm ready!
04/16/21 - This 'n' that
I figured I'd better dip my toes back into the modeling pool with some smaller projects before getting started on anything major like the WPW, so I finished up some bits of yard detailing instead. First up, a "No Trespassing" sign for the east end of the yard -


Then a couple of barrels -


Then, another sign and a couple more barrels for the west end -


Next, some pickup trucks for the office. And for the DME truck, I went ahead and added some decals and stuck some maintenance equipment in the back (ala the prototype) -

In preparation for the eventual "Giant Pile O' Junk" project, I put down some static grass weeds and planted a large bush/tree thingy next to the scrap metal shed. I would've liked to have made said thingy a bit bigger, but I still haven't figured out a good way to get WS's "Fine Leaf Foliage" product to do what I want it to do -

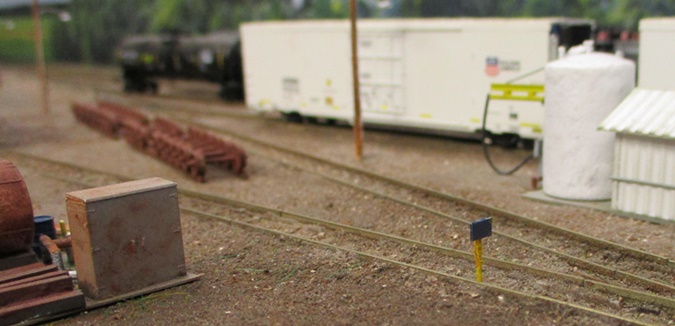
Lastly, I got rid of the Kato Unitrack bumper that I had at the end of the RIP siding and replaced it instead with a pile of dirt and a sign (which I guess is how real railroads handle their dead-end tracks - or at least that's how these guys did) -

So, that's that. And I gotta say, this has been all kinds of fun and I think I'll do some more of it
04/18/21 - As promised, more yard detailing
First off, some utility poles for the access road -

And I don't know what these green posts are for, but I have them now -
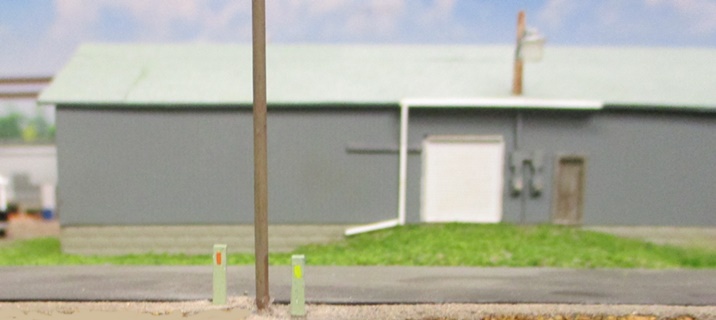

Next, some "Safety First" signs for either end of the yard -


Next, a Model Power fire hydrant, a couple of "Please don't run over the fire hydrant" safety posts, and a rusty old "Stay the hell off the RIP track" sign -


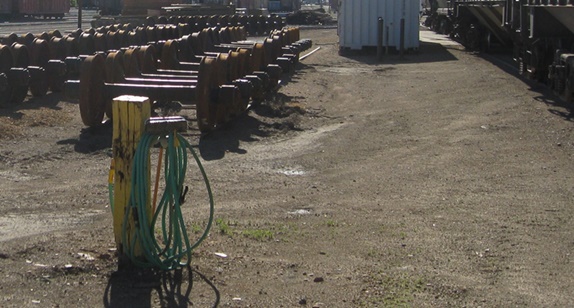
Lastly, a hose post (I skipped the little scrub brush  ) -
) -
04/23/21 - Modeling by credit card
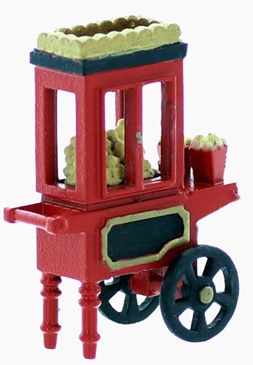
I've had a notion on the back-burner for a while that it would be fun to add a popcorn cart to the car show scene (as a nod to the outdoor movies that Hope used to show in that lot back in the day). Y'know, something along these lines -
Trouble is, nobody makes anything like that in N scale and the idea of scratchbuilding one wasn't really thrilling me all that much (and hence the back-burner). Well, I decided to take another look at what was out there last week, and... still nothing. However, what I did find (tangentially) was just too cool to pass up. Namely, this Oxford weiner wagon -
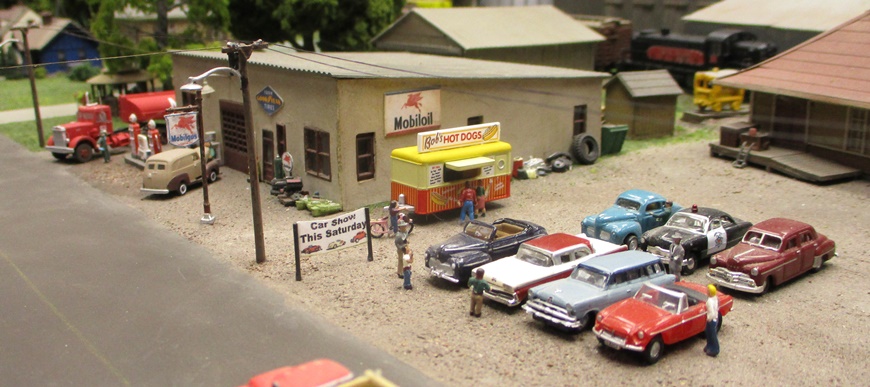
Way cooler than any half-assed popcorn cart I might've cooked up my own, right? Now I just have to talk Bob into adding popcorn to his menu....
04/24/21 - More modeling by credit card
Uh oh, Woodland Scenics has gone and done it now. I never thought it would happen, but it looks like they've finally come out with an expensive prebuilt that I can actually use!
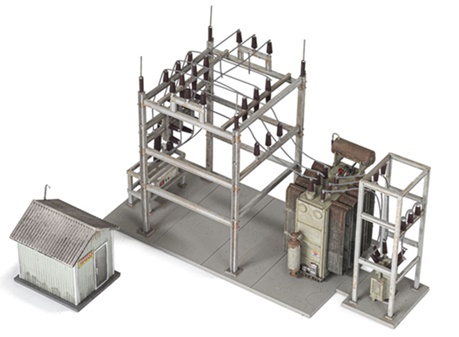
Basically, it's going to knock a big chunk off of what I need to build for the substation I'd planned for the west end of the yard -

Since what I'd planned on building was going to be a big foobie anyway (as compared to what's actually there in Waseca), I guess I don't feel too guilty about taking the easy way out here. And even with the assist from WS, there's still going to be plenty of opportunity for modeling there. So, it's all good.
05/03/21 - Lots and lots of junk
This was another one of those projects that was going to be pretty much impossible to screw up. I mean, junk is junk, right? I guess my only regret is that I didn't try to get those
rails buried a little deeper. But in my defense, I just didn't like my odds of not screwing up the cork base in the process 


I think I pretty much nailed all of the little details from my scouting photos - right down to the giant pile of (wtf?) bicycles. For those, I used a few Woodland Scenics "Bicycle Buddies" bikes along with an assortment of GMM etched brass bikes (simply painted rusty brown). The rest consists of pallets, boxes, random bits of styrene and assorted little oddities from my junk box -

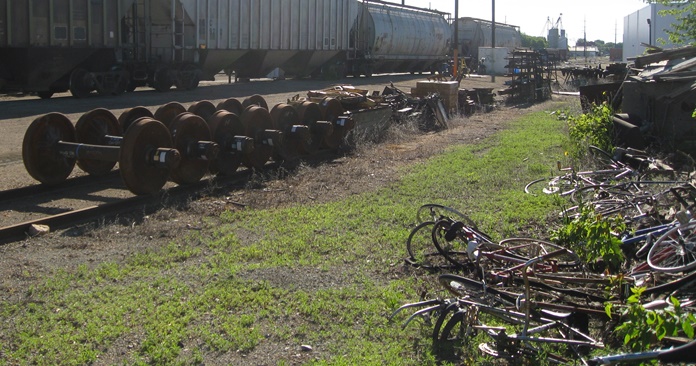
Unfortunately, that all was just the tip of the junkberg. Still lots more to do there -


I tell ya, modeling the shiny new CP yard office that recently sprung up in this space probably woulda been a hella lot easier 
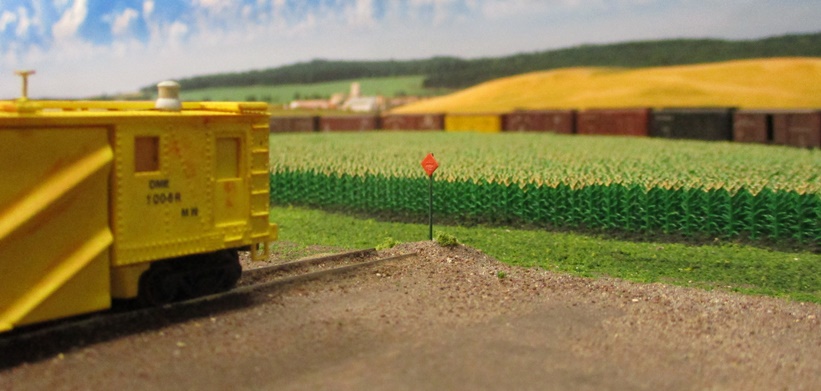
05/22/21 - A visit to Hope
I drove down to Hope with the idea that I was going to get pictures of all the little railroad signs along the main (thus allowing me to model them). And so -
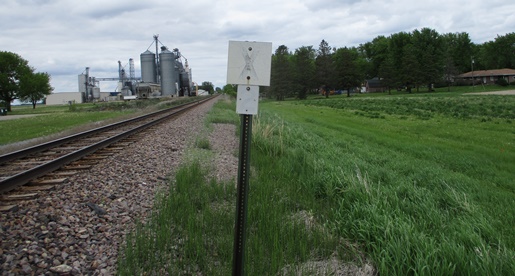


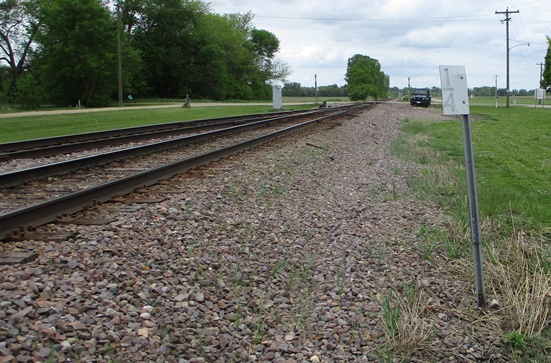
Unfortunately, said signs turned out to be quite a bit less interesting than I was anticipating (horn instructions and mile markers, whee). And when I got to thinking about all the track cleaning headaches that signs like that were ultimately going to cause me, I decided that it wasn't a project worth pursuing. That said, I did find a sign at the entrance to the SunRich siding that was at least interesting looking -
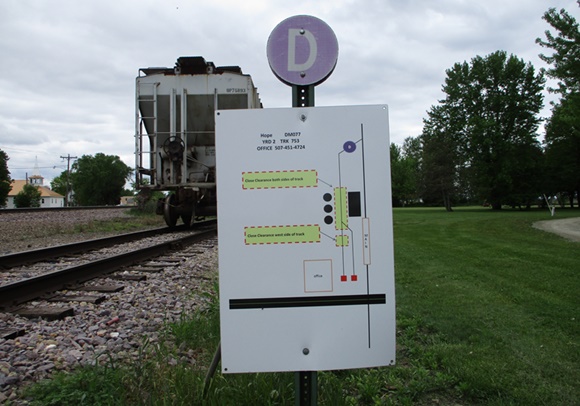
I don't generally clean the siding track (since I don't ever run locos on it), so that one might be worth replicating - or at least worth putting on the "maybe someday" to-do list.
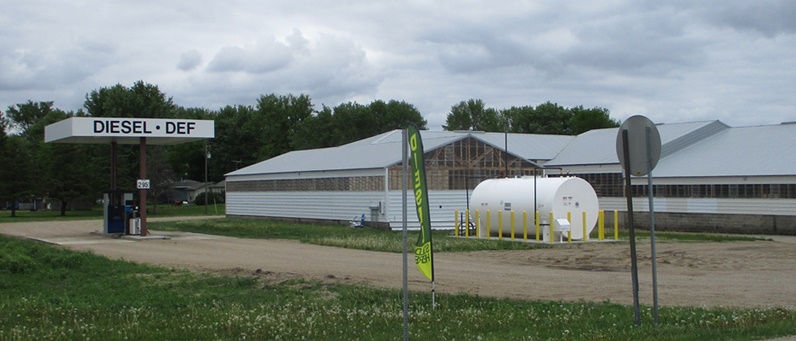
In other news, the Hopies have been (as is their wont) busy changing things. For starters, Krause's got a new diesel/DEF filling station -
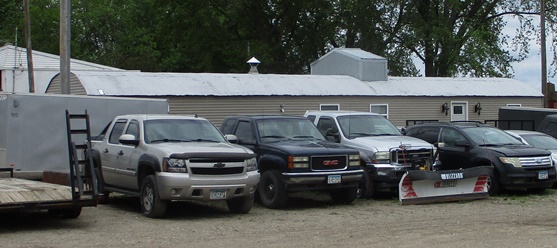
CS Customs got yet another new paint job / color scheme -
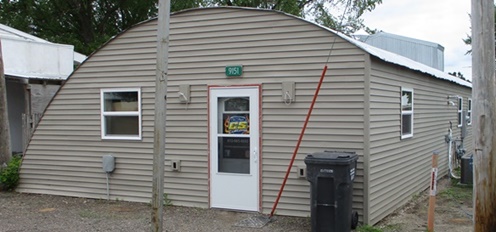
The feed grain storage shed got new siding and a start on a new roof -

And, oh no! Evidently Finch's didn't survive the Covid shutdown and is up for sale -

Of course I'm not going to be modeling any of that stuff, but reporting the changes does seem to have become something of an annual tradition around here
05/25/21 - More yard detailing
Over here on the west end of the yard we have a container with some sort of weirdo crane contraption up on top, a pile of dirt and a pile of ballast, a dumpster, and a pile of ties -
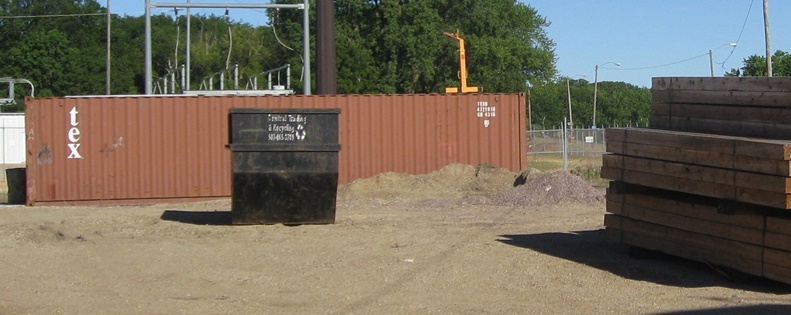
Panning to the right, we have a light pole, assorted junk and another pile of dirt -
And finally, more junk -

JTC makes just the right kind of "tex" container, so that part was easy. The Model Tech Studios dumpster was easy as well. The Osborn "Stack O' Ties" kit was a huge pain to assemble and if I ever need something similar I'm going to try something else. Lastly, I built that crane thingy myself -

The rest is just assorted ties, pieces of rail, styrene "concrete" blocks, barrels, etc. I made that little switchstand thingy by sticking a square piece of styrene to a leftover trailer hitch from one of my NH3 trailer kits (lol) and I kludged together that skid steer grader thingy from bits of a Woodland Scenics cement mixer (double lol) -

Still lots more junk to come, but at this point I think I can at least see the light at the end of the tunnel.
05/30/21 - Hey look, more junk!
I think I'm definitely starting to lose my motivation to accurately model every single stinkin' piece of junk here, so I guess it's a good thing I'm nearing the end of it.

By my reckoning, that just leaves some piles of lumber and old ties and whatnot over on the east end of the yard. And I gotta say, I'm very much looking forward to being able to turn in my junk modeler badge and gun and get on with something else!
06/03/21 - Could it be? Yes, I believe it is! More junk!!
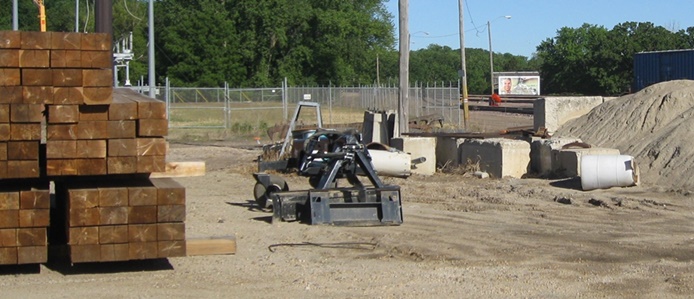
I haven't the faintest idea why they keep all this lumber laying around, but I dutifully modeled it anyway -


Apart from the mysterious tube, it's all just a lot of wood scraps. So, pretty much "falling off a log" easy to replicate -


So yay, that finally wraps it up as far as yard detailing goes. And double yay, that means I finally get to go blow the dust off my WPW project and get back to work on that.
06/05/21 - Progress on the WPW
Even though I've had the basic walls sitting on my workbench since last summer, it wasn't until just today that I finally got around to finishing the tedious business of punching and filing the door and window openings and getting everything glued together -

So, cool. Now I can get on with all the fun stuff!

06/17/21 - Better barrels
As part of the WPW project, I recently acquired a bunch of roadwork safety barrels (from Shapeways designer NScaleAddict). And of course they look about a million times better than the featureless "tube" barrels I inflicted on SunRich last year -
So, one quick swap later -
A small detail, perhaps. But every little bit of added realism helps, right?

Now you'll have to excuse me while I go try to build an N scale generator (grumble, grouse).
06/20/21 - Just about done with the WPW
As interesting as modeling the building in its "under repair" state might have been, I really have no idea what the interior looks like. So, I decided to just go ahead and finish fixing their door for them -
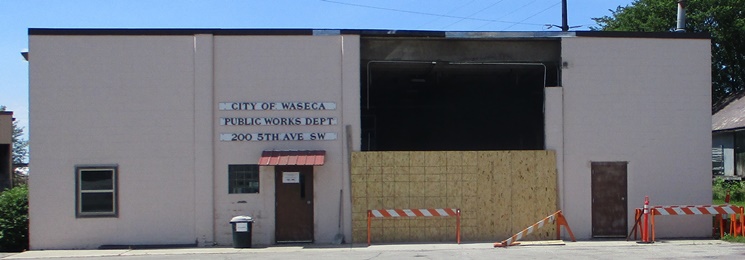
I can't say that I'm altogether thrilled with how everything turned out, but I guess it's at least liveable. Most of the doors and windows are frameless, which means that my openings had to be spot-on perfect (no frames to cover up the oopses). Unfortunately, spot-on perfect isn't really something that I do, so the whole thing is a bit glitchy looking. The light ivory paint scheme wasn't much help either as it tends to highlight pretty much every single gluing miscue. Fortunately, all of the interesting little bits of ground detailing do help to distract attention away from the sloppy building. The safety cone, trash bin and dumpsters are from Shapeways, the ground A/C unit is from All Scale Miniatures, and the rest of it I cooked up using hobby shop styrene.
I gotta say, I do really like the way the generator turned out. My bright idea there was to use decals to simulate vent slits, door latches and door hinges, and I think it worked out ace. Also, the Rust-Oleum "caterpillar yellow" paint I used was a nice match for the prototype and something I wish I'd discovered years ago!
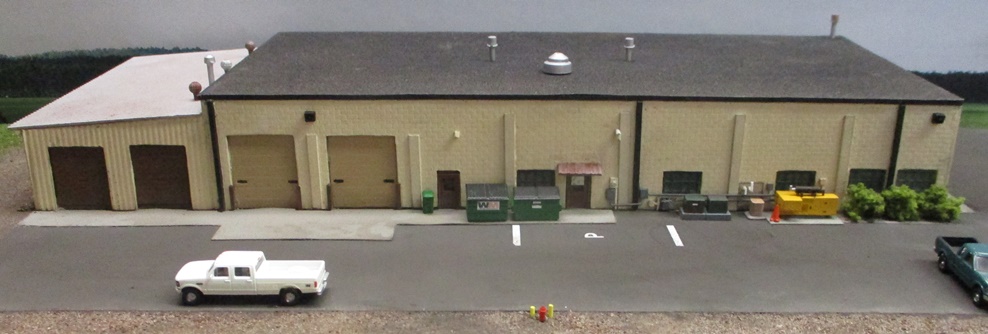

I really like the look of the JTT "Concrete Block" siding that I used (#97463). They advertise it as 1:125 (more or less TT scale), but I think it scans quite well as N scale block -


Next up, a whole lot of road construction foofarah -

And here's my RS-2M for no apparent reason 

07/13/21 - I never thought this day would come, and yet here we are....
When we first purchased our house back in 1998, our neighbors were mainly a lot of quiet and considerate retired types. Of course things have completely turned over since that time and now we're surrounded by a lot of noisy families. And this being a post-war / first-tier suburb of a major city, we're all crammed in next to each other like sardines (front, back and sides). Unfortunately, close proximity to all these young people is making for a level of noise and general annoyance that we are finding less and less tolerable as we approach our AARP years (and hey, don't even get me started on all the backyard fire pits that fill our house with smoke every night - when did that become OK??)
Anyway, the upshot of all that is that we decided to move to a nicer house in a quieter and less densely populated part of town. And check out the view from the
back yard, nary a neighbor in sight!

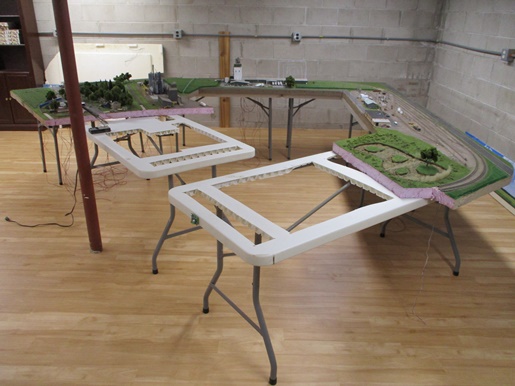
So yeah, we're super excited about the whole thing. The only problem is this giant layout that I've been slaving over for the last 12 years. Frankly, I never thought we'd ever be
moving, so of course I spent exactly zero effort on making it movable

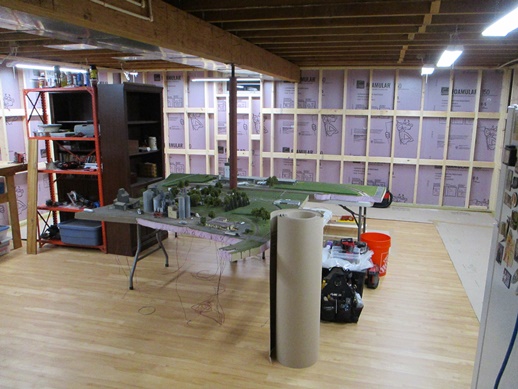
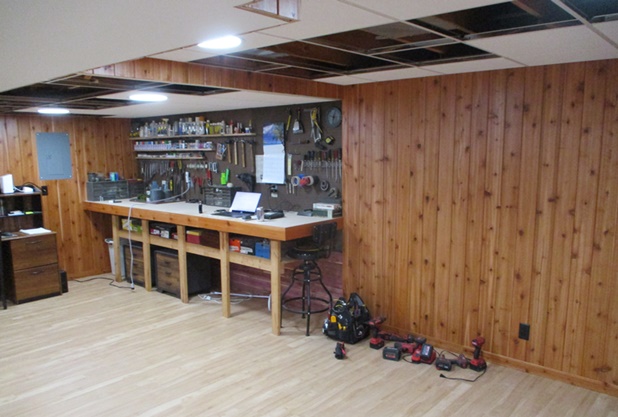
At least for now, the plan is to chop it up into four pieces (which will hopefully make it up the stairs and out of my basement). As for putting it back together at the new house? Well, that's going to be one helluva project and likely to keep me busy for quite a while. Fortunately, said new house has an unfinished 21' x 21' shop room in the lower level that I'm going to turn into the model railroading man-cave of my dreams, so it should be a fun journey -

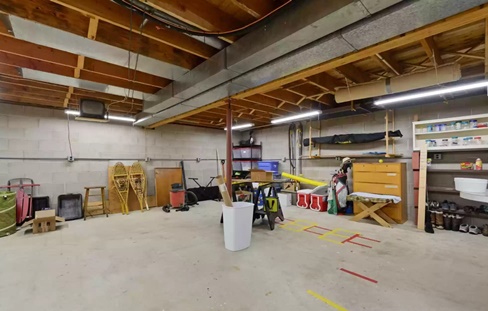
See ya there! 
07/24/21 - Ouch!
OK, all chopped up and ready to move -


Closing is on August 6, so I imagine I'll be loading all of this stuff into a truck on August 7 and carting it off to the new house. The only snag is that the guy I've hired to finish
the basement workshop for me (flooring, walls, ceiling, lighting, etc) isn't going to be available until probably October. Which means my mangled layout will have to moulder away in
pieces for the foreseeable future 
08/19/21 - A new home for Hope
I managed to get my layout moved over to the new house, and with only a modicum of mangulation. A few things did fall off in the process, but I think I managed to snag most (if not all) of them. So, mainly it's just going to be a matter of remembering where everything goes and then gluing it all back down. And fortunately for me, I have this exhaustive blog as a reference.

Unfortunately, when basement finisher guy starts his work the whole thing is going to have to move yet again (this time out into the garage). However, that won't happen until October at the earliest, so at least for now it's just going to have to sit there in its mangled state.
09/05/21 - Because of course
I see that Walthers has come out with a new Cornerstone barn and silo kit that would've been perfect for my "Miller Farm" scene in Hope -
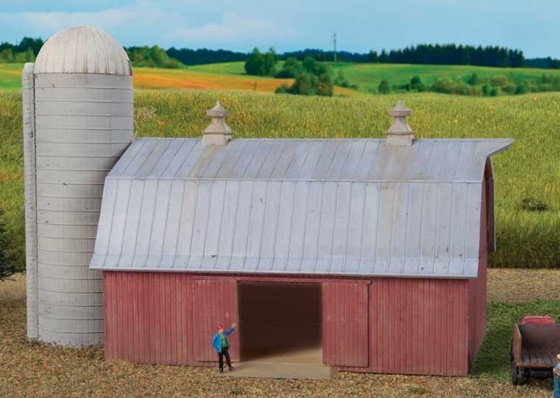
Ah well, twelve years too late
09/08/21 - All tooled up and no place to go....

09/24/21 - Inching forward....
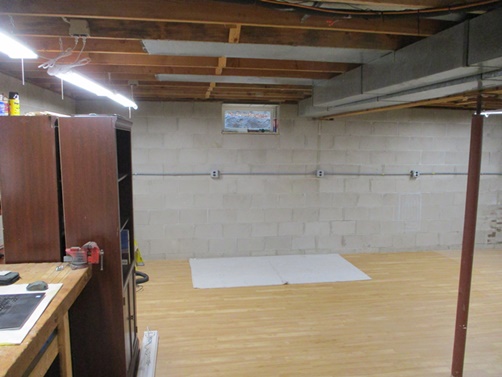
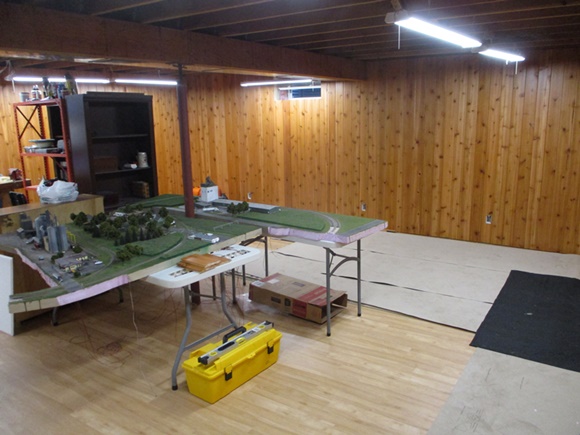
Well, I at least have a floor now -

10/09/21 - Safety first
Yay, I have a window. Now my modeling chemicals won't be killing me quite so fast -
Next up, walls.
10/31/21 - Trying to stay busy
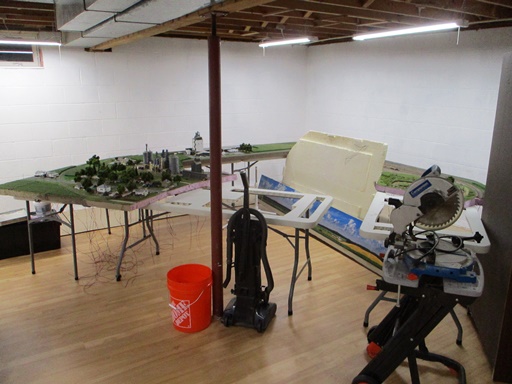
Nothing much has been happening on the shop finishing front of late, but I figured I could at least start prepping my layout for reassembly. So, I went ahead and took a jigsaw to all of my support tables. And as expected, all of my lighting wires dropped right on through and are now ready to be reconnected to their corresponding terminal boards -
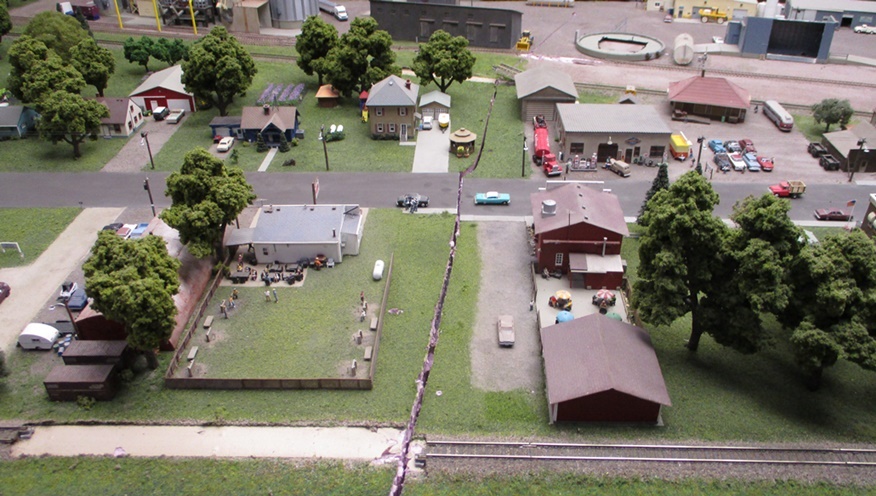
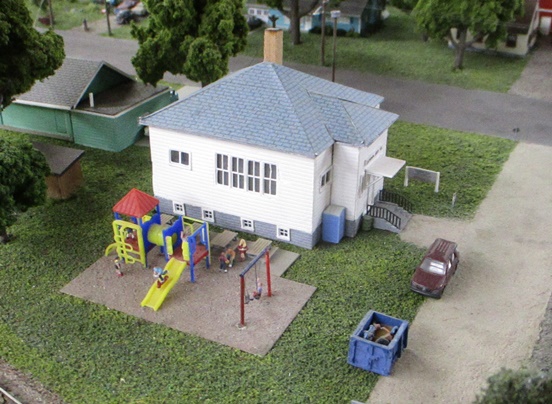
I've also been spending some time fixing stuff that fell off or got broken (or both) during the move. For starters, the school took a dive and wound up in several pieces (as did all of the playground detailing). Fortunately, nothing got lost and now it's all back where it belongs -
One thing I've been noticing lately is that the turf on some of my older areas (the Finch's Pub diorama for example) has become decidedly gray and drab looking (no doubt due to years worth of dust) -
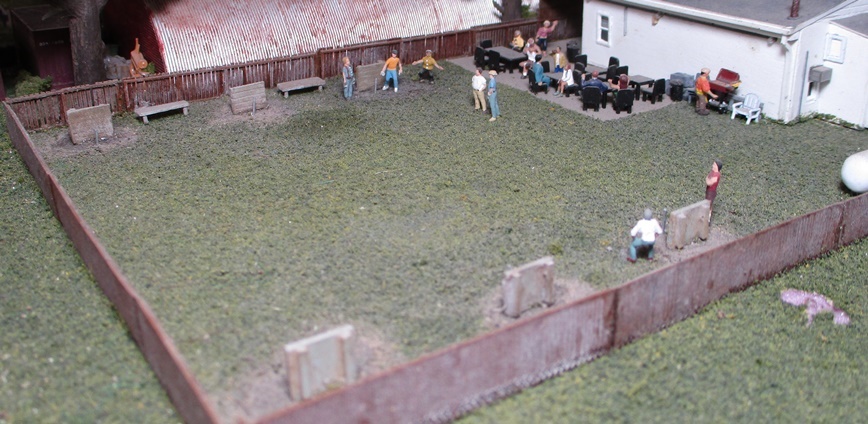
Fortunately, the solution turned out to be very simple - just add water! As you can see, the gray retreated quite readily when faced with a little bit of
water from my eyedropper. I tell ya, I do so love solutions that don't require much effort

In the meantime, my contractor promises me that he's all mine starting next week. So, hopefully we'll start to see some real progress around here.
11/03/21 - The glacier grinds along
The concrete blocks have been waterproofed, frame-up for the new walls is next -
Meanwhile, I fixed some mangled irrigation -


I also fixed some major mangulation at SunRich -


Most of the little fiddly bits were accounted for, although I did have to recreate a few small details that had gone missing. And thank
goodness for this blog, because I'd be completely lost without all of its old photos to guide me!
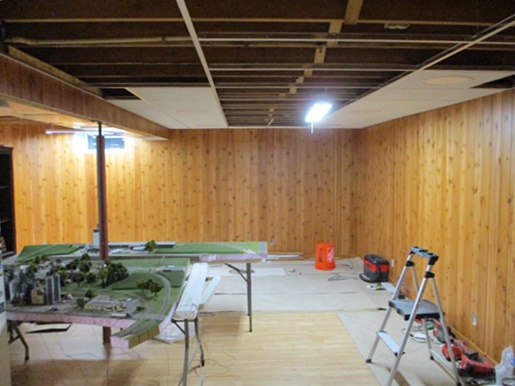
11/13/21 - I have insulation and I have studs
Now I get to twiddle my thumbs while I wait for the oh-so-busy electrician to come out and wire up the outlets
12/05/21 - We have outlet wiring!

I also had him replace the crappy old Federal Pacific breaker box that used to be down here. Call me crazy, but I'd just as soon not have my house burn down due to an overly forgiving breaker!

So, cool. Now my guy can get started on putting up the T&G cedar wall boards.
12/16/21 - The walls are up!
If you like that color, it's Minwax Polyshades "Pecan". My guy had never used Polyshades before and was a little dubious about one step products (stain and finish all in one go), but he's definitely a convert now.
Wall-wise, all that's left now is the one in front of my desk. Unfortunately, we're stuck waiting for the electrician again. I tell ya, if this all gets done by the spring it'll be a miracle!
01/24/22 - A little more progress
My GC was down and out with covid for a week and his electrician likes to vanish for weeks on end, so the going has been achingly slow. However, GC did manage to finish up the
last of the wall boards. I had him use aromatic cedar to cover up the wall underneath the workbench, so it smells very nice in here now

He also got started on the ceiling, although now we're waiting for the electrician again (to wire up the light fixtures) -
This would've all been done by now if not for that electrician, but what are you gonna do?
02/09/22 - Almost there
Yay, this half of the room is done. And no, I didn't skimp on the lighting
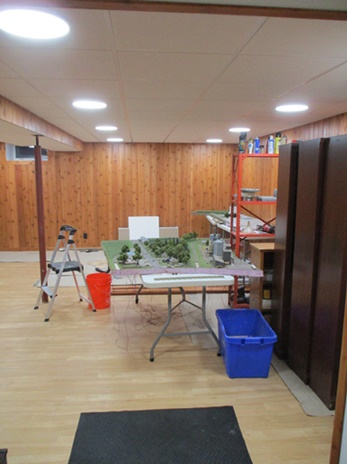
Unfortunately, I did skimp on the lighting over my workbench -
So, one last electrical project there, but then it's train time - finally!
03/03/22 - Finito!
OMG, this turned out exactly the way I was hoping it would!
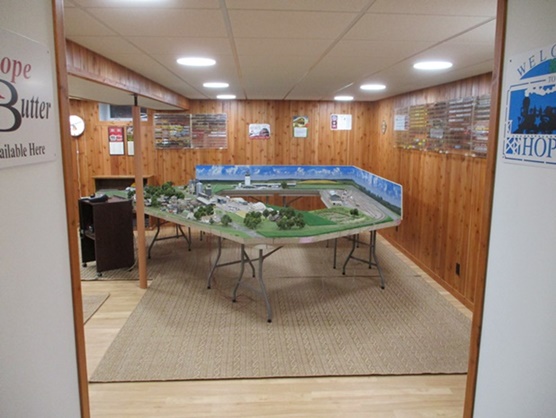


So I guess now it's finally time to start putting humpty dumpty back together again. Paging all the king's horses and all the king's men!
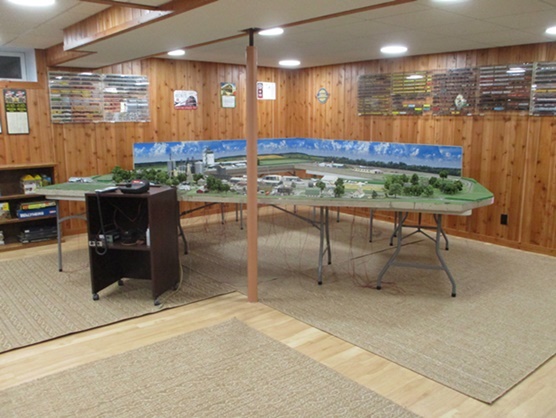
03/10/22 - The modeling re-begins (at last!)
Things have been moving along rapidly now that the shop is done. First off, I got the four puzzle pieces glued back together and the track reconnected, and fortunately no major issues there. Next, I reconnected all the track feeder wires and successfully ran some locomotives around, so all good there. Next, I spent a few days simply cleaning all the crap off. It's astonishing the variety and quantity of shmootz that accumulates on a layout when it spends eight months sitting in a garage (dirt, dust, sawdust, bits of plastic, dandelion fuzz, dead bugs, and on and on and on). Next, I watered down all my turfed areas to re-green the grass.
After all that I went ahead and finished putting all the displaced and dislodged buildings and assorted details back in place (and with the SunRich north elevator being the last major task in that regard) -


Lastly, I decided to redo the Miller Farm fence. Frankly, I've never been real happy with the way that thing turned out (what with all the bending and warping that set in over the years) -

Fortunately for me it broke during the move, so I went ahead and replaced it with some pre-fab fencing from Etsy seller "Railhead Designs". Looks much nicer now!

My next job is to repair all the sliced up scenery.
03/12/22 - Finished repairing slice #1
This wasn't nearly as difficult as I was fearing it might be. Before -
After -

The road was the hardest part. For whatever reason, the two puzzle pieces didn't align very well there (one side being slightly higher than the other, and with a noticeable gap in between). What I wound up doing was bending the high side down so that it matched the low side. Then, I jammed some thin pieces of styrene rod into the crack and then melted them in place with liquid cement. Worked out great (or at least no worse than a "real world" asphalt repair job might look) -
I no longer have the exact same mix of AR&M dirt that I used at SunRich four years ago, so I had to blend in a different mixture as best I could (said mixture being the stuff I've been using at the Waseca yard). But when it comes to dirt, I don't suppose a bit of variability in coloration is necessarily a bad thing. In any case, it's certainly not distracting -
So, that's that. On to slice #2.
03/14/22 - Finished repairing slice #2
Mainly just a lot of grass to fix here, so not nearly as challenging as that slice through town -
I see that there's quite a difference between my new LED light fixtures and the fluorescents I had in my old house. I may have to readjust my camera....
On to slice #3.
03/15/22 - Finished repairing slice #3
Yikes, two roads to fix here....
Fortunately, everything lined up very nicely when I rejoined the two sections, so all it took was a bit of color touch up and the roads were ready to go. After that it was just a matter of adding turf and ballast -

Bring on slice #4.
03/16/22 - Finished repairing slice #4
For whatever reason, these two sections just didn't want to go back together...
The solution? Jam bits and pieces of paper towel down into the cracks and then bury everything in a ton of turf and an ocean of Scenic Cement!
OK, so what next? Oh, right.... reconnecting a couple hundred light wires
03/22/22 - Let there be light (again)!
Wow, what a giant pain in the ass. There were at least ten sets of wires that got stepped on and ripped out during all the various moves, so lots of cursing and teeth gnashing trying to get that all repaired.
I gotta give major kudos to Woodland Scenics for redesigning their splicer plugs - much easier to use now and a total godsend!

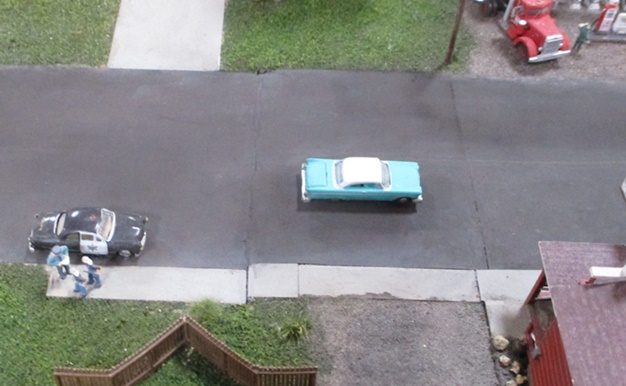
Speaking of Woodland Scenics, one of my "Just Plug" antique cars turned out to be an unsalvageable disaster. So, I decided to replace it with a more modern vehicle from Evemodel -

These things are crazy cheap ($15 for a pack of twelve in various colors from Amazon). Evemodel doesn't specify what type of car they're supposed to be, but based on the grill I'm thinking they must be sort sort of BMW. The lights are somewhat overly bright when powered off my 12v lighting circuit, so I may need to add a resistor (personally, I think they look a lot better at around 8.5v).
And then I suppose I'll need to put a few of them out on my various highways - which suddenly makes me wish I had some lit up big rigs to go with them
(hint, hint Peteski)
Anyway, my next (and last) moving related task is to repair all of my screwed up E-Z Line. Fun times!
03/26/22 - Track do-overs
Slice #4 turned out to be even more problematic than I'd originally thought - a fact that I discovered when I tried running my UP excursion train around. The track on the inner loop had basically turned into a roller coaster and my danged Challenger was derailing every time it went through the curve. And after messing around trying to solve that problem I started having all sorts of conductivity issues (stalls) through that section of track. And after dicking around trying to solder the rail joiners (and making a big mess of it), I finally decided to just tear up all the track and start over (which is exactly what I should've done in the first place).

And yes, that did solve all the problems

And now back to the E-Z Line.
04/04/22 - The last strand of E-Z Line has been strung, so the move is officially over!
Yep, everything is back the way it was eight months ago (just relocated eight miles to the west) -
I honestly had no idea if this was going to work out, so color me giddy
04/18/22 - Resistance is useful
I added a 10K ohm resistor to the wiring for my Evemodel car and now the lights are much more reasonable -

Now please excuse while I go catch up on a stack of locomotive reviews