07/17/19 - Irrigation for the soybeans
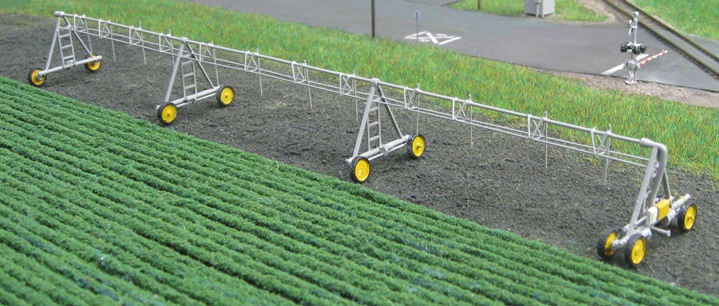
The gantries for this "lateral motion" irrigation system came as part of a Shapeways kit from designer Baldylox (the kit also comes with parts to make a "center pivot" system should you want to go that route). The spans are a tangled assembly of Plastruct styrene rod that I cooked up myself (said tangle not being something that Shapeways can adequately render) -
Not knowing what prototype Baldylox used as the basis for his model, I simply picked a picture of one that appealed to me and painted mine to match (I guess I
chose this one mainly because I liked the yellow wheels  ) -
) -

I used this picture as a guide for constructing the spans -

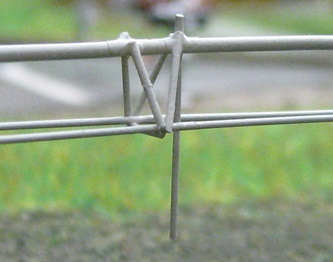
I started by inserting a 1 mm diameter rod through the holes provided in the gantries for the main/central pipe. Then I added .5 mm horizontal support pipes to either side of (and below) the main pipe. Next, I made little triangles out of .5 mm rod to connect the main pipe to the supports. I then added short pieces of .5 mm rod to connect each of the opposing pairs of triangles. I finished things off by hanging a spray pipe off of each support grouping (also .5 mm). I pretty much drew the line there, figuring that was more than enough detailing for my purposes. And no, I didn't even bother trying to bend the spans into arch shapes. Compressed as the entire assembly is, it just wasn't going to work.
So, that's that. Now let's hope that this motivates farmer guy to finally get off his duff and finish planting the field! 
07/17/19 - A Big Boy comes to town
Yep, I made it down there

There's always at least one idiot who has to stand too close to the tracks and ruin everybody else's shot, right? I hope he enjoyed getting a face full of
steam 

Anyway, cool stuff. And I'm definitely looking forward to the Kato version (scheduled for release next year). Hopefully they'll come out with some fresh new excursion cars as well.
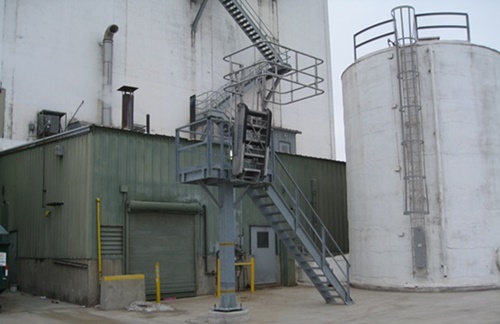
07/20/19 - More fun'n'games with little fiddly bits of styrene and glue (lots and lots of glue)
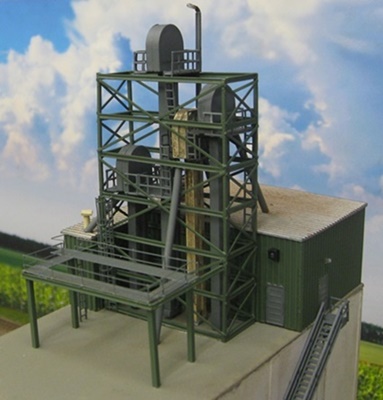
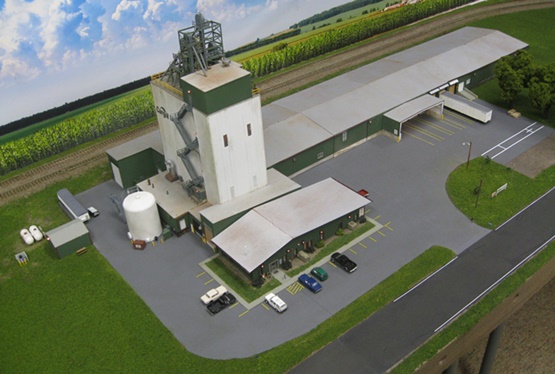
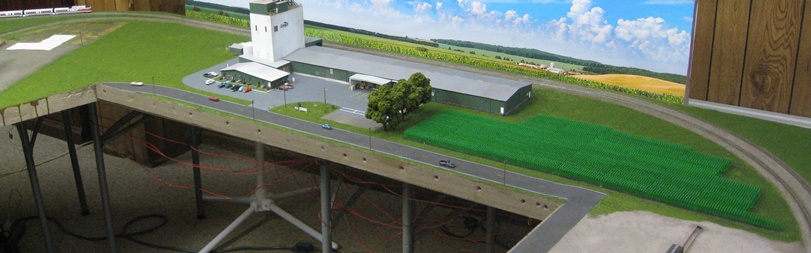
Using long distance ground level photos to design this roof stuff is a bit challenging. There's a hella lot going on up there and everything just kind of blends together into a big jumble in my photos (not to mention the fact that the roof level stuff isn't visible at all) -

Anyway, this is what I have so far -

Now I just need to cram four different elevator legs inside of that thing (all differently sized and shaped) and then figure out where to put all the ladders and landings. Good times!
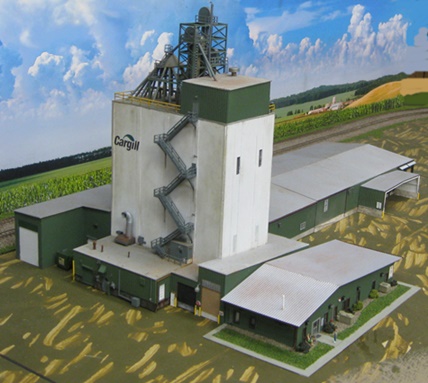
07/24/19 - More Cargill progress
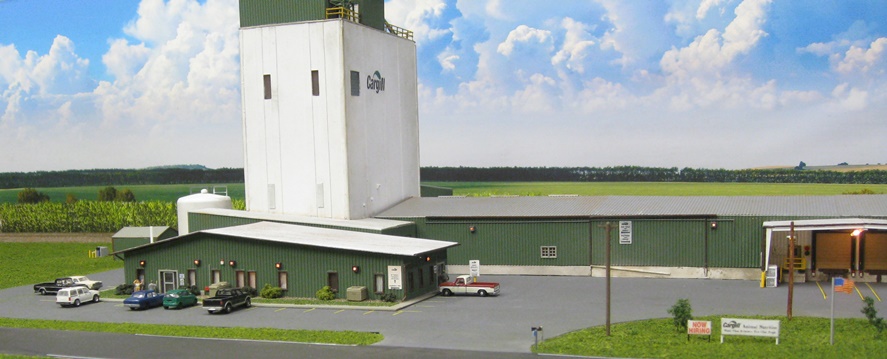
OK, I finished up the jungle gym -
Oh wait, that's not it. Let's try this again
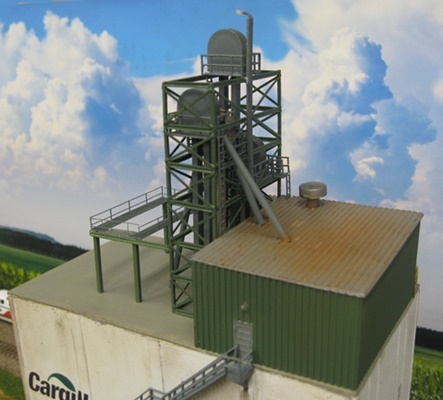
Given the limitations imposed by my reference photos, I did wind up having to freelance quite a bit of this. Yes, the basic guts of the structure are correct
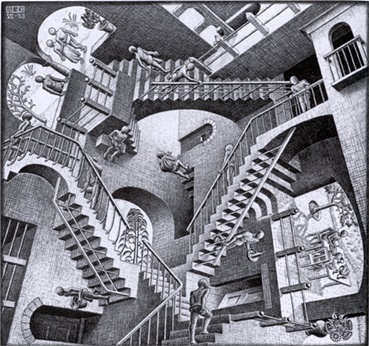
(four legs, five chutes, leg support cage, elevated walkway platform, etc). However, I wouldn't spend a whole lot of time trying to figure out how to get from Point A
to Point B on those ladders and landings inside the leg cage. I'm pretty sure it can't be done

Apart from the brass GMM industrial walkways and safety cage ladders (which always give me fits), this all went together pretty easily. Fortunately, Rix elevator
tops/platforms were a perfect fit inside of the cage, so I didn't have to scratchbuild those particular details. The rest of it is just various flavors of Plastruct
rod and strip styrene held together with a whole lot of plastic cement. The area light is pretty basic - a Miniatronics bulb with its wires CA'd to a long piece of
I-beam styrene and painted gray. And I will tell you, getting the wiring for said bulb through both the shed roof and the main tower roof was quite an adventure

So, there ya go. Now, on to the octopus (ugh).
07/25/19 - A trash compactor for Cargill
I originally thought that I was going to have to scratchbuild this "Cram-A-Lot" trash compactor (yes, really, that's the brand name) -

Fortunately for me, it was Ngineer (Shapeways) to the rescue -

I had planned on replicating all of the detailing of the real thing, but the Shapeways model turned out to be based on a rather different sort of prototype than the one at Cargill (and one that didn't really lend itself to a lot of modification). So, at the end of the day I decided to just paint it green, add some Waste Management decals and call it "close enough".
07/27/19 - More Cargill progress
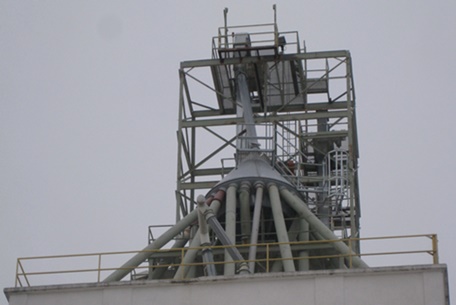
OK, I finished up the pipes -

Oh wait, that's not it. Let's try this again

A casting of a pointy bin bottom (from my old hopper bin days) turned out to be exactly what I needed for the cone thingy, so I caught a bit of a break there. For the rest of it, I just crammed in as much Plastruct tubing as would fit. And although not 100% accurate, I think I achieved the desired level of tubular chaos -

My main problem (vis'a'vis accuracy) was that I couldn't always make the pipes go where I wanted them to go. Cargill cheats by having bends in their pipes and/or running them right through that elevated walkway, so they wind up with a nice orderly grid where the pipes connect to the roof -

As for my model, I really didn't want anything to do with pipe bends or holes in my walkway, so my pipe placements wound up a bit more random. Still, I think I captured the overall scene pretty well, so I'm happy.
08/04/19 - Moving on to the office
I've been a little surprised at how quickly these Cargill buildings have been going together. But then it occurred me - no windows! Well, those
were the good ol' days 'cuz this danged thing has thirteen of 'em (not to mention two fancy glass doors and about a million wall lights) 


The going has been slow, but so far I've made some decent progress on the difficult stuff (doors, windows, lights, signs). Still a long way to go though -

One annoyance I already have with my model is that I think I missed an important feature of the prototype. Namely, that it looks like the front wall used to be symmetrical and that later on an extension was added to the right side. The upshot of that is that the left/side wall should be a little taller than the right/side wall. But of course, mine isn't (oops). I sure do wish google earth could tell me heights as my guesstimating abilities do seem a bit wanting at times.
In other news, I've been kind of stressing about not having enough room for a proper highway and a decent sized parking lot in front of Cargill. But then it dawned on me that this section of the layout isn't up against a wall anymore, so there's no reason I couldn't just make it a little wider. And so, I got out some glue and some 6" drywall screws and added an extra 3" to the inside edge of the base -
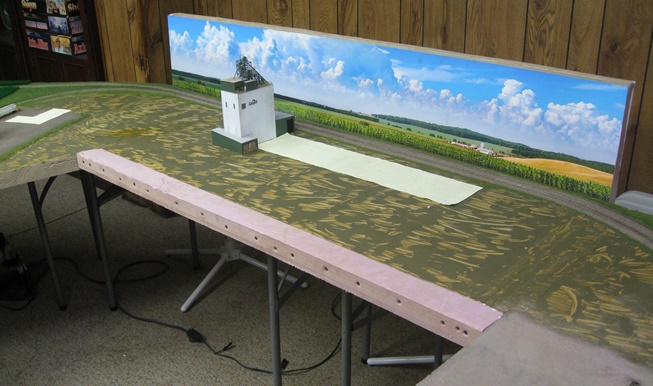
Yep, yet another one of those "duh" moments for me 
08/04/19 - Desperate times, desperate measures
Getting from Point A to Point B during layout construction occasionally takes one down some strange paths, and this one is certainly right up there with the weirdest ones for me....
To wit - I realized today that I had made my irrigation thingy a titch too wide for my field (IE, the non-motivated end was going to wind up running through the tall static grass weeds along the edge of the field). Well, "not good", I thought, and decided I'd better move those weeds back a bit and put down some more dirt. Trouble is, my previous attempts at removing static grass were not successful (to say the least), so I needed to come up with a different way to go about it. And my bright idea this time was to get out my beard clipper and give my layout a quick trim. Then it was just a matter of putting down some dirt and, ba-boom, ready to roll

Whatever works, amirite?
08/09/19 - Finished the office
I had a lot of problems with my window openings back when I made the add-on office for the machine shop, so I tried something a little different here. My normal procedure is to paint the window frames and walls separately (since they're usually two different colors). But since it's kind of difficult to get a good fit with the windows when making holes in this sort of coarse ribbed styrene, I decided to install the windows before painting anything. This allowed me to fill in the inevitable cracks and crevices around the window frames prior to painting and the net result was much better looking windows. Of course, the downside is that you wind up having to handbrush the window frames, but given the improved quality of the windows I definitely think it's worth the extra effort.
Hmmm... now that I look at the two photos, I probably should've put a little more effort into my window spacing as well. Not quite jibing with the prototype there

I decided to go totally overboard with the detailing (as is my wont) However, I did wimp out on my original plan to add little lit foyers inside each of the doors. I mean, seriously, enough is enough.
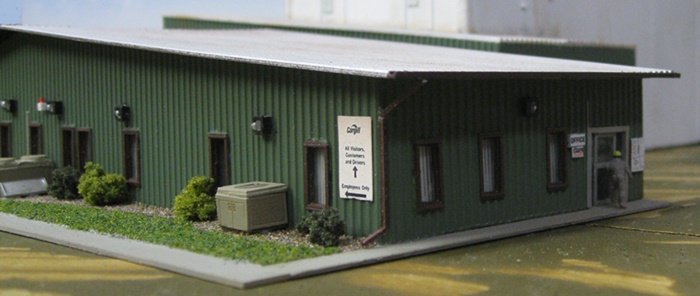
I made the glass doorways the same way that I made the front door of the antique store - IE, I made the door and surrounding frame out of thin strip styrene and then glued all that to a piece of clear styrene. Worked out great -

I must say, I'm really pleased with how well these Cargill buildings are turning out. I guess engaging in actual planning and going with mostly accurate measurements
does have its advantages
Anyway, on to the mother of all sheds!

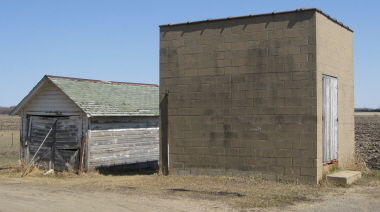
Speaking of that shed, I was looking at my pictures and having just one heckuva time figuring out what those long bars on the roof peak might be. However, after a bit of googling I decided they must be roof vents something like this -
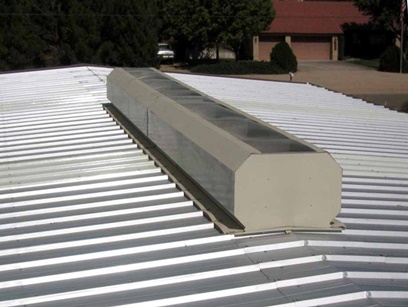
So, there ya go - google to the rescue yet again. What a wonder.
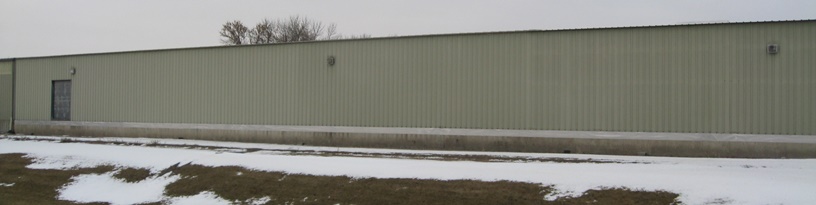
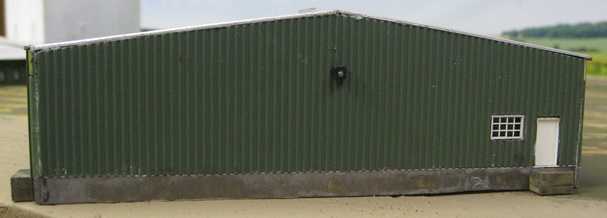
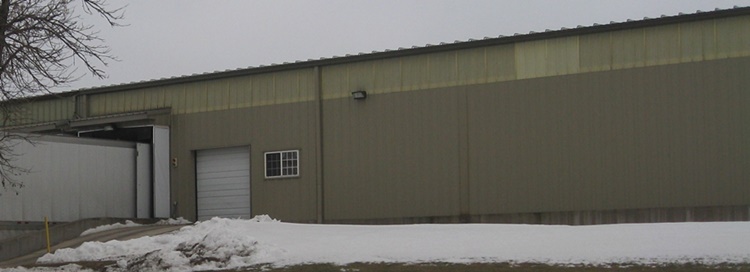
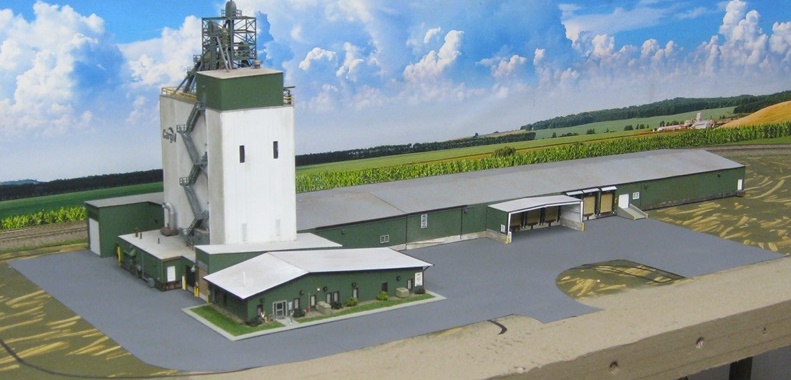
08/12/19 - Got started on the Cargill warehouse
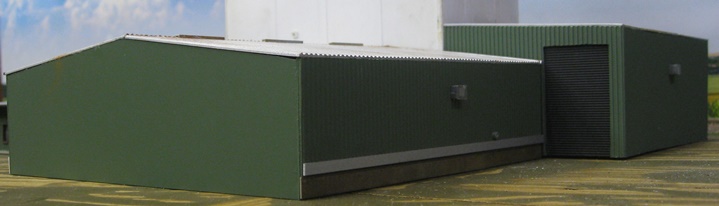
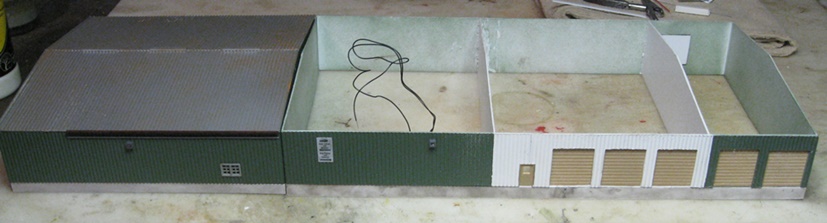
The prototype appears to have been built in three distinct sections, so (for better or for worse) I'm building my model the same way. Getting everything (roof, siding, foundation) to line up between the three sections may eventually become difficult, but it'll at least be a bit less unwieldy this way (as opposed to trying to wrangle a single 28" x 6" model). This first section is just 6" x 6" and blessedly free of a lot of labor intensive detailing (just the one window and no doors at all) -


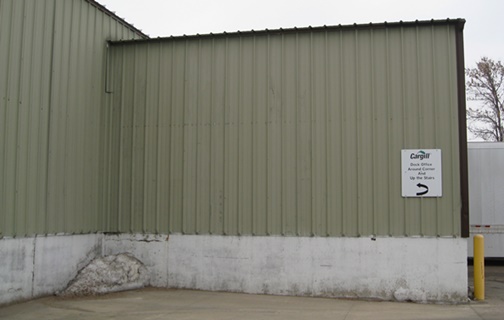
As on the railcar shed, I didn't bother wiring up a bulb for the light fixture on the track side (there's just no point). As for the shiny metal strip along the wall? Well, I'm not sure what purpose that might serve, but I added one just the same -
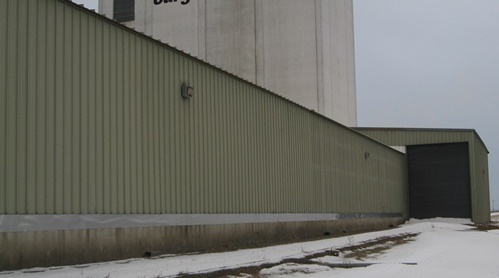
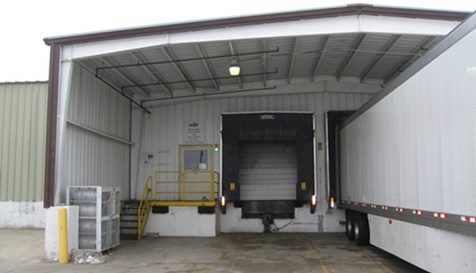
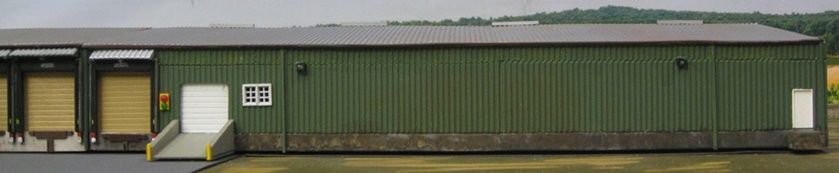
As you may (or may not) have noticed, I've been putting a little extra effort into the foundation on this one. As on my previous efforts, the walls consist of a siding layer glued on top of a plain styrene layer (with the siding layer being shorter than the underlayer, thus creating a visible foundation). The only problem with that method is that the foundation winds up being recessed from the siding. And since I'll eventually be needing to attach the below pictured "trailer port" to the wall in the loading dock area, I'm going to want the siding and the foundation to be flush with each other. So, in aid of that I've been adding a second layer of styrene stripping to the foundation. A minor detail perhaps, but I think things will look a little better this way. It also helps with downspouts and other details that run over both the siding and the foundation.

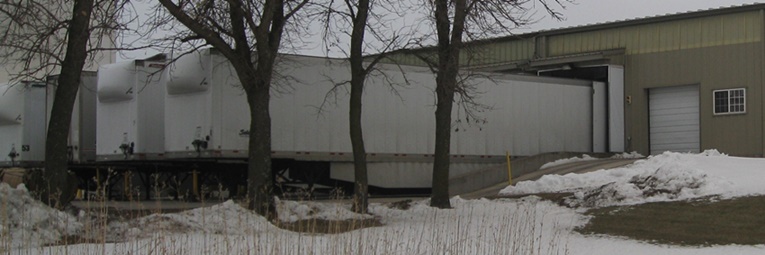
Speaking of loading docks, I decided I'd better check around for some appropriate trailers to park in front of them. And what I came up with were these Train-Worx 53' jobbers. They look pretty much spot-on perfect for my needs -

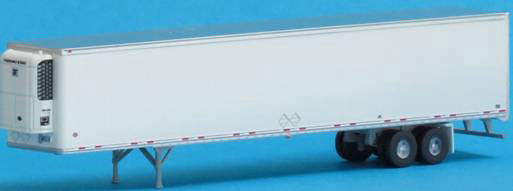
Unfortunately, they're not available yet. But, that's not going to slow me down. I'll just have to hope that they're going to work with the loading dock doors that I'll eventually be building.
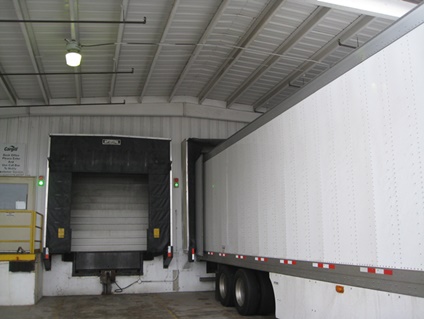
And speaking of loading dock doors, Walthers recently released some interesting looking ones; one of which is somewhat similar to the ones that Cargill uses -

Tempting I suppose, but I think I'll save myself a little money and just scratchbuild my own. It doesn't look like it's going to require a degree in rocket surgery.
08/17/19 - On second thought...
This middle section of the warehouse is turning out to be just one hell of a lot of work....
....and there's still tons more to do -

In light of that, I think I'm going to give those Walthers loading dock doors a try after all. Or more specifically, their loading dock door shrouds. The thought of
building six of those from scratch (and somehow getting them all to be the same size/shape) was starting to give me a case of the cold sweats. So, now I just have to
hope that they're going to work with the doors I've already made
08/18/19 - Gifts from the Gods
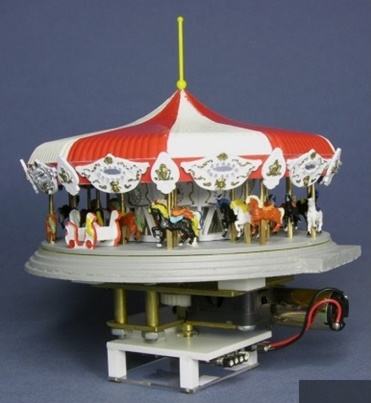
Remember back in January when I was lamenting the fact that my Finch's Pub parking lot sign didn't light up? Well, I actually did spend a bit of time researching
ready-made sign options, and I even wasted a few hours trying to scratchbuild my own custom sign. Well, along comes my buddy Peteski in the middle of all this,
aaaand.... he volunteers to do all the work for me! Now, if you've ever seen any of Peteski's "old world craftsman" style work, you'll completely understand why I
chucked all of my sad little experiments into a box and jumped on his offer. I mean, just check out this carousel that he animated and lit for Dick Ollendorf!


So anyway, fast-forward seven months and it looks like my sign is just about finished -
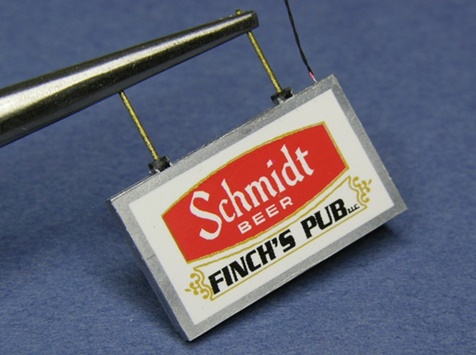
I can't wait to get my hands on it - definitely worth the wait!
09/01/19 - Finished up another 11" worth of warehouse
This didn't turn out too bad, although as I suspected, getting all of these sheets of styrene accurately measured and cut such that they match up from one section
to the next is not something that lies within my skillset. And while we're at it, no, I don't know what I was thinking with those gigantic light fixtures. It's a good
thing that nobody outside of this blog is ever going to see them

The Walthers door shrounds worked out pretty well, although they did wind up being a bit overlarge for my needs. Consequently, I had to sand them a bit thinner to get them all to fit. And even downsized, I still had to lose some of the dock details (mainly the little green/red lights between each of the doors) -

I did have enough room for one set of lights to the left of the first door (well, not lights per se - they're just little colored beads that don't actually light
up). I figure the rest of them won't really be missed since most of this is eventually going to be hidden behind trailers anyway (which, given all the detailing that I
actually did do, is enough to make a grown man cry ) -

As pictured, I kind of went overboard with the weathering inside the truck port. Y'see, I was trying to cover up an "oops" on the foundation underneath that
first door and, uh, "one thing led to another". Oh well, I like weathering so I'm not too upset about it. And if you're wondering - yes, there are ten
little propane tanks inside of that propane tank cage. What can I say? My insanity is well established at this point 


Another issue with the dock shrouds is that they were a bit taller than I was expecting, so I had to change the height of the truck port roof to accommodate them. And since I'd already built the walls for that, I decided to just make their foundations a little taller. The upshot of that is that they don't really match up with the foundation of the main building. But seriously, would you have even noticed if I hadn't told you? (the answer we're looking for here is "no") -

Due to the size of the Walthers shrouds, I also had to skip the white frames around the outdoor docks. Will anyone ever notice? Let's hope not.
Despite all the little glitches, I think big picture-wise things are coming along nicely -
One more 11" section of warehouse to go and then I can start thinking about how I'm going to make that big ol' parking lot....
09/01/19 - Yes, it's another piece of wall art
I decided that for my doorway, "Welcome to Hope" was a slightly more uplifting message than "Beware of Trains"

So, at this point is there any doubt that I am not done getting custom signs made for my train room? No, don't bother. I'm pretty sure I already know the
answer to that one
09/08/19 - Finished the warehouse
I knew going in that this third section was going to be a giant pain, what with its yellow strip along the tops of the walls -

Masking the walls for a two-color paint scheme is really hard on this sort of ribbed siding, so my bright idea was to instead cut horizontal strips off the top of the walls and paint those separately. Unfortunately, I can never seem to cut a straight line, so it wound up looking pretty lame. Making matters worse, the yellow paint I used went completely nutso when sprayed on top of the green paint (looking nothing at all like the rather washed out yellow of the prototype) -

I tried retro-fixing it in various ways, but things just kept getting worse and worse. So, ultimately I decided to just paint over it with green and get on with my life -


The siding on this section creates a rather interesting looking drainage pattern on the foundation (no idea why). Unfortunately, I was not able to capture the look (although truth to be told, I didn't try all that hard).

Getting everything to line up between the three sections remained a problem (for example, the door overhang wound up a bit too low). But oh well, it's all liveable.
I needed to make a parking lot before I could get on with some of the free-standing details, and so I did. To differentiate it from the (eventual) highway, I simply sprayed it with gray primer and called it a day (IE, no WS pigment and no Bragdon powder) -
Eventually there will need to be a road that runs north to the Waseca yard and south to SunRich. I sure hope it works out

09/08/19 - A new sign for Finch's Pub
Yep, it's finally here!

As you can see, it looks quite a bit nicer than my old one -
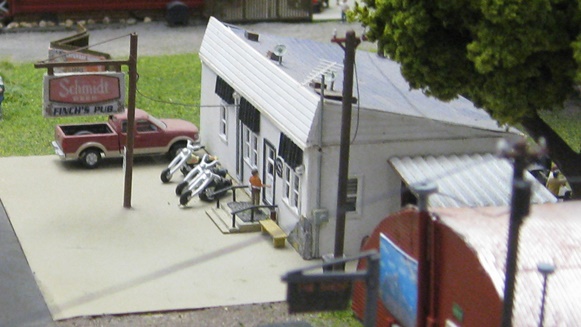
And better still, it actually lights up! Woohoo!

Major kudos to Peteski for whipping up that bad boy for me
09/12/19 - OK, enough with the wall art already!
Yeah, what can I say? I couldn't resist having a couple more pieces of railroadiana made up for my train room -

M&SL timetables are as rare as hen's teeth and I wasn't about to destroy one just for this project (and truth be told, they're pretty boring looking anyway). Instead, I used the above pictured image of an old M&SL calendar (scanned from the back of an M&SL history book and sent off to Dave at Wall Art). Conversely, C&NW timetables are as common as hen's feathers, so I didn't feel too bad about wrecking this one from 1939. It includes the Minnesota 400 (and Waseca), so basically a nobrainer companion piece to my Rock Island timetable -
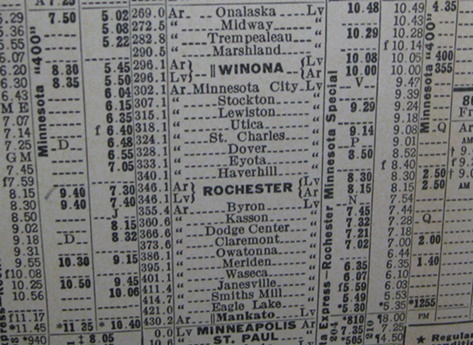
So, that makes seven pieces now. Seems like about enough, doesn't it?

Well, maybe. I guess we'll see
10/03/19 - Finally finished with the soybeans!
Ay yi yi, that was a lot of work. I think I could've knitted a closet full of sweaters in less time....

I actually did put in some pipes and plumbing to get water over to my irrigation contraption. Unfortunately, I wasn't able to find any "real world" pictures
to use as a guide, so I pretty much had to make it up as I went along. So, no, no closeup photos of any of that stuff. The prototype police already have
enough on me!
I think that's about it for me and soybeans. Given the gargantuan nature of my Cargill facility, there's just not all that much space left over there for crops (yay). And in light of that, I think I'm just going to stick with corn. The good news there is that Craig over at Bluford Shops gave me a really nice deal on his last 12 boxes of Autumn Corn, so I'm good to go for now (12 boxes being what we in the corn planting biz call "a good start", lol). However, before I can get going on any of that, I still need to figure out just what I'm going to do about roads over there (ugh).
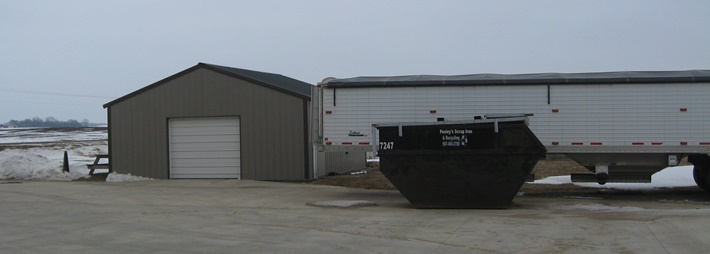
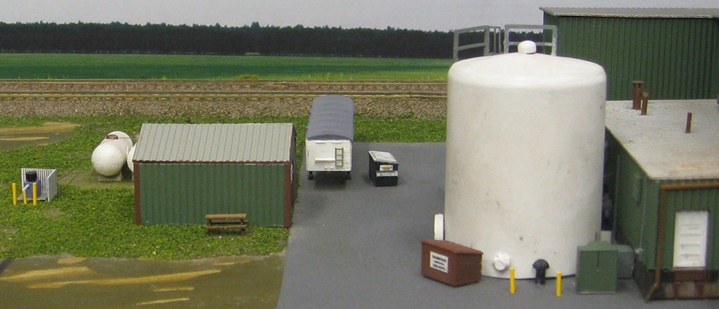
10/04/19 - Finished up the free standing details on the southern end of the Cargill facility
Plastruct makes a peaked top storage tank kit that I thought was going to be just what I needed - except that, oops, I needed something that was 1.5" diameter and their's was 2". Well, no problem I thought - I'll just supply my own tank and then make use the rest of the Plastruct kit to finish it off (downsize the top, etc). Well, it seemed like a good idea up until I got my hands on said kit. I mean, calling this thing "craftsman style" would be an extreme understatement. Basically you get some generic plastic sheeting, a few plastic rods, a plastic tube for the tank and a couple of injection molded detail parts. The peaked top is nothing more than a circle of thin sheet styrene that they've cut a slit into and then glued into a shallow cone shape.
Well, long story short, I made my tank using the bottom half of a bottle of Model Power track cleaning fluid that I happened to have sitting around. I then glued said cone to the top of my bottle, trimmed it with scissors the best I could, and then smoothed out the edges with Bondo putty. Then I glued on their two details (the round "whatchamacallit" on the front side and the "whozamawhatsit" up on the top. After that, I finished things off with a couple of curving handrails (left over from a Walthers oil tank kit I'd built years ago), a GMM safety cage ladder, a long styrene pipe, and then all the rest of the indeterminate litttle blobs and bumps evident in my scouting photos -


My understanding is that elevated platform thingy (made by Bullard) is an access platform for getting up on top of tank trucks (which I assume is an adjunct to the adjacent storage tank). In any case, I made mine using various bits and pieces of styrene (handrails, ladders, stairs, etc). I then finished things off with a transformer (a couple of pieces of styrene with some styrene ribs glued to them), a Shapeways dumpster, and various styrene safety posts and barriers.
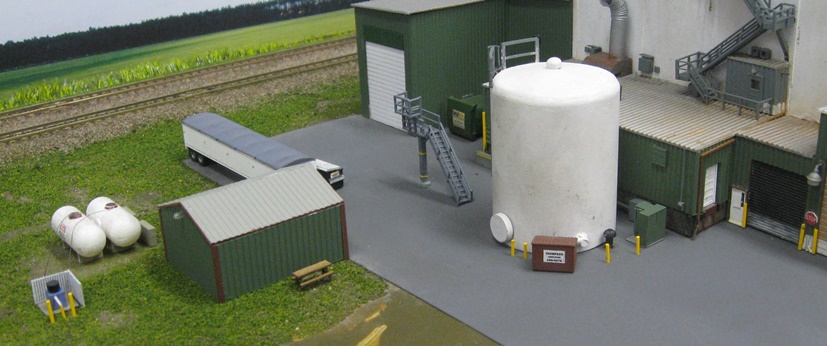
Over here we have another Shapeways dumpster, a Shapeways grain trailer (a really nice design from NScaleAddict), a shed, and a couple of Shapeways LP tanks. That trailer was so nice looking that I decided to really go the extra mile getting the fine details right (IE, lots of decals and handbrushing) -

Lastly, we have a picnic table and some LP tank hardware (partially surrounded by a wooden fence for whatever reason - maybe to keep the snow drifts at bay?) The prototypical tanks have hoses running over to said hardware, which I simulated using EZ Line (almost completely pointless since it's virtually invisible) -

So, that about does it for the hard stuff. Now I just need to get a road put down out front so I can finish up the ground cover.
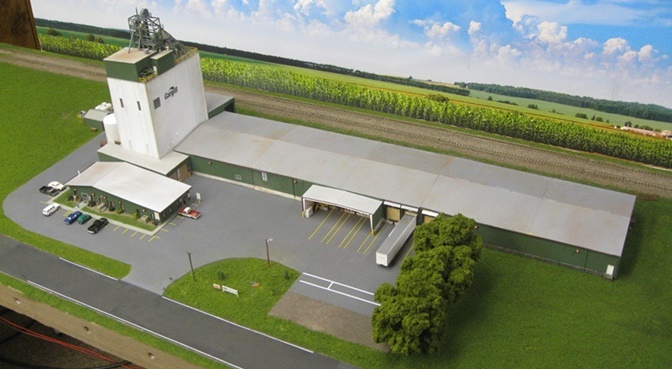
10/25/19 - Finished Cargill!
Well, the road is still a work in progress and I don't have my Trainworx trailers yet, but other than that it's finished.

So, lets see... we got cars and trucks and parking lot lines. And since I didn't have any major gripes with how my grade crossing decals worked out, I decided to go with decals here too. And honestly, they're not bad at all. Maybe just a little shiny when you catch them at the wrong angle, but otherwise more than passable -
I kind of goofed up this little auxilliary trailer parking area. I didn't notice until recently that it's actually mostly dirt (with just a thin strip of tar for the trailer landing gear to rest on). And unfortunately, I didn't make that offshoot large enough to accommodate all of that. Oops.
On a side note, is it just me or does that landing strip look like the world's largest AA battery?

Anyway, I did add some dirt to the end of the offshoot to make it at least little more correct, but that was about all I had room for -
So, not great, but I think I redeemed myself by getting all of this detailing right -
Street number sign, mailbox, utility pole (still waiting for its wires), "Now Hiring" sign, "Cargill" sign, flagpole, parking lot light, and three small trees -

Kind of hard to see, but I added a parking lot sign over there to the right of the office -
I was wracking my brain trying to come up with a good way to model bundles of cardboard, and then it dawns on me - just tear a piece of actual cardboard into
little pieces and glue them together. Duh

I'm not sure that the invisible siding was worth all the effort. Frankly, I think it turned out kind of "meh" looking and I may revisit it someday....
Lastly, lots of lights -

Lots and lots and lots of lights -

So, knock me over with a feather, I can't believe it's already done! Would that all my projects went so smoothly
10/27/19 - More ammunition for the Prototype Police
I really hate adding out-and-out lies to my model of Hope, but.... aesthetially speaking, the Krause end of town has always felt a bit bereft in the lighting department. And since I happened to have a spare WS streetlight sitting around doing nothing, I decided to go ahead and put it in play down there -
Ahhhhh.... much better! Now I just need to add a lit car sitting there at the grade crossing....

I tell ya, I really do hate trying to take pictures down on this corner of my layout. Having a giant wall of corn blocking the road out of town does tend to
spoil the illusion
11/01/19 - Finished with the roads
I decided that my original plan (running the road all the way from Cargill to SunRich) just wasn't going to work. As you can see, I would've had to create some sort of weirdo S-shaped monstrousity through my corn field to get the road over there (the SunRich admin building being represented by a piece of paper at the top of the picture below). So, I decided instead to just keep things simple by curving the road right off the edge of the layout. It does seem to make a lot more sense this way since in reality Hope and New Richland are a good 20 miles apart.
That said, I did go ahead and slap reality in the face by connecting the highway to the Waseca yard access road (14 miles apart in the real world). Unfortunately, the two roads need to originate from the same basic spot on my layout and I just couldn't really think of a better way to deal with them.

Liking the way the Cargill parking lot turned out, I decided to go with decals for the road as well. I also decided to spend a little more effort on prototypical accuracy by adding both white shoulder lines and dashed yellow center lines. Additional detailing includes some utility poles and a handful of traffic signs.

I'll probably wind up extending that yard access road a little further into the yard, but I'm not going to worry about any of that until I have a better idea of what the structure situation is going to be up there. Also, I think that highway would look a lot more interesting with some tar repair lines (the prototype is rife with them), but that's a project for another day.
11/07/19 - And for no apparent reason....
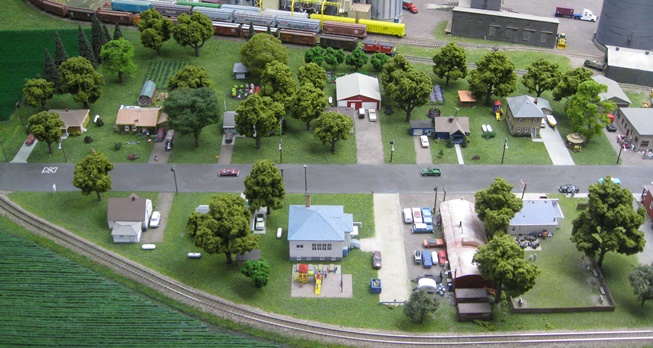
....here's a little aerial photography of the seldom seen "reverse view" of Hope -

Amazingly enough, this thing is really starting to come together and look like an actual model railroad. At this point I figure that if I don't finish it up in 2020, then certainly the year after that. Frankly, there's just not all that much left to do (relatively speaking).
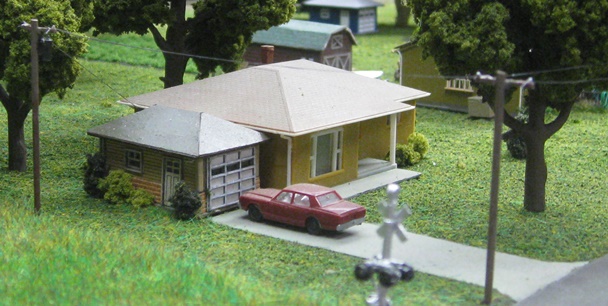
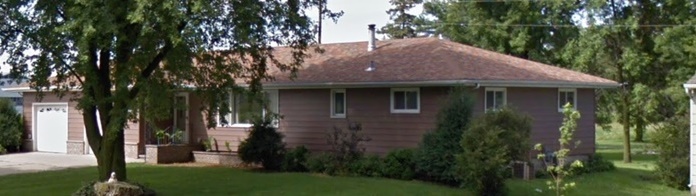
11/14/19 - House detailing
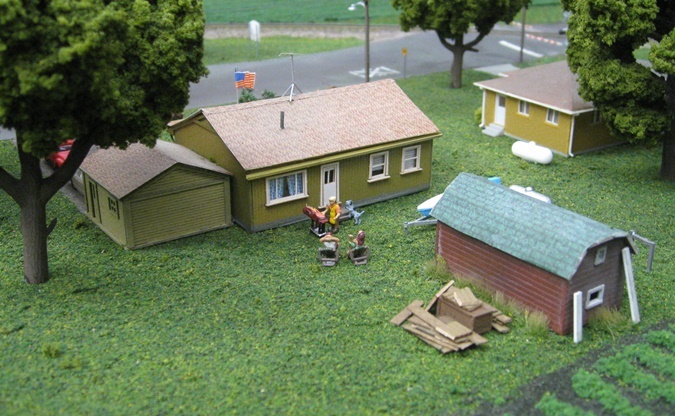
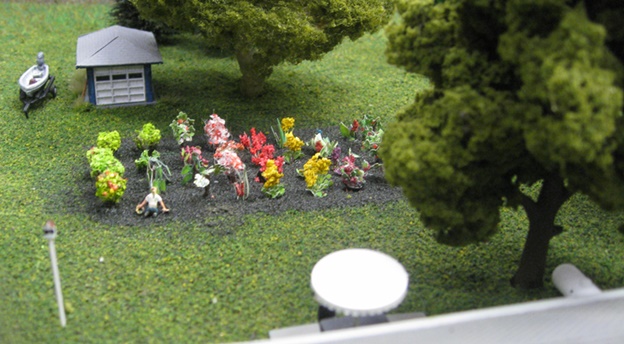
I decided to get going on adding detailing and scenery to the residential end of town. And since the Vieguts have so much interesting crap laying around, I decided to make them my first victim. Of course things have changed a lot over the years, so I kind of had to cherrypick the stuff that I did and didn't want to add. What I wound up with was a stump, a safety pole, a bush, an A/C unit, a hose, a cinder block, a lawn mower, a flower pot, a chair, a couple of bikes, an antique plow (courtesy of Shapeways designer RAILNSCALE), a couple of people, and various weeds and shrubs.
Funny thing... I never really noticed those orange and white safety poles before (as Sherlock would say, "I see, but I do not observe"). However, now that I'm looking more closely at my photos it seems that there is one next to just about everything you could conceivably hit with a car (utility poles, mainly). So, I guess I'll be making a bunch more of those....
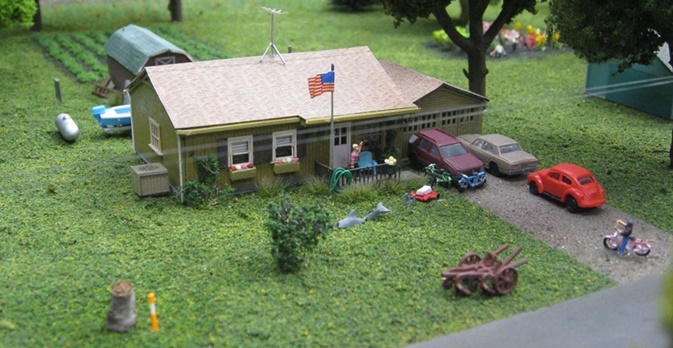
It took me a while to identify that weirdo gray thing to the left of the lawn mower as a lawn ornament - specifically, a partially submerged dolphin. Or maybe it's supposed to be three dolphins? I'm not really sure, but if it's just one it certainly doesn't have a bone in its body! In any case, the model came from Shapeways designer 3D-Aircrew (with my contribution boiling down to painting it gray and then hacking it to pieces). And yeah, if you'd told me a month ago that I was going to need to hunt down an N Scale dolphin for my model of a small town in southern Minnesota I would've sic'd the guys with the butterfly nets on you!

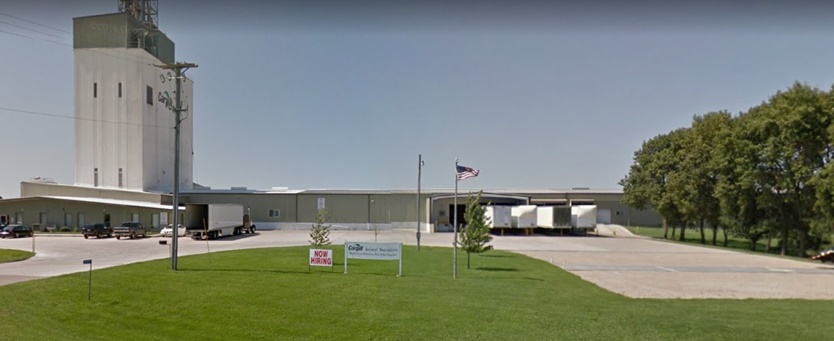
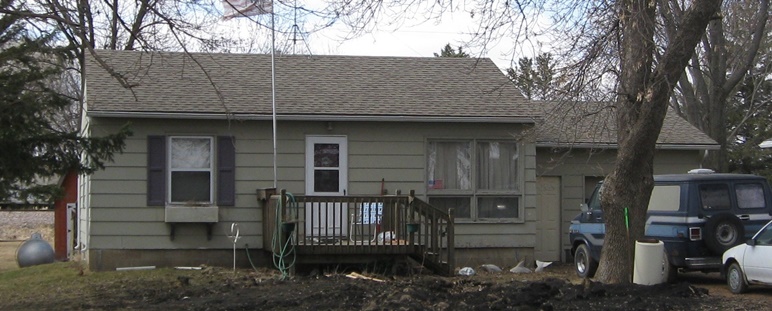
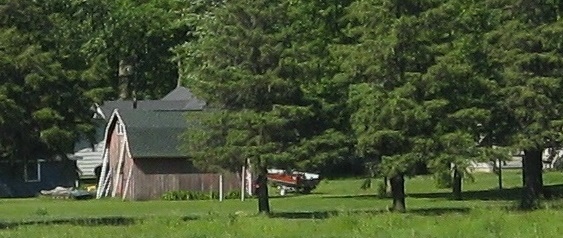
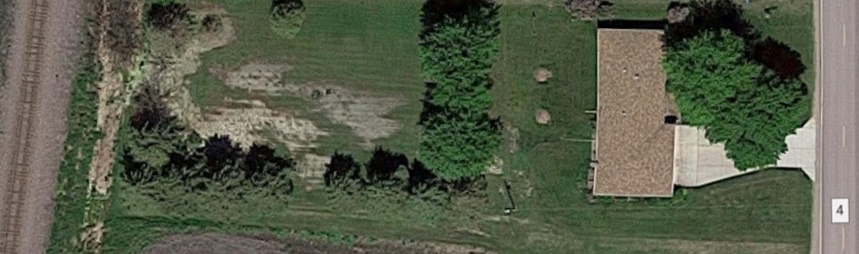
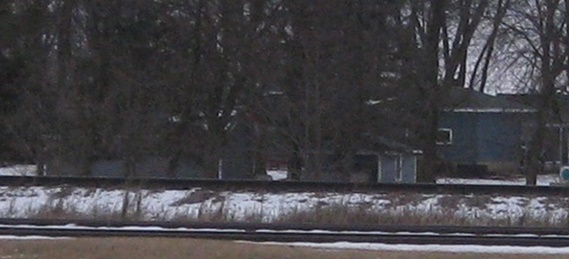
Trespassing is pretty much the only way to get decent pictures of what's going on out back. But since I prefer not to do that, about all I had to work with were satellite images and pictures taken from a loooooong way away. Vis -
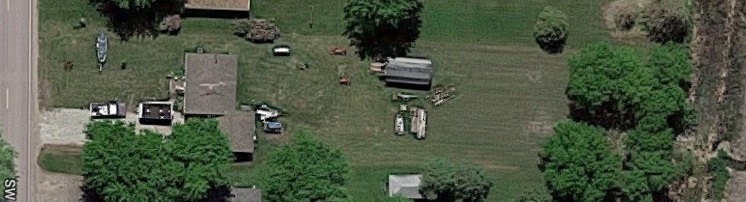


Absent any real recon work, I just tried to get as much of it right as I could (and then pull the rest straight out of my ass). And of course, job one was to
scratchbuild yet another bleepin' shed. Whee!
Looks like they have a fine crop of coarse turf coming in there, eh? As for the pile of lumber... Well, I have no idea if there's actually anything like that back there, but I figured "what the heck, why not?"
In other news, I finally finished burning through my twelve boxes of corn -
I'm thinking another twenty boxes should get me pretty close to the finish line, and the good news there is that Bluford Craig just got a new shipment in.
So, look out Mr Wallet!
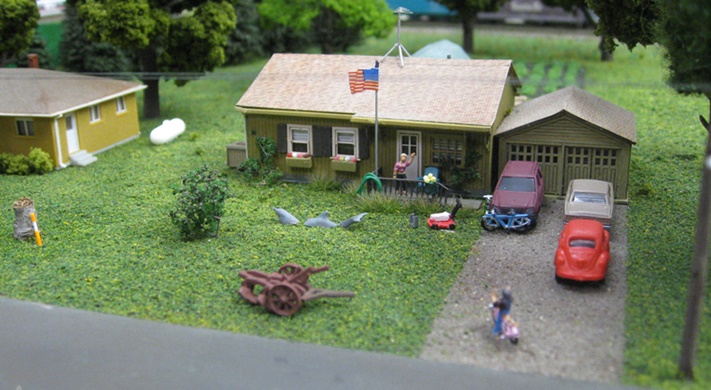
11/15/19 - More house detailing
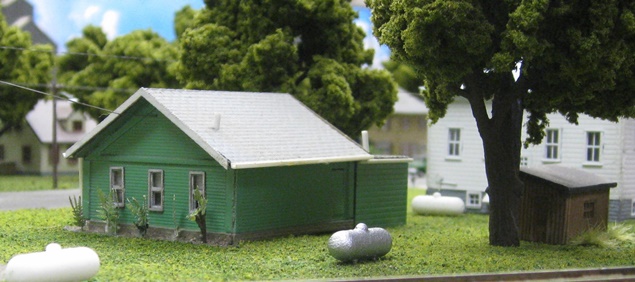
The Schulers run a pretty tidy little operation here, so it didn't take much to finish off my version.


Basically all I had to do was add a couple of LP tanks (the second one is for the neighbor), a bush, and some shrubbery in front of the house -

I also had that lopped off portion of the schoolyard playground equipment sitting around doing nothing, so I decided to toss that into the mix as well. I mean, what the hey, the whole place is a total foob, so why not?
11/17/19 - Another problem solved
Remember a few years back when I said that I was going to explain away all of the antique cars rolling up and down main street by claiming that there was a classic car show going on in town? Well, take one sign.....

....add a helping of old cars and a dash of humanity.... and suddenly there really is a classic car show going on in town!

Seems like a no-brainer solution that I should've implemented ages ago, but I've actually been kind of saving that spot with the idea that I was going to model an outdoor movie theatre there "someday" (outdoor movies having been shown in that lot back in the 30's and 40's). Unfortunately, I could never really solve the problem of what to do with such a scene when it wasn't nighttime (IE, how to explain why a bunch of people would be sitting on rows of poles in order to watch a movie screen in broad daylight). So, ultimately this seemed liked a more practical use of the space.
11/17/19 - More house detailing
I never noticed until recently that these guys have their own utility pole, so I extended the wires running along main street a little further south and then added a couple more poles. I also added some shrubbery to the side of the garage -

I added some more shrubbery and a couple of bushes over here. I also added an LP tank (since I assume they, like everyone else in town, must have one tucked away someplace) -

Apart from the trees (and possibly an LP tank), there doesn't appear to be a whole lot going on out back. Nothing super interesting anyway, so at this point I'm calling it done.
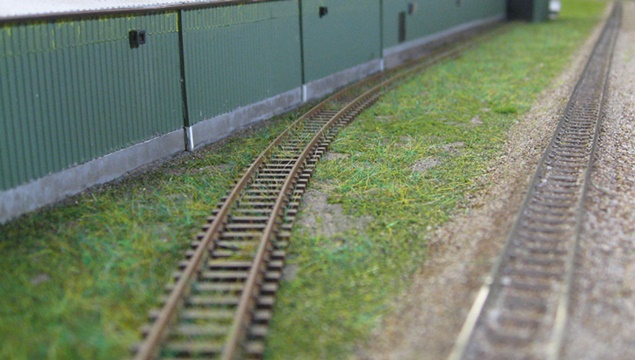
11/17/19 - Taking another whack at the invisible siding
It occurred to me that one of the reasons this siding didn't look quite right is that I neglected to put ballast around the ties -
So, I went back and addressed that. I also added some more (and taller) static grass weeds -

I think it looks a lot better this way. Of course, it'd look even better as an operational siding with a couple of boxcars parked on it. And who knows? I may actually do that someday (y'know, when I run out of actual useful things to do around here).
11/22/19 - Finished with the trees
I'm close to being done with all the house detailing, just not quite (the ones that are left are all sitting there waiting for one last thing or other to show up in the mail before I can call them done). In the meantime, I did finish with the tree planting (mainly standard WS prebuilts, but with a handful of WS "Premium" trees thrown in for variety's sake). Of course, it would've made a lot more sense to finish off the detailing before putting all those little arborial finger blockers in the way, but I just couldn't restrain myself.
Also, since it doesn't appear that people are mowing their lawns all the way back to tracks....
....I went ahead and put down a strip of static grass weeds along the roadbed -

(both sides)

So, that's that. Now, back to waiting for Mr Postman....
11/23/19 - Progress so far
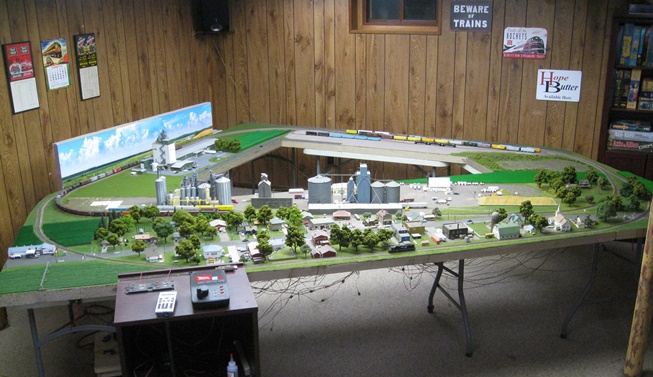
In case you were wondering, here's the big picture -
11/24/19 - More house detailing
Out front, these guys got some shrubs and a little newspaper delivery box -


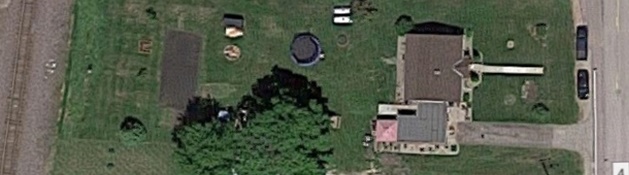
Long distance photos of the back seems to show a couple of garagy looking buildings -

However, satellite imagery only seems to show one -

Well, one seemed like plenty to me. And since the roof looks quite a lot like an Atlas "Barb's Bungalow" garage, that's what I went with. Next to the garage is a fishing boat and motor from a Railway Express Miniatures "Recreational Detail Set". The trailer is scratchbuilt.

Ye olde eye in the sky also seems to show some sort of gardening activity going on out back, so I added that. And since I had all of those stupid oversized flower pots sitting around looking petulant, I used them to populate the garden (painting the pots black and then shoving them right into the foam base). In a similar vein, I had a ton of excess patio furniture stored up from my Spurgy's days, so these guys got a patio. They also got an LP tank. And lastly, yes, I actually scratchbuilt that crazy small birdhouse-on-a-pole thingy.
11/24/19 - Even more house detailing
These guys have a dumpster and a riding mower out by the garage...

...and so now my model does too. The dumpster came from Shapeways and the mower came from the aforementioned REM detail set -
It's kind of hard to tell, but I think that's a utility trailer to right of the garage -

I think there might also be a vehicle parked behind the trailer in the above proto photo, but since it would be virtually invisible on my layout I decided it wasn't worth adding. However, I did add a trailer (from Showcase Miniatures). And since that REM set also came with a snowmobile, I figured this was as good a place as any to use it. And of course, we have the de rigueur LP tank -

Once again, it looks like we have some gardening action going on out back -

To give my scene a little variety, I went with a garden detail set from Busch (mainly for the pumpkins, but it also includes what are allegedly lettuce and cucumber plants). I also added some purple flowers from a Noch "lavender tuft" set (HO scale, but whatever) -
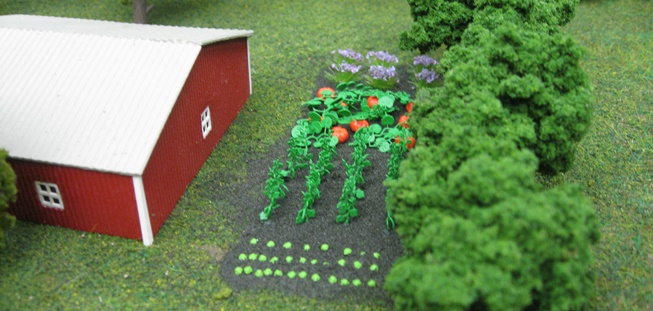
One of the houses that I selectively compressed has a row of small trees in their back lot (which I'm assuming are some sort of fruit tree). In any case, I thought that would be an interesting bit of scenery to replicate here -

11/25/19 - Yet more house detailing
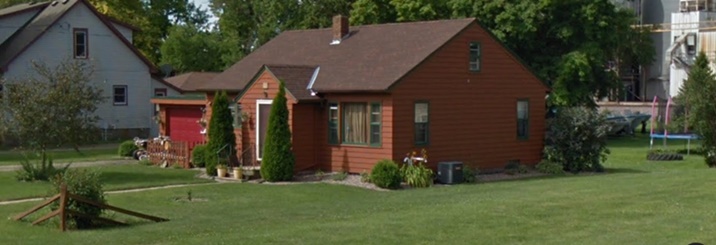
I picked up a Blair Line coal shed kit thinking that I could use it for these guys -

Unfortunately, it turned out to be rather overlarge for the available space (something you'd think I would've realized ahead of time since, duh, I already have one on this layout). Anyway, not being in the mood to scratchbuild yet another shed, I went ahead and cobbed the shed from the back of the creamery and stuck that over here instead. Also, since there appears to be some stacked firewood back there to the left of the shed, I scrounged up some stacked firewood details (from eBay seller "chucktheprinter") and stuck those back there too. And yeah, I think it's pretty safe to say that I've stopped caring about trying to get these house details right, lol.

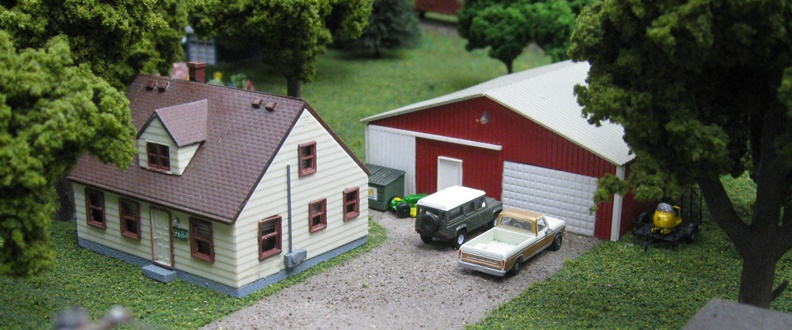
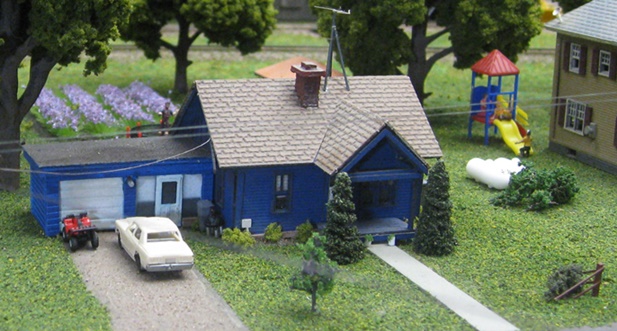
As pictured below, this house got a serious makeover at some point over the last decade -
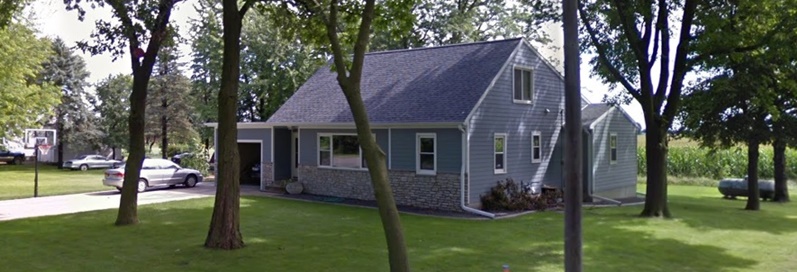
Well, I wasn't about to repaint my model blue and add the brick trim. However, I did add a strip of landscaping rock around the foundation. I also added an LP tank and some ferns (cobbed from my collection of overized flower pots) -
The driveway got a basketball hoop and a couple of basketball kids (courtesy of Woodland Scenics) -

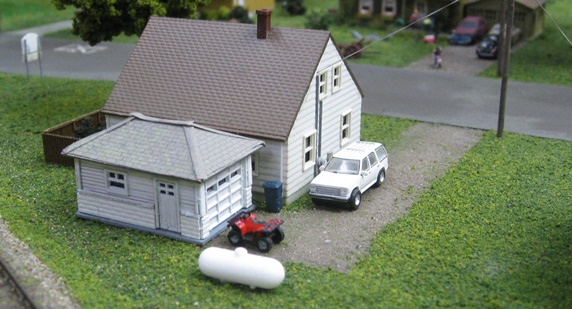
11/25/19 - Yep, more house detailing
This place also received a major makeover at some point, so I just kind of cherrypicked what I did and didn't want to model. And sorry, but all of these pain-in-the-ass trees and telephone poles are making it really difficult to get decent photos of my modeling, so you're just going to have to bear with me here.


Anyway, I added a Shapeways trash bin, a scratchbuilt BBQ grill, an ATV (from Shapeways designer Ngineer), a strip of landscaping rock around the foundation, and various bushes and shrubs -
Over here we have a couple of pines, a couple of flower pots, an A/C unit, that weirdo fence sculpture thingy and more bushes and shrubs -

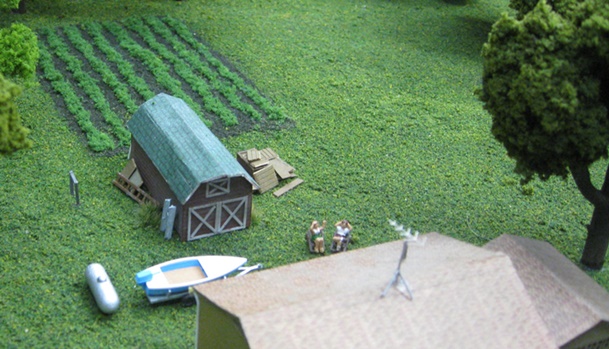
Out back we have a trampoline (I kid you not), a tractor tire planter, a shed and another garden -
Having no ground-level photos of the shed to work with, I decided to just use the other Atlas garage I had on hand (just stripped down and simplified). The trampoline is a scratchbuild (and no, I'm not going to try to animate it, so don't even ask). The garden is more of that Noch lavender stuff -

So, yay. One more house to go and then I'm done with all this Better Homes & Gardens crap.
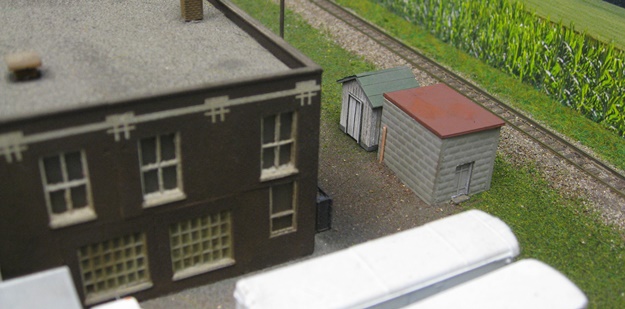
11/28/19 - Creamery Sheds
Since I was replacing the wooden shed behind the creamery with a new one (the aforementioned "too big for a backyard" Blair Line coal shed), I decided I may as well expend a little effort in getting it right (IE paint the walls white and the shingles green) -
Of course, once I'd gone down that road I was pretty much doomed to have to build the accompanying cinder block building as well. Ah well, you can never have too many sheds, amirite?
Meanwhile, I'm still waiting for some wood fencing to show up in the mail so I can finish up the last bit of house detailing. Hurry up, Mr Postman!
12/09/19 - Done with the house detailing
These guys got some shrubbery out front and a fenced-in area on the side. I also tossed in a picnic table just for fun -


Lots of wild greenery out back, but given my track situation I really couldn't replicate any of that.

I did add the LP tank and a trash bin. And since I had an extra one, I gifted them an ATV as well -
So yay, that's it for the house detailing. And now, back to the corn.
12/10/19 - One field down, one more to go
I kind of lost track here.... was it 20 boxes of corn? Well, whatever, it was a lot. And yet somehow I still haven't figured out a good way to eliminate the
discernable lines you get where the ends of the corn rows meet up. It seems like you'd pretty much have to stagger every single piece, but that's a way bigger job than
I'm interested in tackling
I guess the simplest solution is to just stick with ground level photos

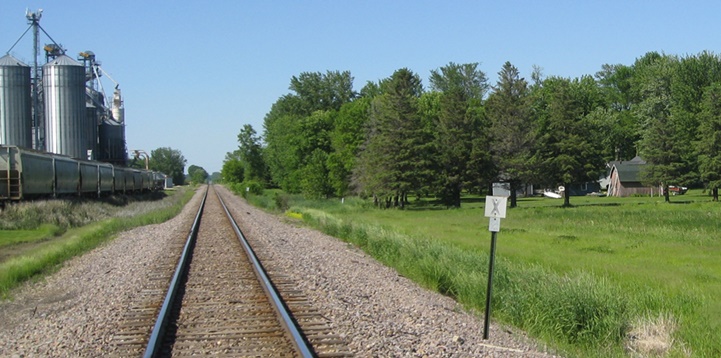
As handy as Google Earth is for scouting out buildings and such, it's not quite as useful for modeling greenery. Current satellite views are from very early spring (no snow, but nothing growing in the fields yet). Streetview looks to be a little later in the growing season (maybe late May or early June?), but still not quite the mid-to-late summer look that I've been trying to emulate, so not much of a guide either.
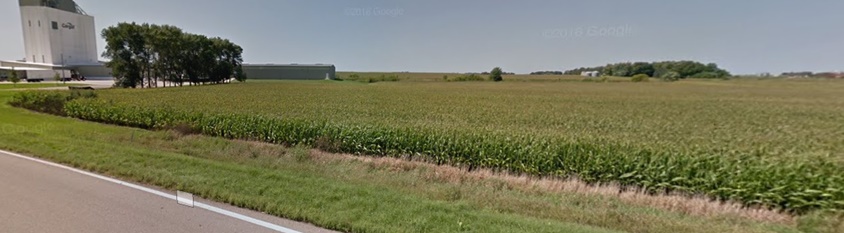
Pictures of corn on the web are pretty much all over the map in terms of the color of the plants (varying pretty wildly depending on the region and the time of year). Hell, even different parts of individual plants are different shades of green, but overall I think the Testor's "Gloss Green" I've been using isn't too far off from the real thing. Vis -

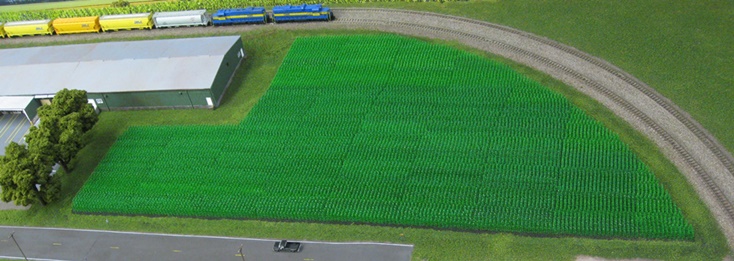
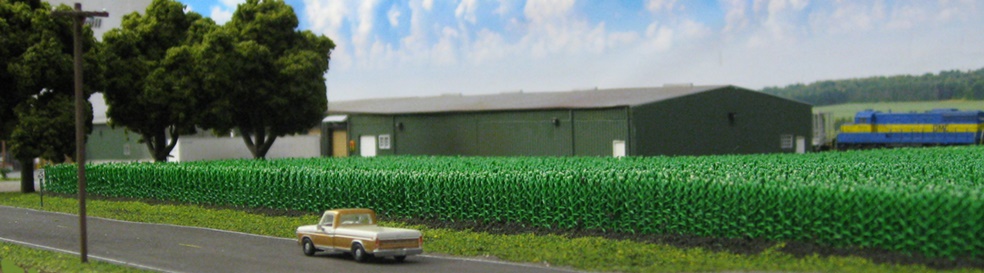
After living with my last corn field (the one behind Krause's) for a while, I decided that I didn't like the look of having the corn so close to the tracks. So this time I made a conscious effort to provide more breathing room. Having an inch and a half between the corn and the roadbed wound up looking just about right -

One thing that turned out very nicely (and quite by accident) is the slight rolling effect provided by the strip of plaster cloth I have running through the field
(said strip being there to cover up the seam between two base sheets). From my perspective, I thought the whole field was flat. But actually, the plaster created
just enough of a hump to change the angle of the corn running over the top of it. So, huzzah for serendipity 
Now, just one more big ass corn field to go. And for this one I think I'm going to go all out and build the mother of all irrigation systems -

So, woohoo. I guess I'll see you in about six months
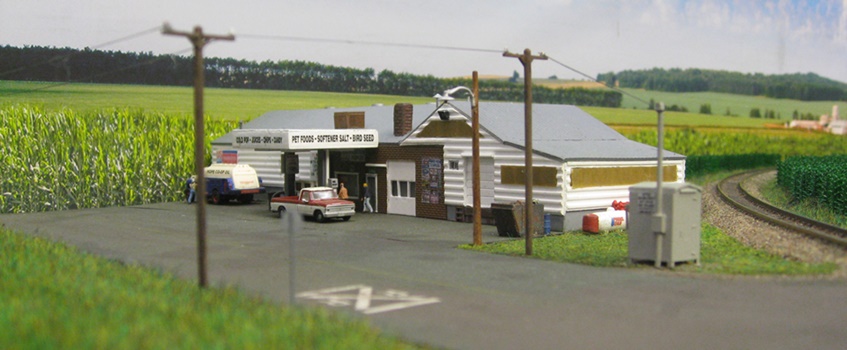
12/26/19 - Post Office detailing
I got bored with working on the irrigation system, so I decided to take a break from all that and add some details to the post office (always one of my favorite activities). I started off by sprucing up the lightpole by adding a "Do Not Enter" sign, a little gray utility box thingy, and a support cable. I wanted to use styrene rod for the cable (much easier to paint than brass wire). But even the smallest diameter styrene rod wound up looking stupid fat, so I gritted my teeth and went with the metal instead -


While perusing old photos of the area, I noticed that there used to be a small shed behind the old farm implement shop. And you know me, I never met a shed I didn't like, so I went ahead and built one (admittedly kind of pointless since it's virtually invisible and practically impossible to photograph) -


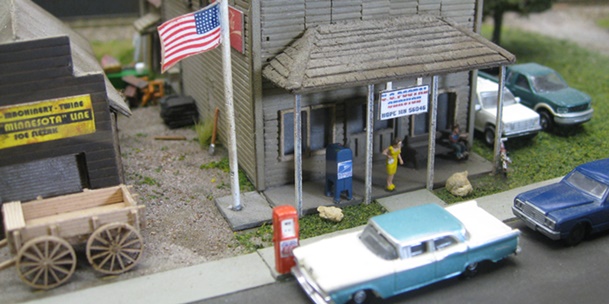
The above proto photo is from the old general store days (1970's) when they still had a gas pump out front. And yeah, I couldn't resist turning the clock back a bit and adding a Phillips 66 pump to my model. Next, I (finally) replaced the old blurry hanging sign out front with a new/sharper one. I also added a USPS graphic to the mailbox. Lastly, I added three talus boulders to the grass strip -

Out back, I added junk. Lots and lots and lots of junk -

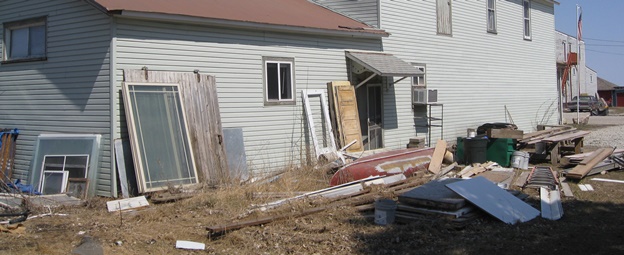
I was kind of looking forward to building this weirdo trailer thingy. But dang, there's just no room for it back there

Also, they seem to be letting things go these days (vis'a'vis the vegetation) and it probably would've been more accurate to overrun all my modeled junk with weeds
and bushes and scrub trees and whatnot. But to heck with that, I'd rather see the junk

So whee, that was fun. And now, back to the irrigation
12/28/19 - Ready for planting
I finally finished up the irrigation system for the corn field south of Cargill -

I built this one pretty much the same way I built my last one (just four times as big). However, given the size of the thing, I decided to use 1 mm rod for all of the span arms (as opposed to the .5 mm rod I used for the lower support arms last time).
For variety's sake, I decided to go with a "center pivot" system here. And at this point I still haven't quite decided if I'm going to try to model wheel tracks through the corn or not. But I guess I won't have to worry about that until I actually have the corn planted. So, what are we waiting for? Off to Bluford land we go!