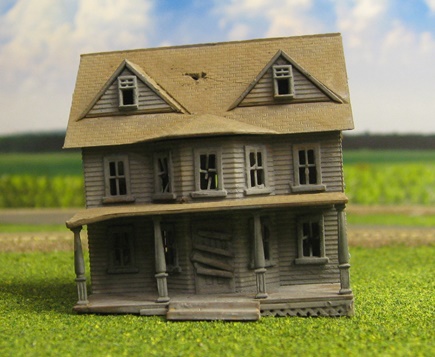

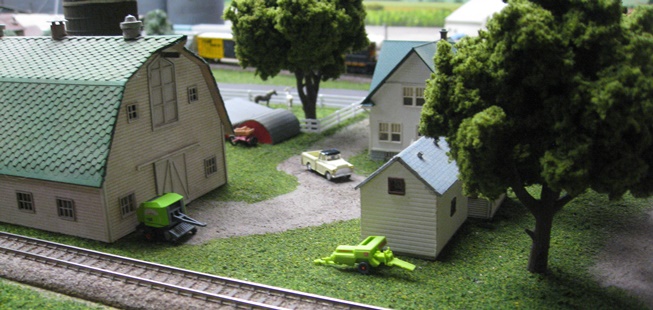
07/16/18 - Whipped up an abandoned farmhouse
You'll probably recognize this as Model Power's venerable old "Haunted House" kit (aka The Slanty Shanty). All I had to do was break a few windows, punch a few holes through the roof, and then slather on several metric tons of Bragdon weathering powder. As cheapie kits go, it's not too bad. And it certainly fills my needs nicely.
As luck would have it, there's also a handy-dandy abandoned barn kit out there (courtesy of Woodland Scenics), so that will be my next quickie project. I don't know what I did to do deserve all this cosmic largesse, but I'll certainly take it!
07/17/18 - Finished WS's "Rustic Barn" kit
This was an interesting experiment - apart from a coating of gray primer, I didn't use any paint at all. I made the white checkerboard pattern on the silo with white stripe decals and then used Bragdon powder for everything else.

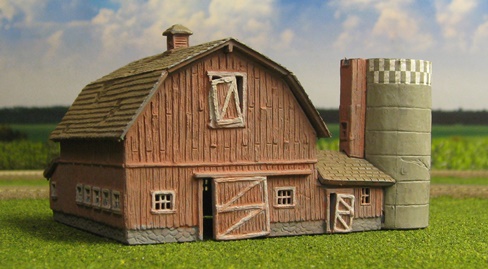
I guess the parts are made of cast resin (since you have to use CA to put them together). And although a decent enough looking kit, the walls are very thick and the molded-in detailing looks a bit coarse. Still, if you need a dilapidated barn, what other options are there? I wouldn't want to try scratchbuilding one, that's for sure.
For mine, I decided to punt on the "witch's hat" topper for the silo (must be an Eastern US thing 'cuz you sure don't see silos like that around here). Prototype pictures on the web do show Minnesota silos without any sort of dome up on top, so I didn't bother trying to find one to fit my model (not yet, anyway).
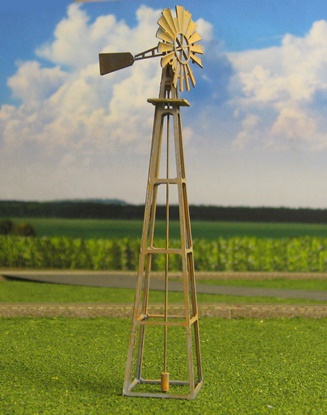
Next up, a creaky old windmill.
07/19/18 - One last structure for the abandoned farm
I've had the second half of a Walthers "Van Dyke Farm Windmill" kit (it builds two) sitting around since 2007, so I was muchly pleased to finally be able to pull it out of storage and actually do something with it. Apart from simply putting it together, my only other contribution was to break off a few fan blades and add some rust. Oh yeah, I also left off the base (didn't seem prototypical) and replaced the bendy wire pipe down the middle with a piece of styrene rod -
In addition to trees and bushes, this scene just seems to cry out for some tall static grass. Of course, not knowing a single thing about the whats and wherefores of all that, I'll need to do a little research first.
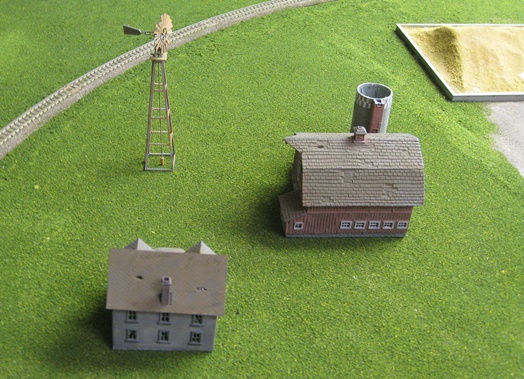
Also, I think I'm going to see if I can't add a dome to that silo after all. Personally, I just don't think it looks quite right without one (prototype pictures notwithstanding).
07/20/18 - More lawns and driveways
I swear, this Walthers "Cape Cod House" is going to be the death of me. As you may recall, I wound up destroying my first attempt at building this kit (after some "paint retrofit" mishaps) and had to build it a second time. Well, deja vu all over again... I had some paint retrofit misadventures on this one as well and wound up having to build it a third time. What happened was that the walls turned out to be virtually transluscent when it came to the interior lighting, and so I tried to retroactively apply a coating of black paint to the inside. Well, suffice it to say that that didn't work out too well and the whole thing went into the garbage. So, say hello to Hruby House #3 -

No such worries on this Imex house - you can't see through the windows, so there's no interior lighting at all. And as you can see, I kind of ran out of vehicles. So, everybody's just going to have to walk until I find some that I like (and that aren't Kato Toyotas).

And speaking of lighting, here it is -
07/20/18 - Added a little detailing to Hope Co-Op
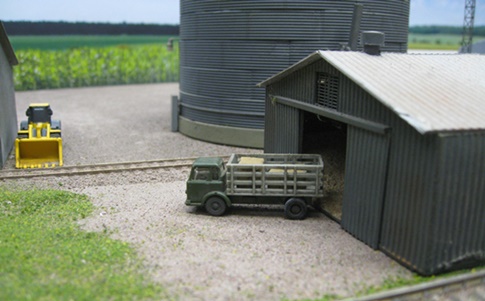
It's still a little too early to be worrying about a lot of fine detailing, but whenever I get a decent idea I do try to act on it right away ('cuz I will surely forget it if I don't). In this case, I thought a Classic Metal Works "1954 F-700 Tank Truck" would make for a nice addition to the Co-Op Oil scene. And to make it even more interesting, I stripped off the stock "SOHIO" decals and replaced them with custom "Hope Co-Op Oil" decals -
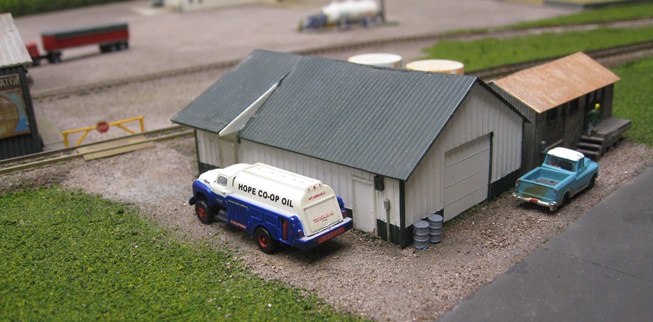
I also added a rusty old Woodland Scenics pickup truck, a couple of oil drums, and a dude walking up the stairs -

Funny thing about that dude - as a roadworker wielding a shovel, he had found his way into my "Big Box O' Useless Leftover Figures". But fortunately for him, his
body language (vis'a'vis pushing his foot down on a shovel) looked just like somebody climbing up a flight of stairs, so I trimmed off the shovel and gave him a job
at Hope Co-Op 
07/24/18 - Well, this is just embarrassing.... 
Hey, guess who just discovered (after 10+ years) that his camera has an "indoor" setting that makes layout pictures look about a million times better?

Hell, it even takes decent "darkened room" pictures -

Jeesh, what a dope. RTFM!
07/25/18 - Capped off the abandoned barn's silo
There are probably easier ways to do this, but the Minnesota way is to take a 1" diameter fishing bobber and saw it in half.

After that, it was just a matter of filling in the hole on top with bondo putty and then sanding it round. To finish things off, I glued on some styrene rod "ribs", painted the whole thing silver, and then weathered it with some Bragdon rust.
07/26/18 - Some old-timey farm equipment for the old-timey farm equipment dealer
Not surprisingly, there's not a whole lot out there as far as old (pre-WWII) farm equipment goes. The best I could come up with were these wooden wagons from DM Toys (Germany). Apart from the spoked wheels, they don't bear much resemblance to the metal hay loaders that Slezak's had parked outside the shop back in the day. But, what are you gonna do? What's out there is what's out there.
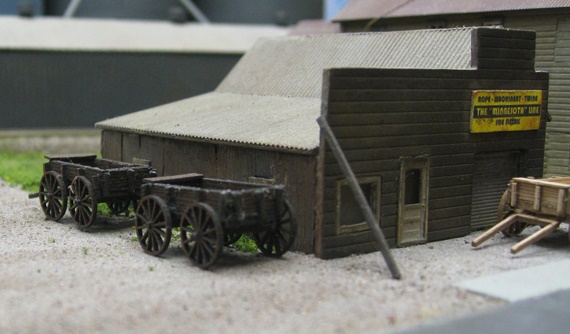
These are actually sold in kit form (with each kit building two wagons - one brown and one unpainted). Each wagon consists of 32 mostly microscopic laser-cut wood parts, so assembly is a bit of a challenge.
So there ya go, another foobie. Still and all, I do think they look kinda cool, so I'm OK with them.
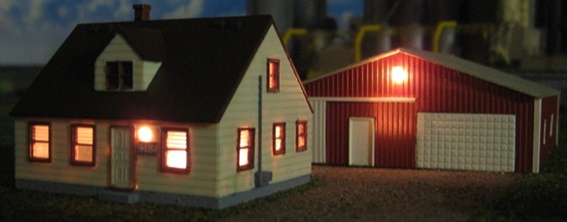
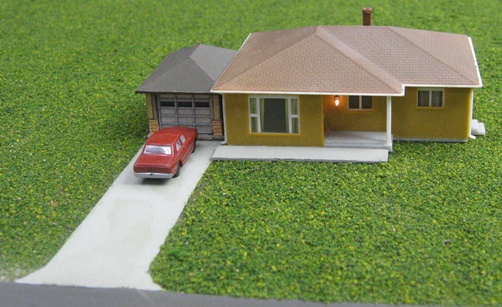
07/27/18 - Another day, another house glued down and wired up
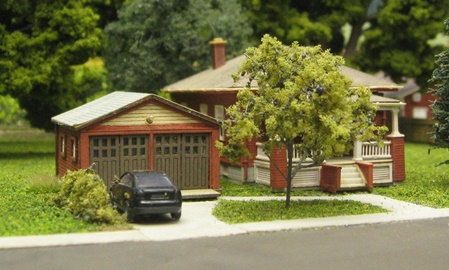
Boy oh boy, does this end of town ever need some trees. Looks like Hope circa 1920.

I guess I was getting bored with lighting by the time I built this one. No external bulbs on the house and no provision for lighting the garage at all.

One more house to wire up and then I'm done with this side of the street.
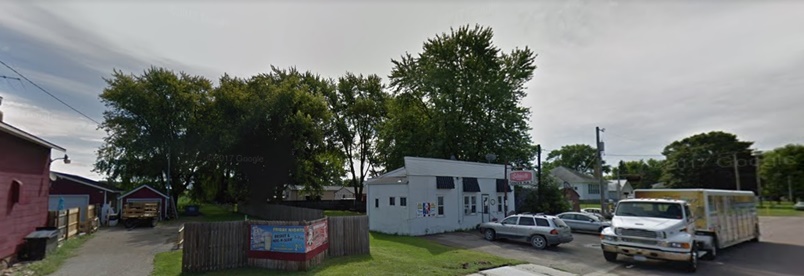
07/28/18 - The Krause's get a garage after all
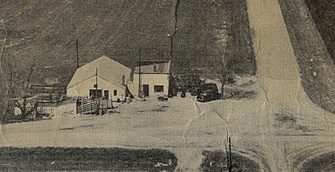
Based on my first photo-taking expedition to Hope, it wasn't clear to me if this house even had a garage (although that would've been kind of odd for Minnesota) -

However, after perusing satellite imagery and Google Streetview, it did become clear that there indeed was a garage tucked away out back -
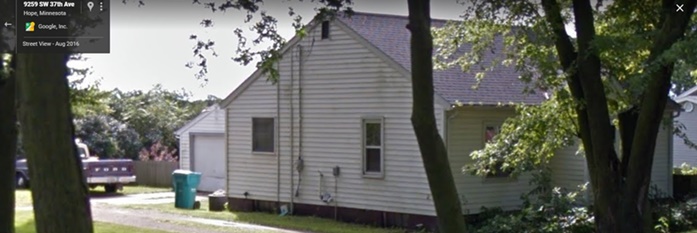
Meanwhile, I was in the process of going through all the leftover stuff I have squirreled away and discovered that I had one last Atlas garage kit sitting around doing nothing. And so, to the Krause's it went -

I do so love finding places for hitherto unused stuff
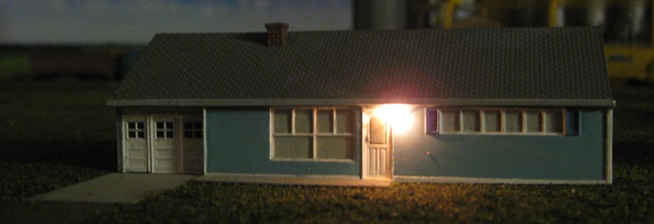
07/29/18 - Turf, a driveway, and some lighting for the Bass house
Evidently no two driveways in Hope are the same, which I guess is OK. More interesting that way, right? Not that I find driveways particularly interesting, but still. And yes, these guys got stuck with a Toyota. It was the last one I had on hand and I figured it was going to be far enough away from the others so as to not appear too repetitive.
As far as lighting goes, this house also turned out to have see-through walls (ala the Cape Cod House). However, rather than risk messing things up with a retroactive coating of black paint on the interior, I decided to just wire up an external light and call it a day.
At this point, it looks like I need to get back to making buildings. I can't really finish up the ground cover until I've built and placed the remaining three Hope structures (auto shop, schoolhouse, and Krause's Feeds). Of course, there's still plenty of other stuff to do (for example, I haven't finished putting down the dirt layer in the yard), but I really am kind of anxious to get all of Hope turfed up (what with it almost looking like a town now).
On an unrelated note, I decided that I'm going to have to bend reality a little more. As pictured below, there is a small field of (what I'm assuming is) sweet corn between Krause's and the UP track.

However, given how things are shaking out, there really isn't going to be much space for anything west of Krause's (what with the fantasyland DM&E track curving right through the area). So, what I'm going to do instead is lose the road west of Krause's and move the corn a little farther north (the unturfed area partially behind the Bass house in the below picture). As is, that was just going to be a big, open (and boring) area anyway, so why not make it a little more interesting?

Speaking of fantasyland... with that westbound road being gone, there simply isn't going to be any way for vehicles to enter and exit the SunRich/SunOpta complex.
Which is actually fine by me, since I wasn't really looking forward to modeling some sort of made up "double track grade crossing on a curve" over there anyway. In
fact, I think I may just acknowledge the overt unreality of the situation and put a humorous bow on it (like a big barrier and warning sign at the exit from the
admin building's parking lot that says something along the lines of "Danger! Reality Ends Here! Go Back!"
Oh, and pay no attention to all the activity around the southern end of the road. That's a topic for another day, lol.
07/31/18 - Thinking about trees
I think I've reached the stage where it's going to be safe to start sprigging in a few trees around town (albeit limited to the areas where all of the really fine detailing is basically complete). But the question remains - how big and how tall? Many of the trees in Hope are nearing their centenary birthdays, and as such are quite huge. Vis -
On previous layouts, I basically limited myself to the defacto standard for N scale tree heights (2.25", as driven by the Woodland Scenics line of cheapie "Twist & Flock" trees).

However, if I'm modeling reality, I'm thinking that a lot of these Hope trees should be in the 3-4" range (if not taller). But if I go that route, are the trees going to blot out the buildings underneath them? Or because we're all so used to seeing smaller trees on our layouts, will they wind up just looking weird and out of scale as compared to the buildings?

Well, I guess the only way to find out for sure is to go get some really big trees and see how they look once plunked down on my layout. And so, I guess a shopping trip to my LHS is my next order of business.
Hey lookee there, "The Shop in Hope" is almost done. I may even have an entry for that little beastie in the next week or so, so stay tuned.
And darn it - looking at the above picture, it occurs to me that I should've put the cop and the Gang O' Sheiks next to the cycles in Finch's parking lot.
Missed opportunity! 
08/01/18 - It's true, size does matter!
Yep, I am definitely on board with the big trees. I mean, my gosh!

They do block out the buildings a little bit (when viewing things from the front of the layout), but they look so much more realistic than small trees that I don't think I even care.

Of course, not all of the trees in Hope are gigantic and there will be plenty of spots on my layout where smaller ones will be required. EG -

The only brands my LHS had on hand were Woodland Scenics (the big ones), Bachmann (the less big ones) and Busch (the tall pines). And although they're all quite serviceable, I think I need to check out these "Super Trees" that everyone's talking about. Also, I need to see if the WS trees are available in "DIY" form. The prebuilt ones are awfully expensive, and since I can glue foam foliage to a plastic tree trunk just as well as the next factory drone, why not save some money?
08/01/18 - The world's simplest grade crossing
Ever since I added a road into the equation I've been wondering just how in the heck I was going to get it across my Unitrack. And fortunately for me, the solution turned out to be pretty easy -
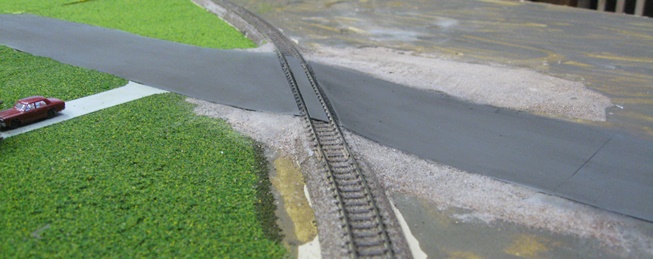
What I did was add an extension to the road that went right over the tracks (glued down on one end and loose on the track end). Then, I took a scissors and made an angled cut in the road where it meets the rails (following their contours). I then glued the loose end to the roadbed. Next, I took the cut-off piece and sliced a thin section (following the same angles as before) to put between the rails. I then glued the remaining piece flush with the rails on the other side. With the road in place, it was then just a matter of pushing some AR&M dirt underneath the elevated portions and solidifying it with Scenic Cement.
I gotta say, I really like the way this turned out. Now I just need to neaten up the dirt a little bit and then I can add some crossing signals.
08/03/18 - The Krause's get a driveway, a lawn, and some lighting
I decided to go ahead and apply a retroactive coating of black paint to the interior walls on this one. And fortunately, everything went according to plan (for a change).


I'm rapidly encroaching on the (still vacant) schoolhouse lot - from both sides, no less. So, here's hoping that my buddy Andy finishes up that Shapeways
schoolhouse project pretty soon
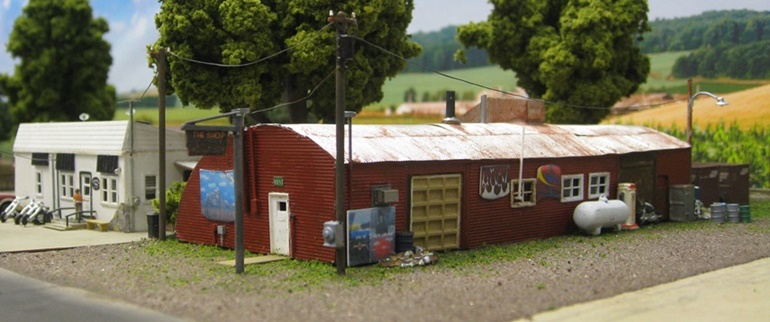
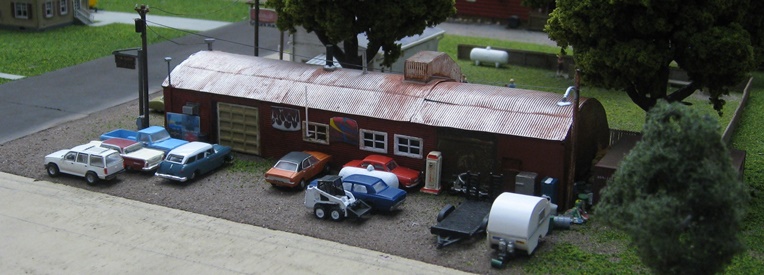
08/04/18 - Finally finished The Shop in Hope
Believe it or not, this thing was about 90% complete last summer. But then I got hung up trying to build that stupid metal shroud on the roof, never did quite finish it, and then along came hockey season (at which point my attention tends to wander away from model railroading). But, for better or worse, it's done now -

I never did get that shroud quite right (cutting pieces of styrene with symmetrical angles on top and irregular curves along the bottom turned out to be damned near impossible). But, whatever. A couple more big bushy shade trees along the back wall and that problem basically becomes invisible.
My other problem (as usual) was getting the sizes of the walls correct. What I did was start with an image of the short wall on the street side and then shrink it down until the door in the picture was the same size as the door I was going to use in the wall. Then I printed said picture, stuck it to a sheet of styrene and then cut it out. Then, all the other dimensions were driven by that (with construction following the exact same procedure that I used on the chicken coop over at the Miller farm).
Well, it seemed like a good idea at the time. However, when it came time to make the graphics for the various custom-painted auto and truck hoods hanging on the walls, they wound up being waaaayyy out of scale (like almost HO scale). I did size them relative to the walls so that they look like the ones in the proto pix, so I'm not sure what happened there. Maybe the door I used wasn't quite N scale and that screwed up everything else.
But anyway, it's finally done and I think it looks OK. Now I just need to add a bunch of vehicles (not to mention a few million pieces of assorted junk) to distract attention away from the "oopses".
08/10/18 - A lawn, a driveway and electricity for the Sackett's


So, that wraps it up for the houses. And under the heading of "great timing", it sounds like the school is just about ready for printing.
08/16/18 - This 'n' that
I've been working on adding some detailing to The Shop's rather baroque parking lot. And yep, I finally got some utility poles up (I use cheapie trainset poles from Bachmann or whomever, trim off most of the arms, paint the insulators white and the poles dark brown, and then Bragdonize the poles for a more "woody" look). So huzzah, the electrical wires from The Shop and Finch's are actually connected to something!
What's that? A Woodland Scenics streetlight-on-a-pole? Well, yes it is, and I'll have more to say about it once I get it wired up (at the moment I'm reorganizing all of my lighting power supplies into a hopefully less tangled up mess). And no, I don't believe there are actually any old gas pumps sitting around outside The Shop. But I've had that one (pictured below) for like 20 years and, really liking its look, have been dying to find someplace to put it. And, well.... what better place than a former service station? The rest of the junk is pretty much spot-on (an LP tank, some sort of cabinet thingy, a couple of shipping containers, an old sodapop machine, a pile of old tires, and more old barrels and buckets than you can shake a stick at).

As for the rest of it, I'm currently waiting for Mr Postman to bring me a passel of assorted vehicles to go with all the junk. EG -

Meanwhile, I found this oddball Euro-Truck in my junk box and figured it was now or never as far as doing something with it.
Why it's in Minnesota or what it might be hauling in those crates is anyone's guess. Giant seedpods from outer space, perhaps?
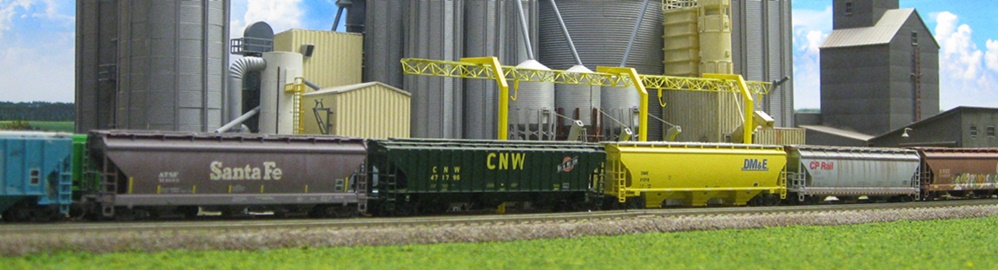
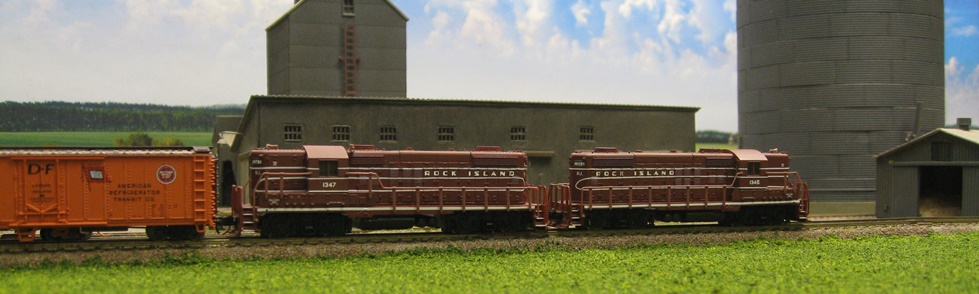
Boy, I really need to start putting some trains into my pictures. I sometimes forget that I'm building a model railroad, lol.
08/18/18 - Relocated my lighting power supplies
I'm going to be needing another 12V power supply pretty soon here (I have a bunch of streetlights in the pipeline and my current power supply is pretty much maxed out). And with limited space left in my "train control" lectern, I decided to move all of that lighting junk away off under the layout -
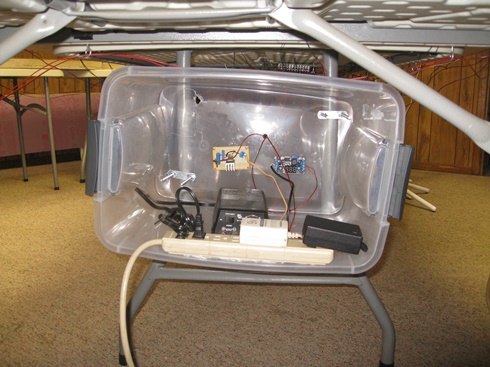
Nothing too fancy here (obviously). Basically, it's just a cheap plastic storage tub clamped to the layout base table legs. But since you can't see it unless you're down on the floor, who really cares what it looks like, amirite? One nicety is that I plugged the power strip into a "stomp switch" extension cord (like you would use for Christmas Tree lights), so now I can turn the lights on and off without having to get down on my hands and knees.
08/20/18 - Experimenting around with Woodland Scenics "Fine Leaf Foliage"
While strolling through Hope (via Google) I noticed that I needed to add some shrubbery and small trees to the Hope Bank and Spurgeon House lots. Vis -


However, what I didn't want to do was use more WS clump foliage (IE foam). Said foliage works great for big trees, but at least to my eye, not quite as well for hedges and small trees. So, I decided to try out their Fine Leaf Foliage instead -

What you get is a big lump of stems and green stuff that appear to be some sort of actual plant material (no idea what). From this you have to pluck out the bits and pieces you need to make whatever it is you're trying to model. And for a first try, I think things turned out pretty nice (particularly the small trees) -
I also took the opportunity to add some detailing to the bank (trash bin, flower pots, flag pole, mulch strip and flower bed) -


Oops, looks like my flowers wound up a little crooked (like anyone could ever tell without using an electron microscope - the stems are barely 1 mm long).
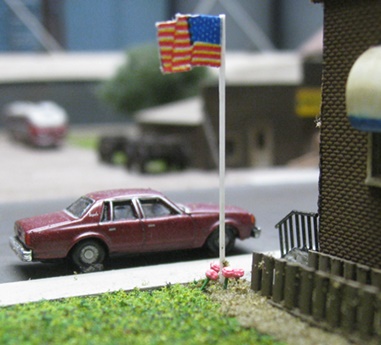
As pictured above, I also installed another WS lightpole and got the E-Z line electrical wires from the antique shop and the bank hooked up to it. I still haven't received my new 12v power supply, so no actual light from the pole just yet. And, hmmm, looking at the Google picture above I see that the Spurgeon's have an LP tank in their backyard, so I guess I'll need to get some more of those (having just used my last "junk box" LP tank at The Shop).
08/22/18 - Farm toys
The farm felt like it needed some machinary, so I added a couple of Wiking hay bailers -
And where there are bailers, I suppose there are going to be bails (or in this case, coils) -

To be honest, I'm not real thrilled with these N Scale Architect hay coils. All the ones I've seen in the real world have been basically cylindrical (unlike these oddities, which look like something you might find on a pastry cart). Oh well, better luck next time.
08/23/18 - More damage to my Visa card
Well, if spending a king's ransom on factory-painted cars counts as modeling, I guess I had a pretty good week, lol. And yeah, it's quite a mishmash of vehicles. Fortunately, this is the one place on my layout where I can legitimately get away with mixing so many different eras.
OK, I did assemble and paint a GHQ bobcat and accompanying trailer. So I guess that counts for something, right?

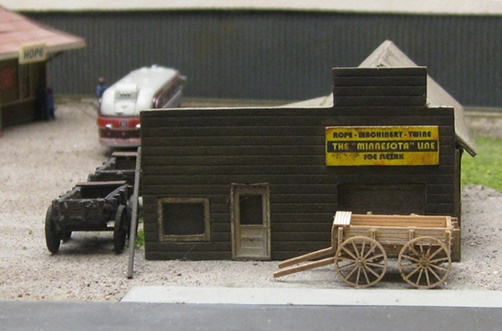
I don't think I've shown a closeup of the sign yet, so here ya go -

Meanwhile, my schoolhouse kit is reportedly in the mail. I can't wait to see it!
08/24/18 - Because, of course
I was down in Hope this morning scouting out a couple of buildings that aren't really viewable via Google. And in keeping with this town's capricious tradition, I discovered that The Shop is no longer The Shop.

They probably changed it the very same day I finished my model 
08/25/18 - Darn it! Darn it! Darn it!
Crud, I have really painted myself into a corner this time (literally). Krause Feeds is supposed to go on the west side of the road here (the top of the photo is west). But thanks to that stoopid "doesn't belong here anyway" DM&E main, there's just no way to fit Krause's into what amounts to a 7" x 7" space and do it any kind of justice.

I mean, just look at it. The place is freakin' yuge!


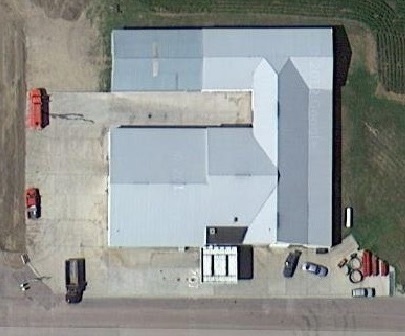
My first thought was to turn back the clock and model it the way it looked in the 1950's. But with just this one tiny aerial photograph at my disposal, that's pretty much of a non-starter.
And of course, by the time you get to the 1960's and 1970's it's already grown too big to fit.

I guess the only practical way to do this is to move the whole thing over to the other side of the road and build it in "mirror image" fashion. Which is going to be annoying enough in and of itself (as far as prototypical accuracy goes). But making matters even worse, it's going to give me yet another cool building that's has its ass-end facing the front of the layout and all of the really interesting stuff hidden away from the casual observer.
Ugh, I think I need a drink...
09/07/18 - Planted some corn
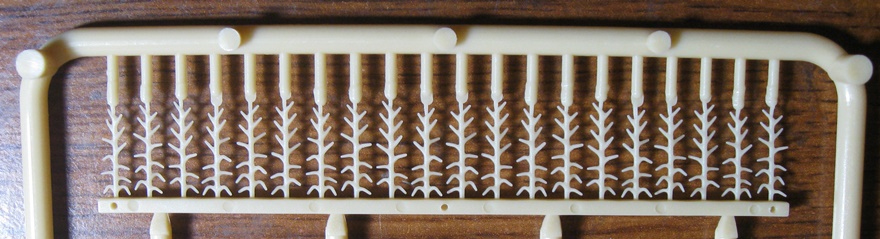
So, here's what a hundred-some dollars worth of Bluford Shops corn looks like (5 boxes, or maybe 6 - I forget).
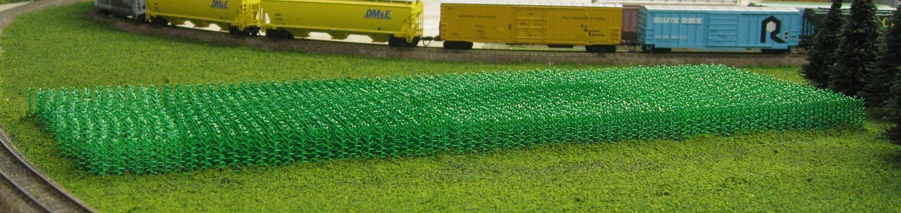
Each box contains 14 sprues and each sprue has 4 rows of corn. And with each individual stalk being connected to the sprue, you wind up having to burn through several Exacto blades (and endure a lot of tedium) in order to make a decent sized field.
I wound up buying tan "fall" corn (at the time, summer green was sold out everywhere). And actually, this worked out pretty well for me as it serendipitously gave me tassels. IE, after spraying the rows green, the Exacto blade left little tan tips on the stalks when I sliced each one off its sprue.
Bluford's instructions for putting a layer of dirt on top of the corn row bases sounded a little unwieldy to me (basically involving lots and lots of manual labor). What I did instead was glue the corn in place and then use a shaker to rain a layer of WS "Fine Turf Soil" on top of it. Then I gave the corn a quick once over with a brush to remove any turf that might've gotten stuck to the stalks. Lastly, I used a sprayer to soak the turf with Scenic Cement. Worked out great.

I guess the corn itself looks pretty good up close, but to my eye the field as a whole looks oddly unnatural when viewed from a more macro view. I'm not exactly sure why that is - maybe it just needs more stuff going on around it (trees, weeds, whatever). Anyway, I guess I'll find out when I start adding more of that kind of stuff.
Speaking of trees, the guy next to the corn has a line of pines that (presumably) demark the border to his lot. However, since I tresspassed the corn onto his property, I had to kind of stagger the pines. But, whatever. It's just nice to get some trees out there to break up the monotony.
09/25/18 - More corn
Well, I thought nine boxes was going to be enough for the cornfield behind SunRich. But nope, not even close. So, ugh, time to burn another hole in my Visa card. I sure hope Bluford Shops appreciates all the business!

Anyway, as you can see I decided to try something a little different this time -
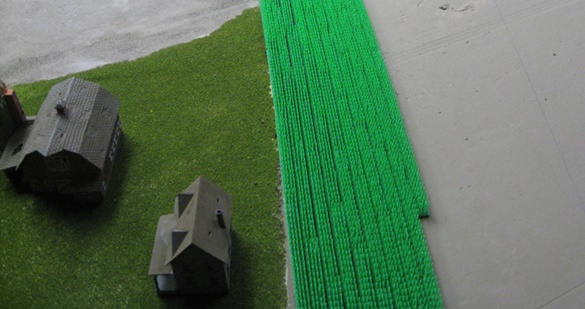
The base for each 20-stalk row has three little holes on one side and three corresponding nubs on the other side (thus allowing one to connect the rows together and situate them en masse). However, after going the "connect them all" route on my first field, I thought the end result wound up being just a little too perfect looking. So, what I did this time was assemble the corn in 4-row chunks (one sprue's worth) and then put those down one chunk at a time (thus introducing slight variantions in the rows). And I'd say what I wound up with looks considerably better than my previous effort - basically nice and orderly, but without looking overly artificial or unnatural. And it should look even better when I add the soil layer.
At this point I think I'm going to scale back my ambitions a little bit and end the cornfield when I hit that bend in the layout base. Frankly, this stuff is just too expensive to go beyond that. Then, I'm thinking a nice reedy lake would make for a good transitional buffer between the cornfield and the yard. As it happens, the prototypical Waseca yard is just across the road from a lake, so not too huge of a leap into fantasyland to add a lake to my layout as well. Better still, I see that WS has some interesting new "water tint" products that will hopefully allow me to model some realistic looking water (for a change).
10/06/18 - Finished the SunRuch NH3 pumping platforms
Basically the same design here as on the storage tank platform I built a few years back (small sections of etched brass industrial walkway, styrene steps and handrails, and various bits and pieces of styrene rod). It was suggested to me that I use some skinny wire for the dispensing hoses, and so I did (worked out great).

I'm not sure what purpose the yellow tub is supposed to serve, but I dutifully built one anyway. I also added the requisite lighting (with the wires for the bulbs glued to skinny styrene rods for support). Kind of klunky looking as compared to the lightpoles on the prototype (which aren't much thicker than a broom handle), but until I get my ass into the 21st century and switch over to LEDs and micro-thin wires it's about the best I can manage. I also built a couple more CG N-Scale NH3 tank trailers (festooned with as many decals as I could find room for). Last but not least, I added a "One Way" sign (because I guess they have lots of converging traffic problems there?)

Oops, I can already see that my "work in progress" styrene cornfield and the cornfield depicted on my backdrop are not going to play well together. Looks like I'm going to have to figure out a way to lower the backdrop an inch or so (not a simple task, since the adjustable supports I'm using are already about as low as they'll go).

Anyway, there ya go. Not a bad a little project to reintroduce myself to scratchbuilding. Now I think I'll take a whack at slapping together a schoolhouse (sadly, the much anticipated Shapeways schoolhouse project appears to have fallen by the wayside).
10/07/18 - One quickie hacksaw job later....
Well, the greens still don't match, but at least the heights do.
