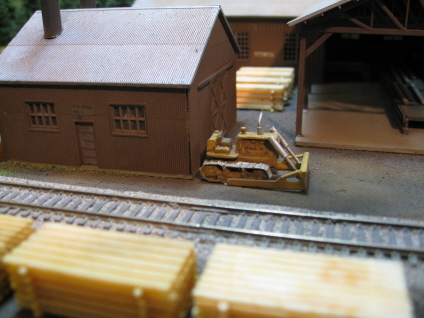
12/22/08 - Finally got a bulldozer

I've given up all hope of ever receiving my bulldozer from Neil's N-Gauging Trains (back-ordered since July). So, I purchased this Cat "D4" off eBay instead (seller "savonart"). It came prepainted and preassembled and, truth be told, it actually looks significantly better than Neil's blobby die-cast thing-ama-dozer anyway. So, all in all, not too shabby for a whole ten bucks (shipped). Unfortunately, it's quite a bit bigger than the one I was hoping to get from Neil's. So big, in fact, that it doesn't really fit through the opening in the burner. And quite naturally, the solution to said problem was to park it a loooong way away from said burner. Frankly, I don't want any fussy visitors pulling out their micrometers and calling me out on the discrepency. Lord knows I've already given them enough ammunition in that regard...
01/02/09 - More trees... (sigh)
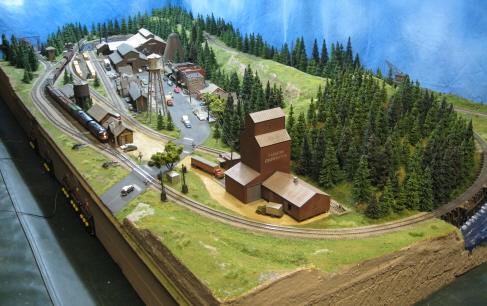
How many this time? Hell, I dunno. At this point it's all become a bit of a flocky blur... But I guess if you put a gun to my head, I'd have to say around a hundred (and then I'd politely request that you pull the trigger).
OK, no, it's not all that bad (kinda close, though). Now that I've introduced "variety" into the mix, I'm now having "buffalo grass" flashbacks - IE, aesthetic decisions need to be made for practically every stinkin' tree. Y'know, "Do I have too many Hekis clumped together? Is it a time for a WS? A deader? Or maybe a "Busch"?) Gah. The only thing that's keeping me relatively sane at this point is the fact that trees take up a heck of a lot more real estate than does buffalo grass. So, despite all the decision-making, I'm still eating up terrain at a fairly decent pace.
Now that I've kind of hit my stride here, I'm pretty much gluing these things down as I go. I'm basically packing them in branch-to-branch, so there shouldn't be a whole lot of need for rearranging things later on. And at this point, I sure don't want to have to go back and basically relive the whole experience just to get things glued down...
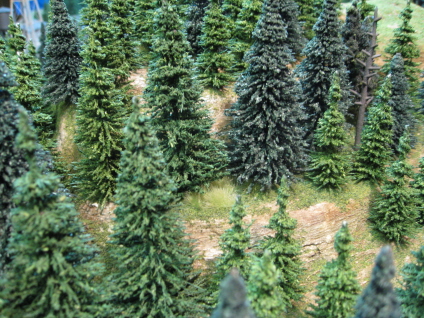
I have to admit, it's a little painful watching all of my carefully carved rock formations basically vanishing into the forest. On the other hand, what does peek through is looking pretty darned cool. I can't say that I planned things this way, but this scenery is turning out to be much more realistic looking than any of my past efforts. Well, OK, I guess I could say I planned it. But I'd be a damned liar if I did...
One thing I've come to learn about these Hekis is that their trunks are made out of twisted metal. No, not a bad thing in and of itself (actually, it's kind of nice since it makes them very sturdy). However, I've noticed that a lot of them have a bright metallic glint on top (where the trunks were clipped off). Consequently, one of these days when I have nothing better to do I'm going to have to spend some time applying dabs of green paint to several hundred tree tops. Ugh.
01/04/09 - A bit of detailing
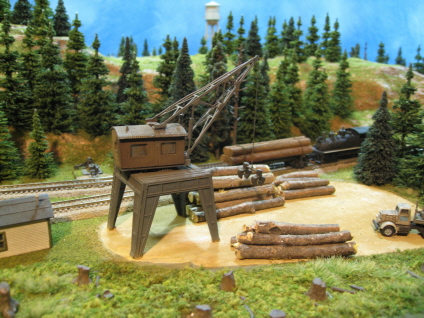
The log loader looked a little forelorn, so I gave it some lilac-logs to play with. Wow, has it really been almost a year since my last lilac expedition to the backyard? Seems like a lifetime ago...
Oh yeah, and I ran out of trees agin. Is that a light I spy at the end of the tunnel, or just an oncoming Shay?!
01/05/09 - Whipped up a mail truck
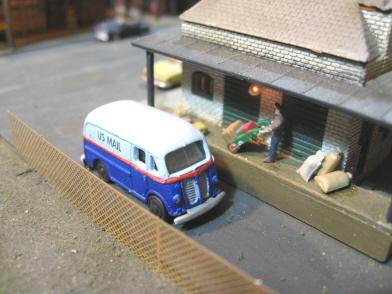
When I purchased this Classic Metal Works "Metro Delivery Truck", I figured it'd make for a nice mail truck to park outside the post office loading dock. However, after living with it and its bright red paint scheme for a while, I eventually decided that it didn't really look much like a mail truck. Then it dawned on me - jeez, just repaint the thing. Heck, if I can do locomotives, a tiny little truck shouldn't be any trouble.
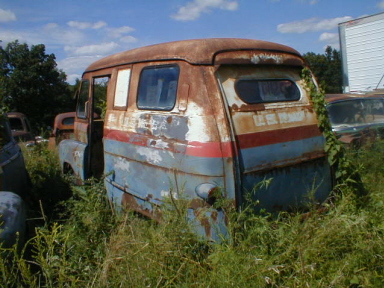
For the paint scheme, I decided to emulate this old 1949 Dodge mail truck -
I started by removing the chassis and the window inserts. Next, I submerged the shell in 91% isopropyl alcohol and let it soak overnight. Came the dawn, I then stripped off the paint using a toothbrush. For paint, I airbrushed on a light coating of primer and then followed that up with a layer of Testor's "flat white". Next, I masked off the top half of the body and sprayed on another coating of white (to seal the masking). Once that dried, I sprayed the bottom half with a layer of Floquil "CSX Blue".
For the red stripe, I used some old Microscale Union Pacific diesel decals I had laying around. These turned out to be a bit brittle, so I pretreated them with a coating of "Liquid Decal Film" (which basically toughens up old decals, rendering them usable once more). Once in place, I applied several coatings of Solvaset to ooze the decals into the various cracks and crevices. I created the "US Mail" logos on my computer (Microsoft Word) and printed them out on Micro-Mark decal paper. Once those were in place, I brushed the wheel hubs with Floquil "Engine Black", the grill and headlights with Floquil "Bright Silver", and then put everything back together. Lastly, I sprayed the whole thing with a coating of flat finish.
So, there ya go - a mail truck that actually looks like a mail truck!
01/07/09 - More stumps

This oddball little corner section seemed liked a likely candidate for another clear-cut. And so, I put one there. Hopefully, nobody will ever ask me why the stumps aren't clumped together nearly as closely as the actual trees across the tracks are...
I think if I were to do this over, I'd skip the white-metal stumps and just make my own (IE, use a Dremel to saw little pseudo-stumps out of a stick). Yeah, it'd be quite a bit more work, but I think they'd also probably be a bit more realistic looking. In any case, they'd certainly be a lot cheaper (y'know, free).
01/09/09 - Birds? Yeah, we got 'em
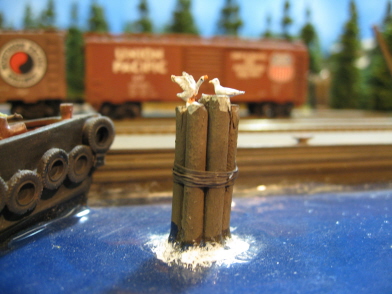
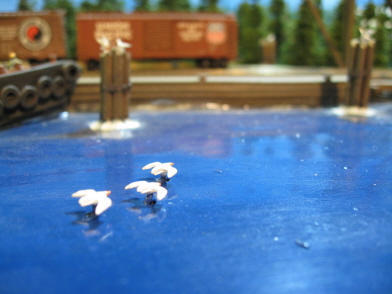
Boy, when you start adding tiny little details like birds to your layout, you're really starting to tread that fine line between "detailing" and "wasting your time, 'cuz ain't nobody ever going to see the danged things anyway". But, what the hey. I figured pilings wouldn't be pilings without a few seagulls hanging around.
The particular seagulls I went with are from Neal's N-Gauging Trains (and wow, it only took six months worth of back-ordering to finally acquire them). Worth the wait though, as they're actually very nice looking for die-cast metal figures. And how Neal manages to actually paint the things is beyond me. I mean, wow, right down to the friggin' eyeballs. Unfortunately, out of the five gulls contained in the pack, you only get two "sitting" gulls (with the other three being of the "in flight" ilk). And with four pilings to populate, two gulls seemed a bit too sparse to me. Fortunately, I had a couple of "going ballistic" geese left over from some nameless Woodland Scenics assortment (probably from back when I was doing the farm on layout #2), which I went ahead and used to augment the gull population. And yeah, they're geese. But I defy anybody to tell the difference (without using some sort of portable electron microscope, that is).
I decided to give the flyers a go as well. And truth be told, they actually look fairly convincing in a "gulls skimming along the surface" sort of vein. However, I did go ahead and paint the little support posts blue in an attempt to conceal the basic "B Movie" fakiness of the whole situation.
01/12/09 - A good idea for street detailing... just, y'know, not for this layout
It's funny how detailing ideas creep into your consciousness... I've probably seen this particular bit of street detailing in a million different layout pictures. Yet it's only been in the last few weeks that it's decided to leap out, grab me by the lapels, and proclaim "you should try this!" Oh, and what am I babbling on about you ask? Why, street repair lines of course!
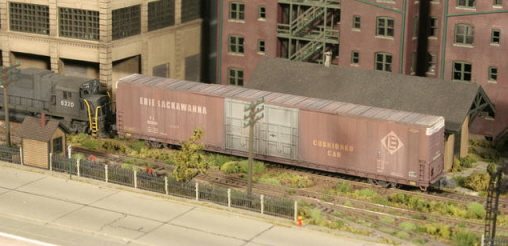
Unfortunately, I've already way finished with the main street through Slackjaw (right down to the vehicles). And as a consequence, I wasn't particularly interested in starting over from scratch in order to do this right. Still, for experimental purposes, I did pull out the black Uni-Ball in order to lay down a few random tar-repair lines (just to see what they would look like) -
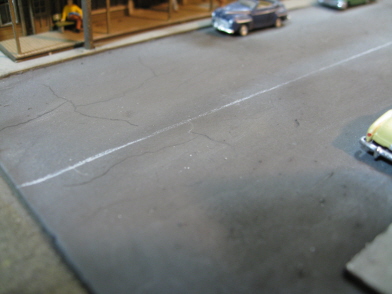
And wow, even half-assed it looks pretty darned good. So, definitely something I'm going to have to keep in mind for future layouts.
01/15/09 - One last building
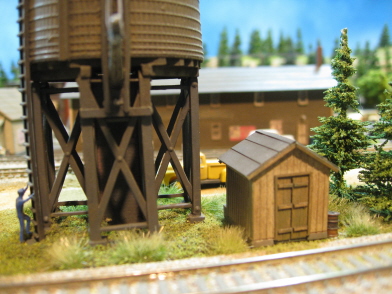
You didn't really think I was going to be able to finish this layout without finding a spot for at least one more building, did you?? In this case, I got to thinking that some sort of small utility building would go nicely in the open space next to the water tower. And this "Coal Storage House" wood kit from Blair Line turned out to be exactly what I needed (note - that's heating coal, not locomotive coal).
For paint, I sprayed the walls Floquil "Concrete", the base "Reefer Gray", the door and trim "Rail Brown", and the roof "Grimy Black". Weathering provided by Bragdon's magic powder.
Although you'd think that a tiny little building like this would go together relatively quickly, well... no. Quite the opposite, actually. Basically you have the same number of pieces as a larger building - just all in miniature. Consequently, it still took me a good hour+ to get the thing painted and assembled. Not that I'm complaining, mind you. Frankly, anything that doesn't involve trees is a welcome respite at this point.
01/21/09 - Another trip to the paint shop
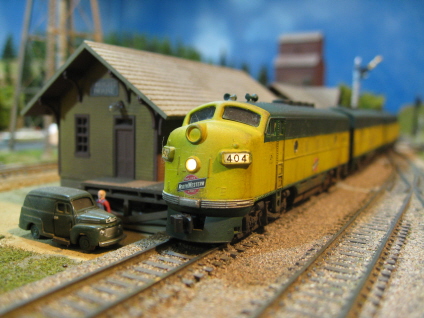
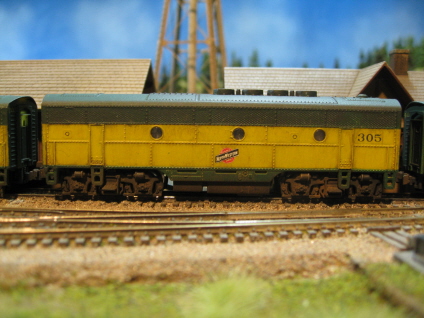
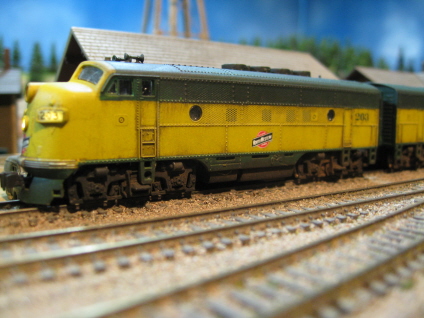
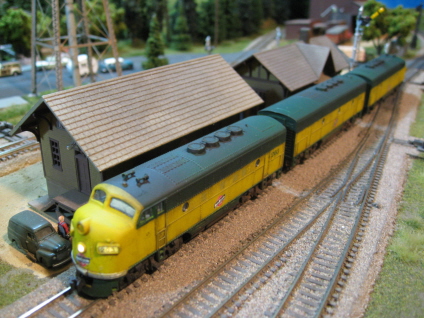
Extracting a measure of revenge for the ol' green and yellow, I repainted a trio of Kato Union Pacific F3's in C&NW livery. And
since I blocked out the Mars lights and installed rotary beacons on the "A" units (ala the prototype),
I guess this counts as my first foray into "super detailing" territory 
OK, anyway, back to the trees... (sigh)
01/26/09 - Oops, ran out of trees again...
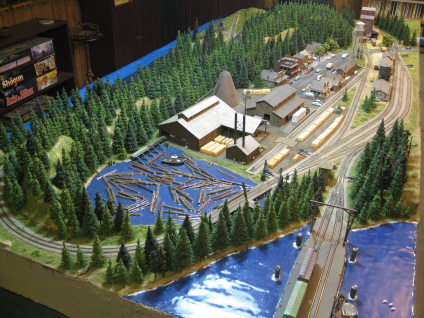
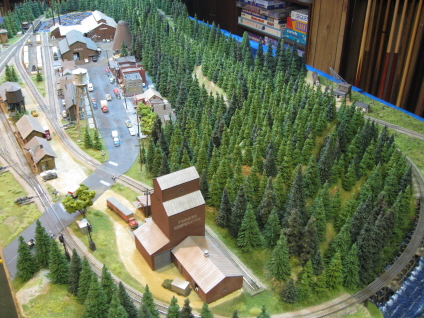
I must be getting better at "tree estimating" (finally). I figured 200 more would get me close to the finish line. And lo, it actually did. I think maybe another 50 more (or so) and I'll be done with the trees.
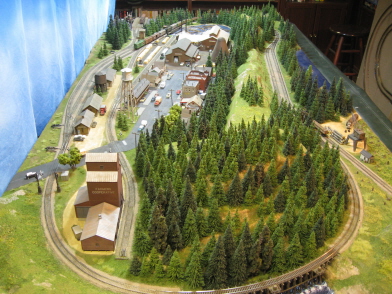
01/27/09 - So, here's what 925 pine trees looks like...
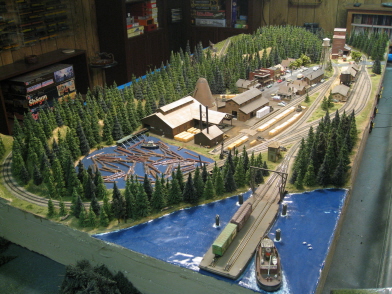
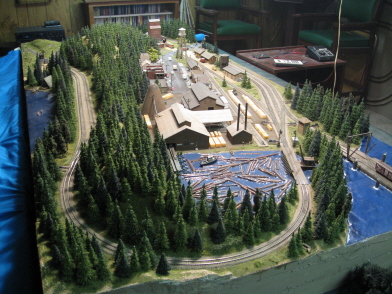
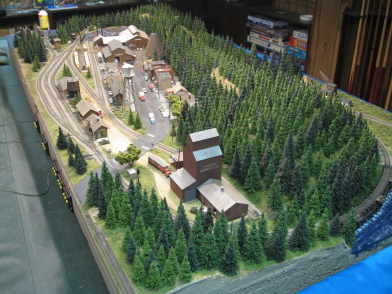
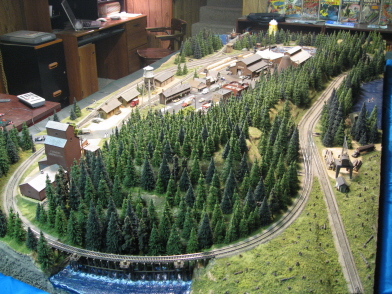
Well, 925 give or take anyway. I wound up with a few left-overs once I finally reached the point where I absolutely could not find a single micron of tree-needing open terrain. But anyway, yeah, I am well and truly finished with the bleeding trees.
I had no idea what I was getting into when I embarked upon this Johnny Pineseed journey. But wow, am I ever happy with the results! I think I hit upon just the right mixture of cheap/easy trees - yielding a very realistic looking end-result. All I need to do now is spend an hour or so flicking some green paint on all those dad blamed glinty tree trunk tips (grr).
Check this out. You can almost hear the thunder and the first few heavy drops of summer rain splatting to the ground...

01/30/09 - Added another forklift
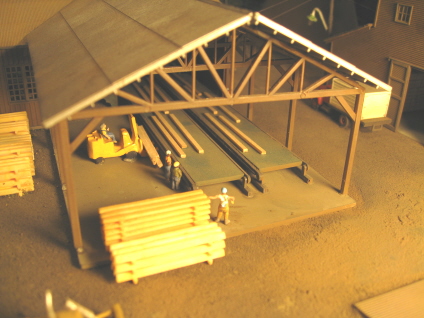
I started wondering how lumber was getting off the sorting line, and thus becoming available for transfer to the drying stacks by my big yard forklifts. And after a bit of research, I discovered that the methods are, as usual, myriad (depending upon era, mill size, etc). They could simply be moved by manual labor... or maybe a forklift... or (most intriguingly) by something called a straddle lifter. Vis -
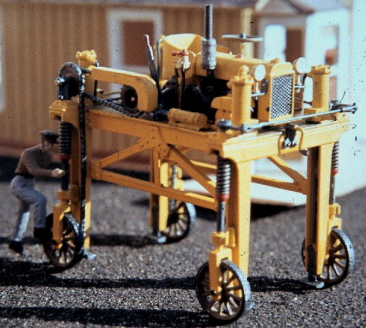
Unfortunatey, the only straddle lifter I could find anywhere is the above Wiseman HO scale model. And although seriously cool looking, I figured I already have enough HO logging machinary squirreled away on this layout, thank you very much. Interestingly enough, I also came across this picture of an actual N scale straddle loader -
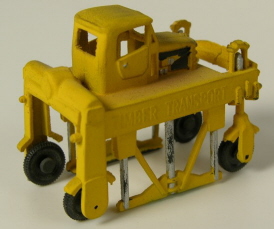
I'm told this was some kind of cereal box giveaway in Australia (!) back in the early 60s. So, y'know, good luck finding one.
So anyway, in lieu of any sort of fancier solution, I simply stuck a small Kramer Products forkift in there. And I guess the theory is that the workers move boards to the forklift, which in turn dumps them into piles at the end of the shed (where they can then be picked up by the larger yard lifts). I dunno how realistic that might be, but I guess it's at least plausible.
Oh, and here's a helpful tip - when lighting a scene for purposes of taking a picture, don't set a 150W lamp directly on top of
your foam-based layout in order to shine light into a buiding (oh, like a sawmill for example). Why, you ask? Well, you
might just melt a big hole in your foam base. You might also warp the hell out of, say, a plastic loading dock. Then you'd get to
spend several hours repairing said hole, and then building a whole new loading dock... Now, I'm not saying
this has ever actually happened to anybody that I know of personally. Still, it does seem like something to watch out for

Oh, and I also spent a half hour (or so) hunting down and painting glinty metal tree tips. Yes, a truly odious task. It's all about what room lights are turned on and your viewing angle "of the moment". Change one or the other and suddenly 20 more trees are glinting at you... blah. At this point I've fixed about as many as I care to (at least until such time as they start to drive me crazy). And if I ever use these sorts of trees again, I'm going to save myself a lot of aggravation and just paint all the tips prior to installation.
02/03/09 - Meanwhile, back at the paint shop
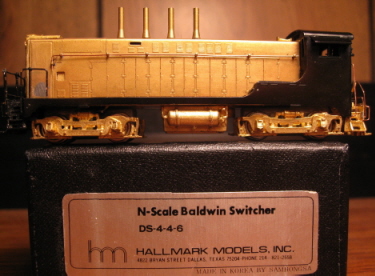
I somehow wound up with this weirdo Frankensteinian brass Baldwin switcher. And not knowing what else to do with it, I decided to go ahead and draft it into the NP -
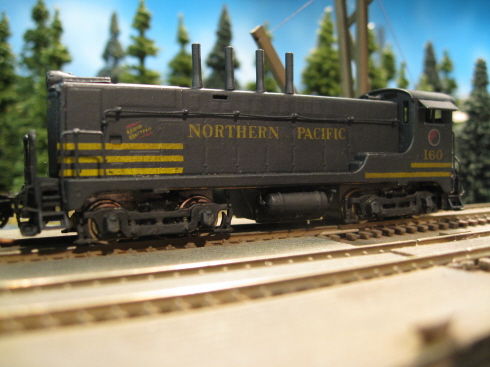
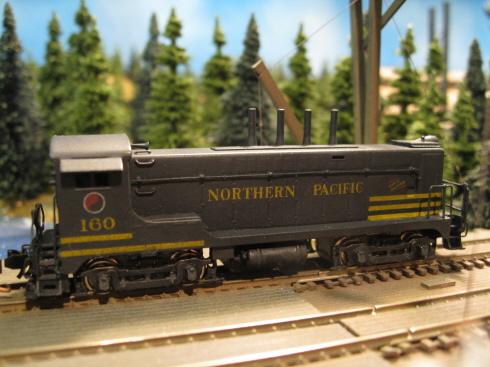
Meanwhile, back on Shay things are rapidly approaching their conclusion. One or two final bits of detailing and I think I'll be done.
02/05/09 - Finished with the scenery
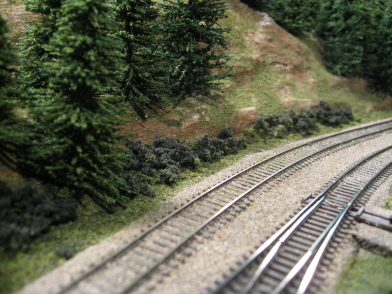
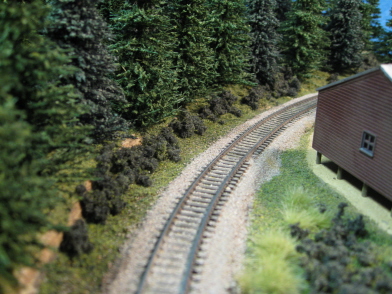
I decided that some of my flat areas were looking a little too "manicured". So, I added a smattering of WS clump foliage here and there to simulate bushes and, well, "clump foliage". I tried to restrain myself and limit the bushes to the occasional scenic "accent" - not wanting to turn the whole layout into some sort of foliage-overrun rain forest. Basically I plunked them down in a few select flat / open areas where I hadn't already put down trees and/or Buffalo Grass.
Application is pretty much the same deal as with any other WS fuzzy turf product - sprinkle where you want it to go, dribble a little WS Scenic Cement with an eyedropper, let dry, and then vacuum up whatever didn't stick.
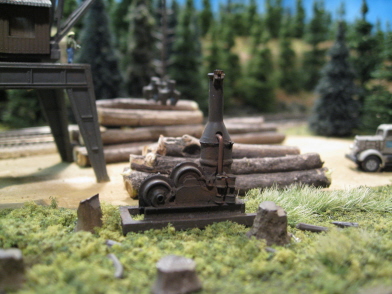
I also added this old "steam donkey" (aka "yarder") as a rusty relic of a bygone era. These machines were commonly found at turn-of-the-century logging operations - used to drag freshly cut trees (via long cables) out of the woods and into the loading area. This particular donkey is a nifty little resin model that I picked up on eBay (painted and assembled) for a whole ten bucks.
So wow, really close to being finished now. Detailing-wise, I just need to add some traffic signs to Slackjaw. Beyond that, I'm also cooking up one last big electronics project. But I think I'll let the suspense simmer on that one for a while longer... Moohahaha!
02/23/09 - I love the smell of burning sawdust in the morning...
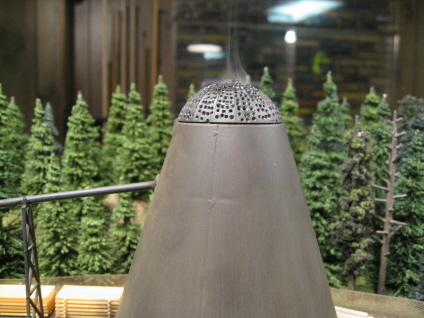
Too bad this smoke goo doesn't smell like burning sawdust. Ah well, it's still awfully cool looking.
Anyway, yes, I did indeed unleash my inner ten year-old and retrofit the slashburner with a smoke generator. I decided to go with Vollmer's #4114 "Seuthe" unit, mainly because it looked easy to fill and easy to install (both of which turned out to be true).
Job one was to make sure that adding smoke fluid was going to be completely and utterly simple. I started by gluing the unit itself to the center of the slashburner base. Next, I drilled a hole through the top of the burner dome and then glued a length of plastic drinking straw inside the hole -
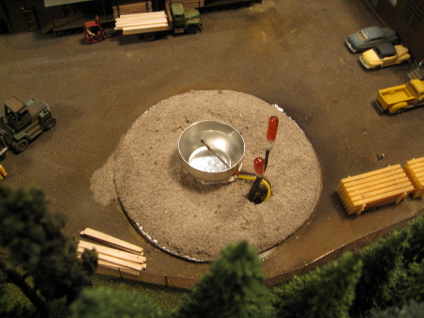
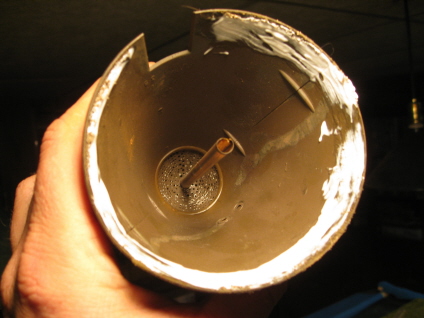
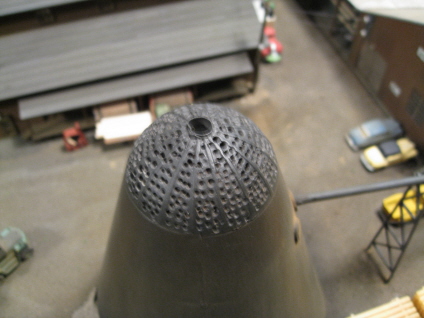
So, adding fluid now is simply a matter of pouring it down the straw. The only thing I have to watch out for is not adding too much. If you fill the "bowl" beyond about the 2/3 line, the smoke generator don't work anymore (too much fluid to heat up, I guess). And woe unto me if I ever screw up and add too much... I'll have to pry the slashburner off the base in order to get at the smoke unit. Either that or tip the whole layout on its side in order to spill out the excess. Either way, it's all bad news. So, note to self - don't go nuts with the smoke fluid.
This unit is rated at 16V max. And although it operates at lower voltages, the closer to 16V the better (IE, more smoke). Unfortunately, this basically precluded using my existing lighting circuit (the 12V one). Too bad that, because it would've been awfully convenient if I could've simply wired it up to the same switch that controls the "fire" lights inside the burner. Anyway, since I didn't want to purchase yet another dedicated power supply, I decided to power it off the AC accessory terminals of my MRC throttlepack (the one I use to run trains around in DC mode).
The "instructions" for the smoke unit (and I use the term loosely) don't specify AC or DC, so I figured AC power would work just as well as anything else. The only minor complication I ran into is the fact that said accessory terminals put out 20V - which I assumed would eventually fry the Seuthe unit. No worries, though. I simply soldered 60 ohms worth of resistors to the smoke unit's wiring and got the voltage down to just under 16V. Then it was just a matter of sticking another Atlas "controller" box on the side of the base and connecting all the various wires to it.
The only real downside to this thing is that the smoke does leave a bit of oily residue on the burner dome. But given the overall coolness factor of having a lazy plume of smoke hanging over one's layout, I think I can live with the goo. Don't ask me why, but this is just the kind of fun detail that really impresses visitors - IE, "You spent hundreds of hours on that scenery, eh? Uh huh, that's nice. But wow, look at that smoke!"
On the other hand, if said visitors are members of my family, they're just as likely to say something along the lines of "Smoke, eh? Uh huh, that's nice. But why don't you make it so the little cars drive around the streets?" Which is exactly why I've learned to more or less ignore them...
02/23/09 - Ah, wilderness!
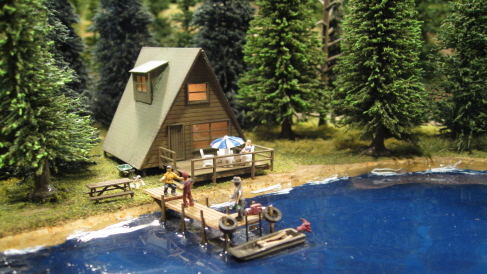
I get a lot of people asking me why, as a Minnesotan, I don't build a "winter" layout. Well, that's an easy one. When it's February out there and the world is a bleak wasteland (as it is wont to be), who in their right mind would want to model it?? Frankly, I'd much rather fantasize about the coming spring by modeling colorful scenes like this one.
Anyway, the above pictured deck furniture was my last bit of back-ordered detailing. Looks like all I need to do now is whip up a few traffic signs for Slackjaw and I'm done.
Oh, and you might've noticed - In addition to all the other stuff, I also added a ladder at the end of the dock. That danged boat wound up a bit too low, and ain't no way nobody was ever going to get out of it without some help.
02/24/09 - Last couple o' things
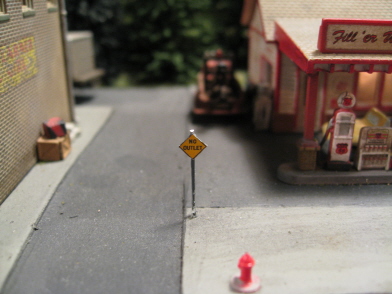
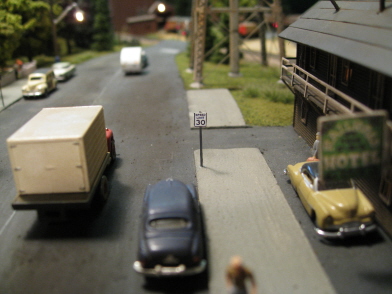
As threatened, I added a handful of traffic signs to Slackjaw. I got these from a guy a few years back who mailed them to me to sample - and I absolutely love the things. They're printed on peel'n'stick glossy paper, and the graphics are absolutely spot-on perfect. Making a given sign is simply a matter of cutting the desired graphic off the sheet with an Exacto knife and then sticking it to a pin. Paint the pin gray, snip off the top and you're done. And being pins, you just stick 'em in wherever you need them to go. Unfortunately, I don't think said guy is in business anymore (his website is long vanished), so here's hoping my supply lasts a good long time.
I really wanted to go berserk with these things, but given Slackjaw's miniscule size, there's just not much call for them. All I could think to add was a couple of speed limit signs, a "No Outlet" sign at the alley entrance, a "Reduced Speed Ahead" sign on the way into town and a "Not A Thru Street" sign at the entrance to the saw mill. Fun stuff, though. And great bits of tiny detailing!
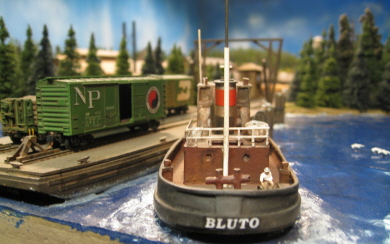
And lastly... Somebody over on the Atlas forum posted a picture of his tugboat (same one as mine) and I noticed that he'd decaled a name onto its stern.
Well, duh! Now why didn't I think of that?? Which is not to say that I didn't immediately set out to copy him. And while digging through
my box of generic decals, I serendipitously came across one with white lettering and a black background that was ridiculously appropriate
for a tugboat. And so, ladies and gentlemen, I give you... "Bluto" 
(Oh, and for the curious - said decal was actually part of a larger "Bluto's Bar & Grill" sign, which in turn came from Gold Medal Models' "City Signs" decal set).
02/24/09 - Finished!

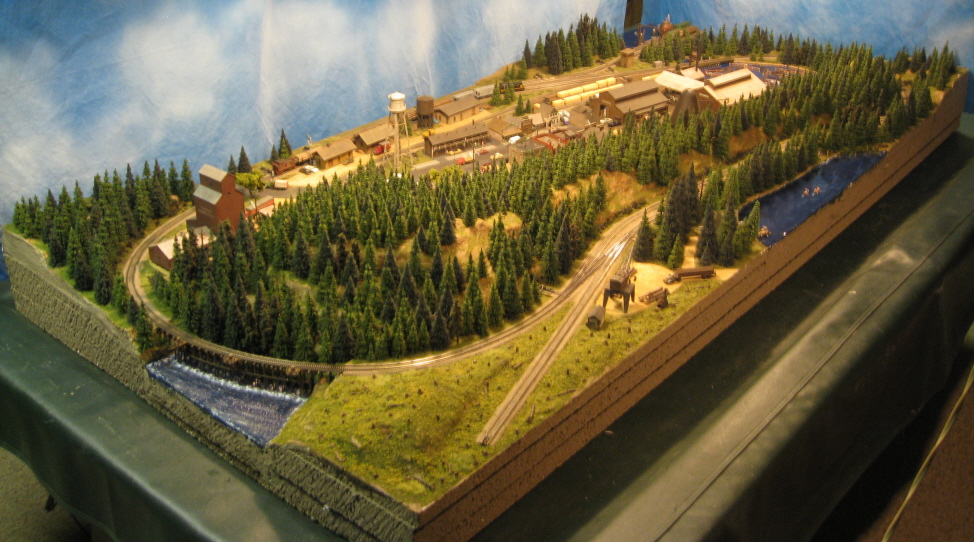
Wow, fifteen months and $4000 later I find that my "to do" list is completely empty. So, I guess I'm done!
Some final thoughts -
Looking back at the start of my blog, it seems that this layout has taken me a whole lot of places that I hadn't really anticipated
going (as layouts are wont to do). Based on my original goals ("small, cheap, and simple"), I guess I'm batting around .333 ("small"). But
shoot, .333 gets you into the Baseball Hall of Fame no matter how you slice it 
Truth be told, this layout turned out way nicer than I ever expected. And I think a lot of the credit should go to the original designer of this layout plan. The way this thing wound up cleverly concealing the fact that it's basically an oval roundy-rounder took a bit more ingenuity than I likely possess. So, thank you Model Railroader.
But beyond my brilliant idea of using somebody else's brilliant track plan, I also think that taking my time and going the extra mile to try out new things really paid off. And looking back, I feel like I learned a whole heck of a lot of new stuff (not to mention better ways to do old stuff). I'm totally sold on the "wire brush + Sculptamold" method for building rock facings. I love the enhanced portability afforded by the all-foam underframe. I no longer live in fear of laser-cut wood structure kits. I love the look of Buffalo Grass and blended ballast. Huge pine forests? Scratch-building? Ain't no thang. And, well, I could go on. But suffice it to say, I think I really enhanced my knowledge base here. And the net result is a layout that I really love - and one that I actually want to hang on to for a while (for a change).
Negatives? Well, as mentioned previously, I'm done with Atlas Code-55 track. It looks wonderful, but there are way too many annoying glitches with the stuff (particularly with the turnouts). Yes, my trains run around flawlessly. But it took way too much effort to get there. And this whole business of constantly having to be swapping out wheelsets in favor of low-pros is getting to be an irritant.
Regrets? Yes, I have a few. I really wish I could've come up with water that I thought looked good, and yet didn't invite scorn and ridicule from pretty much everyone in the world besides me. Also, I really wish I would've sacked it up and done full-blown interiors for some of Slackjaw's buildings. The hardware store and service station in particular look like big empty nothings. Oh, and I really wish I would've figured out a way to make all those cars drive around (actually I really don't - I just added that for my family's benefit).
The biggest thing for me, though, is that somewhere during the course of building this layout I finally decided that I'm tired of building "fantasy" layouts, and that my next model railroad is going to be an actual Model Railroad. IE, a model of something from the real world. But I think I'll save that whole discussion for my next blog (ooh, building suspense he is).
So, that's about it for Shay. Check out the Photo Gallery link below for pictures of all that fine detailing that I've allegedly been up to in recent months. And be sure to check out my next layout project - "A Season in Hope".
Part 2 - Base construction, tracklaying & wiring (and more buildings)
Part 3 - Roads, lighting and scenery (and yet more buildings)
Part 4 - Scenery, detailing (and yet more lighting)