
07/31/08 - Finished the log pond (eventually)

Due to various unforeseen complications, this particular project took just a ridiculous amount of time to complete... And so, let's dissect the madness...
I started out by deciding to take a whack at "painting the pond bed" instead of "painting the pond surface" (just to see if that particular method mightn't yield a nicer looking pond). So, I dutifully painted the shallows tan/brown and the center blue. Then, prior to pouring the water, I went ahead and planted various clumps of reeds and cattails hither and yon (focusing mainly on the little backwater behind the log dump). And major kudos to my kitties for providing so many handy whiskers over the past month!
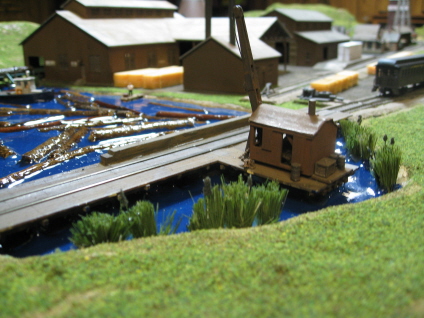
Next, I poured the Realistic Water. And before said water had a chance to set up, I strategically placed all of my "February Blizzard Expedition" lilac logs.
For the logs, my first instinct was to go with the "dry" look (IE, no slathered-on RW to make them look wet). But after staring at them for a while, I decided that they'd look better with a bit of a watery shine to them. So, I grabbed my tweezers and spent a bit of time in "log rolling" mode. And once I was satisfied with the look and placement of all the logs, I figured my work was done and called it a day...
Well, came the dawn, and I'll be damned if most of that RW hadn't simply vanished into nowhere. I've said it before and I'll say it again, this stuff is pernicious! Honestly, I have no idea what mysterious dimension it all vanished into (it sure didn't leak out anywhere that I ever found), but wherever it went, it went. So, I bought another bottle and tried again. And yeah... the next day? Same thing. Most of it was gone!
At this point I was really starting to get nervous. A lot of my logs were RW-fixed pretty much directly to the bottom of the pond. And since the original plan was to have them floating "half submerged", another coating of RW was going to place a whole lot of them in peril of being totally submerged. Well, at this point it's not like I was going to be able to retrace my steps and start over. So, I girded my loins and poured on yet another bottle. And this third time, I really had to get in there and finagle the stuff around to make sure logs that I didn't want totally submerged weren't, in fact, totally submerged.
Well, the third time's the charm, I guess - apparently the RW'd finally decided that it'd had enough glorious expansion and went ahead and set up where it was supposed to. And although I wouldn't dare anyone to check out the surface of that pond with a level, I think it wound up looking OK.
So, next I sat back and evaluated the whole "clear water on top of painted bed" situation. And nope, I didn't like it. What can I say that I haven't already said before (ad nauseum)? I likes what I likes, and that's it. So, I went ahead and painted the surface blue. Oh, and back when I was worrying about how I was going to paint the water under the log dump? Total non-issue. The water wound up riding up so high relative to the dump that I didn't even need to worry about it.
As my last piece of business, I stuck a little dock in as a semi-plausible nod to the fact that the guys in the tug would probably want to eventually call it a day and come ashore.
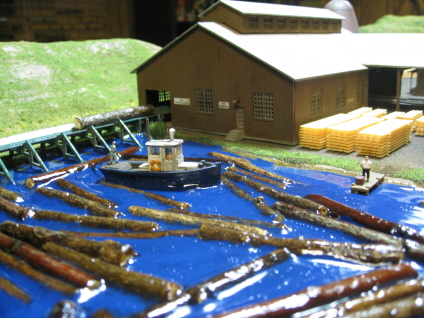
At the end of the day, I'm not quite sure if I went with enough logs. Most of the pictures of real log ponds that I've seen have had logs piled up from here to next week. On the other hand, had I gone down that road, my worry was that my tug would've looked a bit "log locked". So, I dunno, I tried to strike a mix between "lotsa logs" and "room to maneuver". And now that I look at it, I guess maybe I could've wedged a few more in there without causing too many problems... but, oh well. It's done now and it is what is (or is that too many hackneyed business cliches for one entry?)
08/02/08 - Added some forklifts to the mill

Depending on the era being modeled, I guess there are a couple of different ways to model moving lumber around one's saw mill. Back in the old days, most mills used a system of rails and trams to move stuff around. Conversely, more modern mills simply use big forklifts. And for my layout, I decided to go with the forklifts. I mean, as cool as it might have been to go with the trams, I'm not sure that I really have the space to retrofit that kind of thing. And after my travails detailing the mill interior, I wasn't sure I was really up for trying to model something like that anyway...
Up to this point I've only had vague notions about what era this layout is actually supposed to represent (IE, probably after 1930 but before 1960). But now that I'm getting to the point where I'm putting actual vehicles into play (a dead giveaway as far as era is concerned), I figured it was time to pin things down a bit. So, I guess I'm going to go with the "1950s" (and definitely with "quotes" around "1950s"). There seems to be a decent enough selection of cars from the 30s, 40s and 50s available these days (or at least a lot more than there used to be), so I should (hopefully) be able to come up with enough old cars and trucks for the rest of the layout.
The only decently sized forklifts I could find were some modern "Cat" units from Tomix. And as delivered, they're much too modern looking for the 1950s (was Caterpillar even around then?) So, to 1950s-ize them a bit, I disassembled them and repainted all of the yellow parts with Floquil "Dark Green" (figuring that was a more 1950s-esque color scheme than that bright "Cat" yellow). And since the actual functional design of forklifts hasn't really changed a great deal over the decades, I think they actually wound up looking pretty good (and certainly adequate enough for my purposes).
The Tomix forklifts don't really have much in the way of interior cab detail (IE no place for an operator to sit and no controls for him to play with). Nevertheless, I figured I needed somebody inside there to run these things. So, I just took some leftover "generic worker guy" figures, lopped them off at the knees, and glued them in. Hey, better than nothing I suppose. Just try to ignore the agonized screams...
08/12/08 - Starting burning some sawdust

The first thing I did was cut a circle of styrene to fit inside the base of the slash burner. I figured it'd be easier to pile ashes on top of a separate piece (as opposed to trying to work directly on top of the layout base). I started out by building up some heaps of ballast and then soaking them with Scenic Cement. And while the glue was still wet, I then piled on a layer of that Highball so-called "brown earth". And ironically, its overall gray color (not to mention all of those odd whitish chunks) actually wound up working better as sawmill detritus than it did as dirt. Once that all set up, I then drilled a hole in the circular base for my "fire" lighting (a Miniatronics "Fire and Flame Effect" rig). The fire unit is basically a couple of orange minibulbs hooked up to a PC board gizmo that flickers them on and off at random.
Next, I glued the ash-laden base in place, pushed the bulbs up through the hole, made sure everything was working as advertised and then glued down the slash burner. Lastly, I installed the blowpipe (or whatever ya call it). And yeah, I had to put a pretty wicked bend in it in order to get it going where it needed to go.
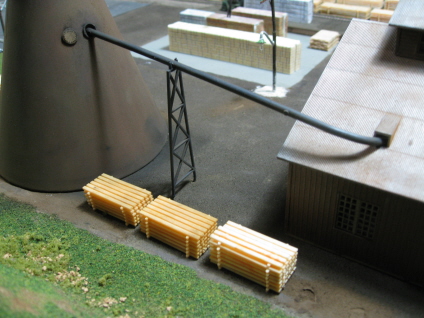
And so, with everything glued down and looking good, I fired up all my lights and sat back to admire my work. And then the fun started...
First off, the flame unit really does look very cool (and about as realistic as you're ever likely to get with lightbulbs). Unfortunately, it has some rather dire side effects when wired up "in parallel" with other bulbs (IE, all of my streetlights and interior building lights). Namely, the other bulbs tend to dim and brighten right along with the flame bulbs. It's not hugely obvious, but it is noticeable (especially if you're as anal-retentive about such things as I am).
I contacted a few of my electronics-wizard buddies who suggested trying different things (soldering in a capacitor, running the power leads for the flame board directly to the power supply, etc). Unfortunately, none of that made any difference. Miniatronics wasn't much help either, as their only suggestion was to provide it with its own dedicated power supply. And I dunno, I may ultimately go that route. But in the meantime, I moved the power leads for the flame rig to their own on/off switch on the main 12v "Controller" box. So at least now I can turn the fire off if having the rest of my lights flickering gets to be too annoying.
08/12/08 - More lights
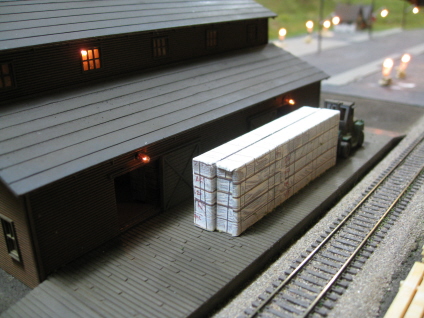

Since the saw mill is turning into something of a centerpiece for this layout, I decided to go a bit nuts with the 1.5v exterior lights on the transfer building (namely, six of 'em). I also tossed one of my telephone pole / area lighting contraptions into the mix as well. So cool, one more building wired up and glued down. Now just a dozen or so more to go... ugh.
08/14/08 - Added some signals

I don't know if this layout is large enough to justify train signals. Nor do I know if I placed them even remotely prototypically (relative to the track plan). But what the hey, I like signals. So, reality be damned, I stuck some in (and with all decisions based solely on what I thought would look "cool").
I initially wanted to go with Atlas signals - mainly 'cuz they offer a nifty little bi-directional unit. Unfortunately, they're designed to work with Atlas' full-blown signal operation system and apparantly have some really bizarre voltage requirements (somewhere around 6v, although I wound up burning mine out before I ever really got the voltage pinned down). So, having already wasted a bunch of money, I decided to stick with tried-and-true (and cheap) Model Power signals. And truth be told, I actually like the look of these things (especially once painted black and weathered a bit). The dead-and-gone Atlas signal did come with a cool little relay shed, so I went ahead and plunked that down next to the signals (cool and expensive - since it ultimately wound up costing me thirty-some bucks).
For grins, I also went ahead and hooked up the control switches (glued underneath the layout). So, I guess if I ever get tired of the current colors, I can go ahead and actually change them (whee).
08/16/08 - Modified the slash burner
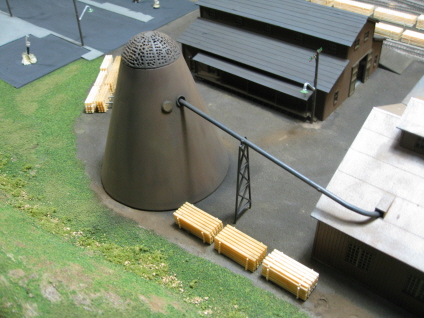

I never really understood how that slash burner was supposed vent its smoke. I mean, there's no chimney or anything, right? I guess I eventually decided it must come out the doorway on the ground floor (although in retrospect, that doesn't make a whole lot of sense).
Thankfully, I got a helpful email from a guy (Hi Tim!) who explained to me that the dome on a slash burner is actually composed of metallic mesh, and that the smoke from the burning sawdust literally billows out through the top. Unfortunately, I guess Walthers decided that they couldn't adequately render said mesh in styrene and wound up making the dome look like a solid cap (which is exactly what I'd always assumed it was).
Well, I got to thinking about how cool it'd look if you could actually see my "fire" through the top of the dome. And eventually I decided to do something about it. I guess a common solution is to fit one of those little tea strainer thingies to the top of one's burner. However, I didn't really want to lose the smooth lines of the existing dome. So, my bright idea was to take my Dremel and drill about a million little holes in the thing (more or less simulating mesh). And yeah. freehanding that Dremel didn't really net me the more uniform look I would have preferred. Still, I think it turned out OK. And better still, I can actually see my fire burning through the top now.
The bad news is that now I wish I'd foreseen all of this and installed an actual smoke generator in there! How cool would that have been? Ah well, hindsight... what are you gonna do?
Another thing Tim mentioned is that most mills kept a bulldozer on hand for clearing the ash out of their burners. So, definitely a good idea for a detail item I can pick up.
08/17/08 - More lights

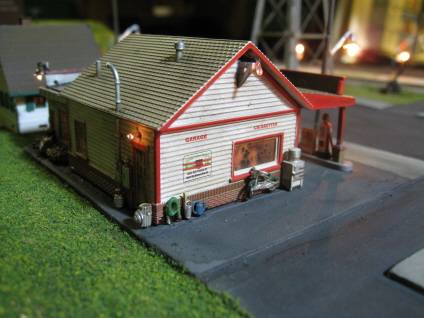
I hadn't really planned on wiring up this gas station with four external lights. But once I'd gone ahead and replaced one of the original external "non-working" light fixtures with a working one, I got on a big roll and wound up replacing them all. Oh well, I guess you can never have too many lights.
Remember a few months back when I was waffling about whether or not I was going to keep all that crazy detailing? Well, I guess I've lived with it long enough that I've gotten used to all the clutter. So, I think I'll just leave it the way it is. I still wish they'd have supplied all that stuff separately, though (thus allowing the end user to install it themselves). The way a lot of it's mounted makes it look like it's hovering ever so slightly above the ground... (insert spooky Sci-Fi sound affect here)
08/19/08 - More signals

Well, if this layout didn't merit two signals before, it certainly doesn't merit four now. And yet, here we are...
Anyway, nothing new to report here - IE, same basic deal as the last time. Sorry, I'll see what I can do about making my next entry more interesting...
08/30/08 - Lots and lots of frog re-wiring
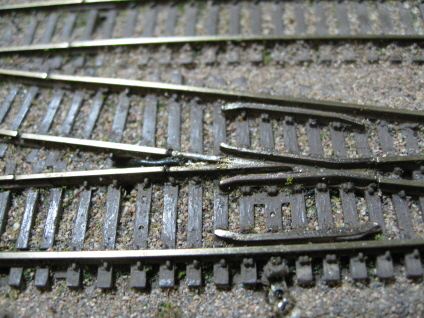
After not running any trains for what seems like a month, I decided to take a break from lightbulb wiring and have some fun for a change. So, I grabbed some old Atlas Alcos and some rolling stock and had at it...
Well, right away I noticed that my erstwhile flawless locos were acting really squirrly whilst traversing some of my supposedly powered frogs. And after a bit of investigation, I discovered that three out of my eleven frogs were, in fact, no longer powered! Further investigation revealed that, yes, power was actually getting to the little external contacts. And yet, no further than that. Well, WTF?!
Stumped, I posted a query over on the Atlas forum. And the information I got in response turned out to be quite disturbing. Apparently there are a series of metal contacts mounted underneath a given Atlas Code-55 turnout - running from the "solder your wire here" hoop and on into the frog. And what I'm told is that said contacts are extremely prone to losing conductivity. Well, no doubt - I can surely attest to that!
So, the suggested solution (or at least the most straight-forward sounding solution) was to remove the feeder wire from the provided hoop and solder it directly to the frog (basically eliminating all of those unreliable middle-men). And brother, if that sounds like a pain in the ass, well, you're right. Believe me, getting all those wires routed through the foam and soldered up was difficult enough back when I had a bare-bones layout. So, add in a lot of fragile buildings, scenery and detailing into the mix and you can multiply the whole headache factor by about ten.
Anyway, that's it for me and Atlas's C55 - we are definitely quits. Yeah, I still think it looks great. But there are just way too many problems with the stuff. And personally, I will always trade reliability and peace of mind for looks any day - especially when it comes to track. So, my next layout? Yeah, I'll definitely be looking for some new kind of track to try out. Micro-Engineering maybe? I dunno, we'll see...
08/30/08 - Vindication!

Awright all you "blue water" naysayers, get ready to eat a big steaming plate o' crow! Uh huh, that's right. 'Cuz I done found the actual prototypical source for said water - namely, the "Old Mill" ride at the Minnesota State Fair! So there! Nyaah!
Conversely, I'm still trying to figure out why I was asked to pose in front of this sign...

09/02/08 - Slackjaw depot gets a semaphore
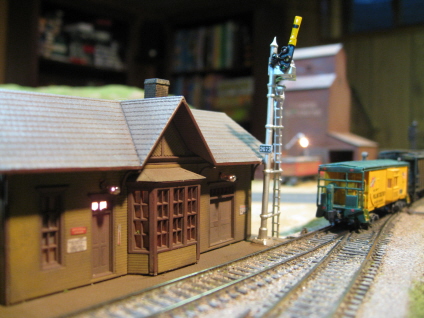
I really like these NJ Int'l semaphores. And so, I went ahead and added one. And yeah, I did briefly toy with the idea of hooking up the supplied "up and down" rod to some kind of servo motor (to, y'know, move the flag up and down). Fortunately, I came to my senses before actually starting down that road-to-insanity. However, I did manage to wire up the light successfully (although it probably doesn't show up very well in my photo).
09/02/08 - All the lights are installed and all the buildings are glued down

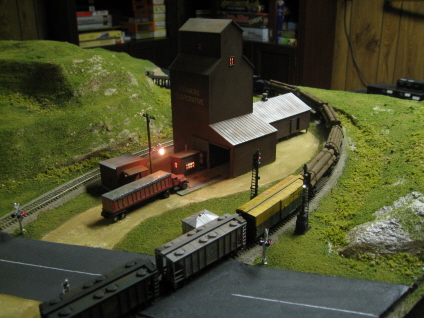
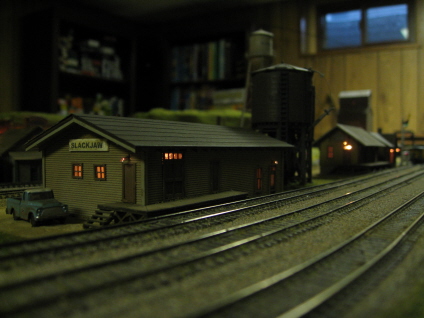
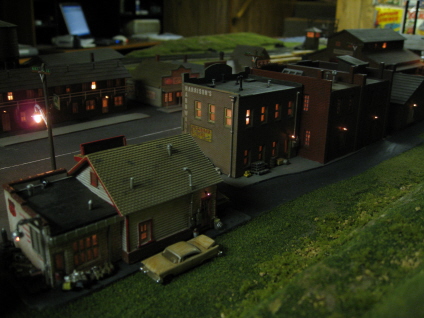
Well, I'm not going to take a picture of every flippin' light, but you get the idea (well I hope you do anyway - my "night photography" skills are definitely a work in progress).
So, lessee... 28 interior lights (12v), 31 exterior lights (1.5v), 4 signals (12v), 1 semaphore (12v), 6 streetlights (12v) and 4 crossing signals (12v). End result? Why, a giganto huge rat's nest of course!

I gotta say, going with this whole "all foam" layout structure has made all the difference for me. Flip the layout up on its side and solder/screw? Man, I must've added at least six months to my life in stress-reduction alone...
Nothing much to report vis'a'vis the actual "install the lights" procedure (hey, it's not rocket surgery). Basically I started out by purchasing whatever Miniatronics 1.5V bulbs YOLHS had handy on any given day. Next, I got out the Dremel and drilled little holes in the buildings for the lights. Next, I strung the wires through said holes. Next, I applied copious amounts of FTG to hold them in place. Next, I drilled a hole through the layout for the wires. Lastly, I applied FTG to the bottom of the building in question, stuck it in place, and then routed the wires into the nest.
I did discover a few interesting (IE, annoying) things during this whole process. First off, sticking interior lighting inside of styrene structures that have light-colored walls looks really dumb (go take a look at my "glowing post office" picture from several months ago). At first I thought that said "glowing" was simply due to some buildings having thinner walls than others. Then it dawned on me (one of those "hit me on the head with a hammer" moments), that only my white-walled buildings were exhibiting this "imminenent nuclear meltdown" behavior.
Well, being occasionally adept at putting two and two together and coming up with four, I realized that the issue here was the color of the walls and not the thickness. And eventually I figured out that applying black paint to the insides of said walls solved the whole problem. Wow, handy knowledge - I wish I'd had it back when I was actually putting these things together!
My other annoying discovery relates to elaborate structure "bases". Now, I've generally eschewed them in the past simply because I've generally found most of them to be, well, kind of stupid looking. However, since I went ahead and actually decided to use a couple of them on this layout (the Post Office and the Depot), I now realize that there's another reason to avoid them - namely, the damned things tend to be warped (well, at least these two were). And man, if there's anything more "amateur hour" looking than a model building that's not sitting flat on the ground, I don't know what it is. OK, actually I can think of a few things that look worse, but anyway...
Fixing the depot wasn't too painful. The first thing I did was remove the structure from the base. Then, I glued the base to the layout and stuck a couple of heavy books on top of it (glue+gravity = de-warp). Once that all set up, I glued the depot back to the base and all was well.
Conversely, the Post Office was something of a nightmare. It simply wasn't interested in popping of its base in one neat piece. So, I basically had to completely demolish it, get the base glued down flat, and then reassemble it "in situ" (and with all the attendant paint and weathering retouch). And trust me, building models on one's workbench is a lot more fun than trying to re-assemble a mangled one directly on one's layout...
But anyway, it all turned out OK. And the good news is that that's it for the ol' soldering iron. I guess all that's left now is detailing and scenery. And oh my lord, I guess that means lots and lots and lots and lots and lots of trees. Yikes...
09/03/08 - Finished detailing the roads
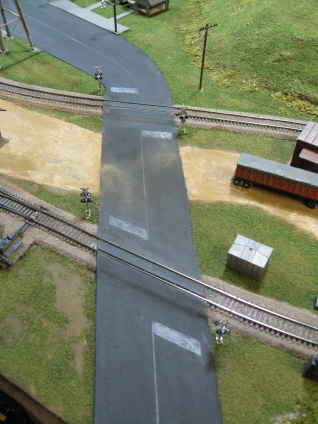
I like to keep my traffic control lines pretty simple - basically limited to white lines down the center and little "stop here" bars at intersections and crossings. When I've gotten any more ambitious than that in the past, the results have been, well, not pretty. So, yeah, "Keep It Simple, Stupid" - that's my motto now.
I've tried lots of different methods for the actual graphics, and what works best for me is to simply draw them on top of the road with a white pencil (aided either by a straight ruler for the straight lines or a flexible ruler for the curves). Once I finished with the pencil work, I then applied a light coating of weatherwash to the roads (and sidewalks), just to grungify them a bit. Lastly, I brushed a smidge of Bragdon "tan" onto the asphalt road where it intersects with the dirt road (to simulate tire tracks).
Somewhere along the line I also decided that my dirt roads (or gravel or whatever they're supposed to be) wound up looking a bit too yellow. So, I went ahead and brushed a bit of Bragdon "tan" onto them as well (in order to get more of a "dirt" look). Wow, Bragdon powder. Is there anything it can't do?
09/10/08 - The saw mill gets a fence


From a detailing standpoint, I've always found Gold Medal Models chainlink fences to be seriously cool looking. And as such, I generally like to find a place for at least one of them on my various layouts. And in this case, the saw mill seemed liked the most likely candidate.
GMM fences come in 3-packs and are honest-to-gosh metal (with each individual section being just over 4" in length). In this instance, I opted for the "fences with gates" packs - thinking I'd use the gates up by the "Slackjaw Road" entry. Unfortunately, that didn't really work out (what with the road being 3.5" wide and the gates being about a 1/2" wide). So, yeah, the gates wound up going to waste. Oh well, I always figured the fence was more for keeping out pain-in-the-ass critters than it was for security anyway.
My first task was to airbrush on a coating of flat finish (to kill the metallic shine and give the subsequent Bragdon powder something to adhere to). Once de-shined, I then applied the aforementioned Bragdon malaise. Next, I clipped the individual fence sections from their metallic "sprues". And while doing this, I also clipped off the barbed wire tops. First off, I didn't really think they were necessary (once again, this wasn't meant to be a security fence). But more importantly, it's just a whole lot easier to make bends in these things with the barbed wire removed.
Once prepped, it was simply a matter of sticking each fence section into place (sinking all the little metal fence post spikes into the foam base along the way). Fortunately, I didn't have any stray plaster obstructions to interfere with that whole process (see my previous layout blogs for my other less-than-happy results). And as it turns out, I didn't wind up literally enclosing the entire facility (again, it's not NORAD). Basically I covered just enough terrain to keep most of the wood-hungry beavers and whatnot out and then called it a day.
09/18/08 - Yeah, I'm still alive...
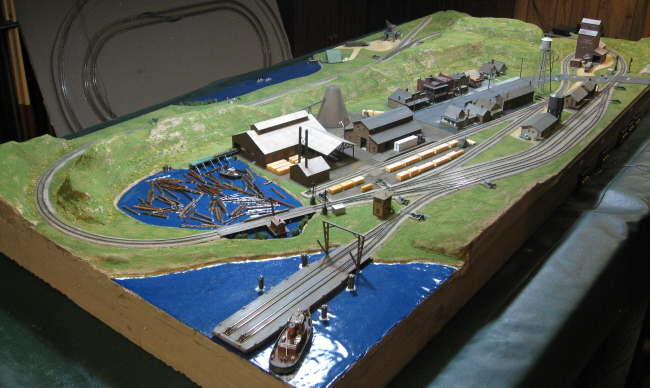
...and boy do I have all kinds of excuses for my recent layout-building inactivity. Want to hear them? OK, good. Well, first off, I've been sidetracked with a bunch of non-layout related train projects (weathering and re-decaling a bunch of steam locos and suchlike). Then there's my continued work on the Locomotive Encyclopedia, and my new Caboose Encyclopedia project, and... well, suffice it to say, I've been keeping busy. However, truth be told, I have been kind of procrastinating about getting on with "Shay".
At this point, what I really need to do is finish up the ground cover. Unfortunately, my recent discovery of Scenic Express's "Buffalo Grass" has become something of a sticking point. Yeah, it looks great. On the other hand, installing the stuff isn't going to be anywhere near as easy as simply sprinkling on a bunch of WS "coarse turf". Sticking on all those individual little tufts is going to take some time and (argh) thought. So, yeah, I've been putting it off...
The other problem I've run into (motivationally speaking) is that I've been a bit undecided on the whole "tree" issue (my next major task after the ground cover). This layout is going to require a whole lot of trees (way more than I've ever had to deal with before), and I've been sort of thrashing around trying to decide on a plan of action that won't cost me a bazillion dollars, won't taken a bazillion years, and won't drive me completely insane in the process.
Whilst researching the problem, I've come across lots of pictures of really nice looking pine trees, and read many a suggestion as far as the best and cheapest ways to go about building them. Unfortunately, most of said suggestions are of the "two hours per tree" ilk. IE, not gonna happen here. Conversely, going the "just buy them" route has its own set of pitfalls, what with most of them either looking horrible (pipe-cleaners on a popsicle stick) or costing plutocrat-type money ($2, $3, $5 or more per tree).
Nevertheless, I think I did come up a couple of viable (IE, cheap/easy/non-sucking) options. First off, Heki pines -
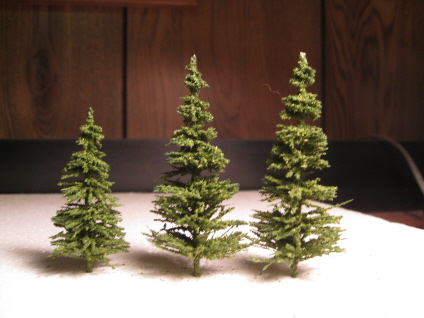
For twenty bucks, you get a box of thirty Heki trees of varying height (2" - 3.5"). And as delivered, they look pretty good (or at least good enough to fill my "I need to build a cheap forest quickly" need). And I suspect that with a bit of judicious trimming they will look even better (IE, more like "Pacific Northwest Pines" and less like artificial Christmas trees).
But judicious trimming and customizing aside, I can't go with all Hekis. Real forests being what they are, going with all the same kind of tree would probably look pretty stoopid. So, my next stop on the "cheap and easy" express was a visit to JTT Trees. Now, these guys offer a huge variety of trees. But the ones that really caught my attention were their Econo-Conifers and Econo-Pines. For $27 you get 36 trees of varying height (2"-4"). And for cheap/pre-fab trees, they pass the "three foot" test pretty well -

Unfortunately, upon closer inspection... well, not so good -
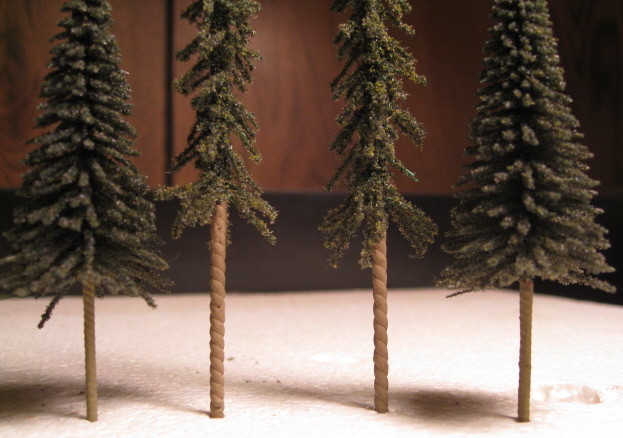
Nevertheless, I already have a couple of boxes of each (pine and conifer), so I'm determined to do something with them. And one of the more plausible sounding solutions to the whole "barber pole" problem that I've come across is to try brushing the trunks with latex caulk and then repainting them. And if that turns out to be viable (IE, not too painful), then the JTT's are definitely in play. If not? Well, I dunno... we'll see.
09/23/08 - Getting on with the coarse ground cover
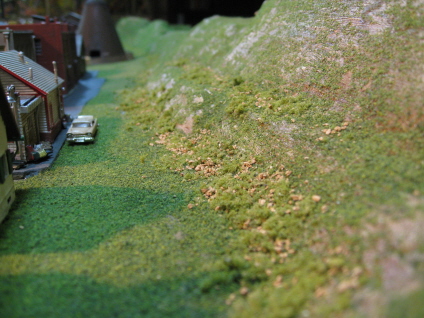
I actually did a lot of this work a couple of months ago, figuring I'd finish up with all the ground cover in relatively short order and then be able to document it all at once. Well, obviously that plan went by the wayside at some point. Anyway, I started off (way back when) by distributing a lot of WS "Talus" around the base of the hills (to more or less simulate the piles of crumbled rock one generally finds underneath limestone facades).
Now, I've never been a huge fan of WS's Talus product (honestly, it looks like "Grape Nuts" cereal to me). But I guess I've been too lazy to seek out something better. And to make matters worse, I used some leftover talus from my last layout - the coloring of which turned out to be not quite right (at least as far as matching the rock formations on Shay). So, my quickie "solution" to the problem was to simply bury most of the offending rock underneath piles of WS "Coarse Turf". However, at this point I remain dissatisified with the results of said quickie fix. And as soon as I get a bright(er) idea, I plan to revisit the whole situation. Hell, if I have to rip it all up and start over, I'll bleeding well do it. I mean, it's just foam and fake rocks...
Anyway, talus problems on the backburner, I soldiered on scattering various shades of WS coarse turf hither and yon. And I tell ya, I have always been in awe of the way this stuff adds instant 3-D excitement to an erstwhile dull scene. Better still, it's insanely easy to apply. In fact, if I'd never heard of Scenic Express's "Buffalo Grass", I'd most likely be done with this whole turf stage and moved on to other things (angsting over trees, for example).
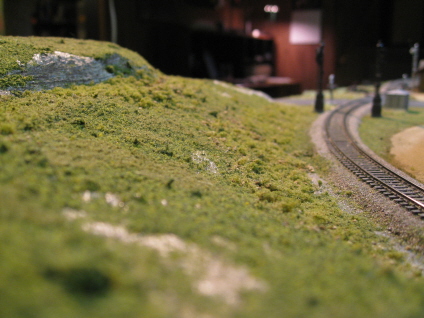
However, stuck with a product that's simply too cool to ignore (the buffalo grass), I'm now doomed to spending much more time on the "turf" stage than in the past (IE, more than one day) -
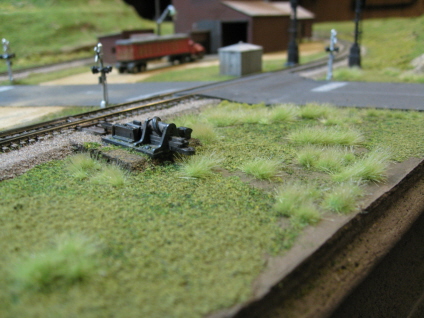
One thing I discovered about BG in this most recent pass is that you don't actually need to apply any extra adhesive to it. I didn't notice this before, but once peeled off their little plastic sheets, the bottoms of the clumps remain plenty sticky enough that they'll adhere to whatever surface you decide to plunk them upon. So, that should help speed up the process.
Anyway, I went ahead and ordered up a second color of BG for a bit of variety ("summer green" as opposed to my original "spring green"). So, if nothing else, I have that as an excuse for continued sloth and procrastination.
10/08/08 - Continuing to get on with the coarse ground cover
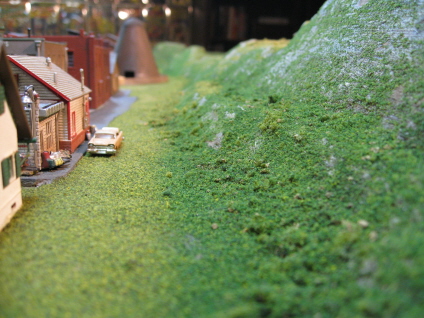
My first (admittedly lazy) whack at addressing the "wrongly colored" talus situation was to simply try recoloring it all "in situ". This involved eye-droppering weatherwash onto the talus-strewn areas in a vain attempt at getting the stain on the "Grape Nuts" to match more closely with my rock formations (and at the same time, not screw up the underlying turf).
Well, that didn't work... The rock coloring didn't change appreciably, whereas the underlying turf coloring totally changed. IE, all of that weatherwash spew basically wound up looking like a gigantic toxic spill around the base of my hills. Um, oops?
OK, I'll admit it, I didn't really have high hopes for that particular piece of tomfoolery from the get-go. And once it became obvious that it was a dumb idea, I went ahead and simply eye-droppered Scenic Cement onto the offending areas and covered it all up with a new layer of WS turf (a combination of coarse and fine turf in varying shades of green). So, problem "solved" - the dumb rocks are, for the most part, buried where nobody will ever see them. And the rocks that you can still see are minimal enough that they no longer stick out like so many sore thumbs.
At this point I'm quite happy with the look of things. In fact, I think my overall turf situation wound up looking a bit more realastic as a result (what with the added variety of coloring and texture). Still, I may eventually decide to revisit the whole talus situation later on (re-adding some - but correctly colored for a change).
So, with the talus problem more or less solved, I went ahead and finished scattering WS coarse turf hither and yon (a task which took about 10 seconds) -
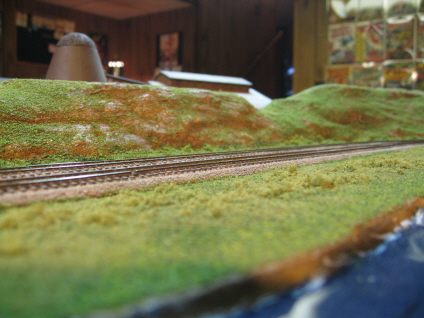
...then I pressed on with the process of sprigging in buffalo grass tufts hither and thither -
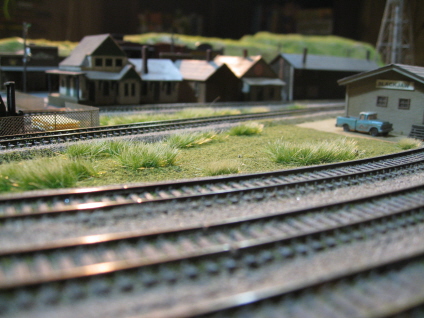
I have a definite love/hate relationship going on with this buffalo grass. I absolutely love the way it looks, but I'm really growing to hate all the effort vis'a'vis the placing of it. Oh, don't get me wrong - plucking it off the plastic sheets and sticking it in place is a simple task. However, it seems to work best as a scenic "highlight". Consequently, you have to sit there and make an aesthetic decision for every stinking tuft. Honestly, it makes my brain hurt (and really makes me dread all the more the whole future "decide where all the trees are going to go" project).
Oh yeah, I also spent about a month (on and off) building this crazy wooden caboose kit -
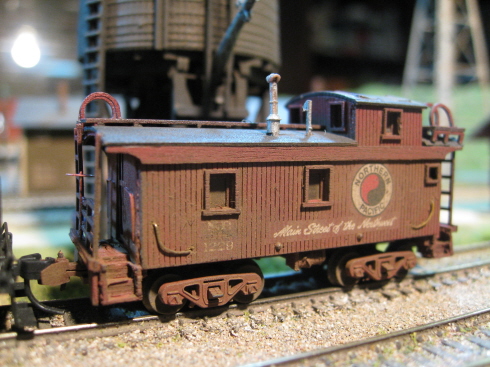
See? This layout is taking forever, but I have plenty of excuses!
10/28/08 - Yeah, I've hit the wall

Well, I guess I've finally met my match. The mere thought of spending any more time on the "buffalo grass death march" fills me with primal dread. Curse you Scenic Express! Worse still, I've suddenly developed this inexplicable passion for building/painting/decaling locomotives and rolling stock. Consequently, work on "Shay" has come to a screeching halt.
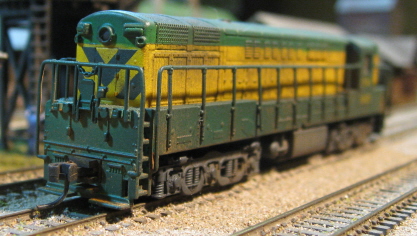
Sorry about that. Anyway, until such time as I decide to get off my ass and actually finish this thing, I guess I can at least regale you with pictures of some of the other stuff that I've been having a blast working on. EG, my Atlas Trainmaster (Chicago & Northwestern) -


Bachmann Doodlebug (Northern Pacific) -


Life-Like C-Liner A/B (Northern Pacific). Yeah, I'm going straight to hell for this one -


11/08/08 - Back in the saddle!
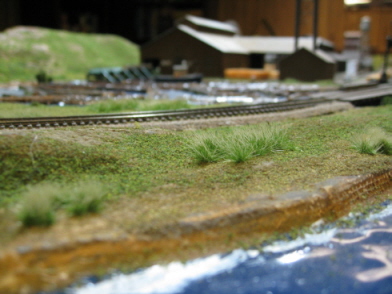

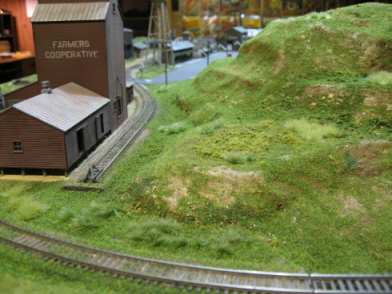
I finally figured out a way around my buffalo grass mental roadblock. I started off by adopting the old "the journey of a thousand miles starts with a single step" philosophy - IE, instead of just avoiding the stuff entirely, go ahead and stick a piece on. Then, if you feel like doing more, go ahead. And if not, fine, at least you did one piece. Maybe you'll do another piece tomorrow. So, that at least got me going again.
Next, I put a finite limit on the entire project. Basically I promised myself that the buffalo grass I had on hand was going to be it. For good or ill, once that was gone, I was done. And although it seems goofy, that really did help to get me motivated. For whatever reason, I find it very difficult to even get started on tasks that are of the "no end in sight" ilk.
Lastly, I got a bit of helpful advice from an emailer (hi Charlie!) that basically boiled down to "nature is chaos, stick the damned weeds anywhere and everywhere". And although I resisted the idea at first, it suddenly started making a lot of sense to me. I couldn't really argue with the assertion that nature is chaos, but I also think that there is a "right" way to model that chaos as well as a "wrong" way. And if you've gone about things the wrong way, you immediately get that "something is off here" feeling in your gut. However, my eureka moment came when I realized I didn't have to get each and every tuft "right" as I slogged through the process of sprigging them in. Rather, I could (like Charlie said) stick them anywhere and everywhere, and then once in place, go back and remove all the ones that wound up looking "wrong".
As I got started on the "anywhere and everywhere" project, I discovered another nice feature of the buffalo grass. Namely, that the individual clumps are held together by the adhesive that holds them to their plastic sheets. The upshot of that is that you don't have to pluck them off one at a time - rather, you can rip them off in great huge chunks and install them all at once. So, now I was really in business. And wow, did things ever go fast! I think I burned through that stuff in about fifteen minutes. In fact, I actually had to force myself to stop so that I'd have some left over for future "touch up" jobs.
Once I'd finished my planting frenzy, I then spent a bit of time looking things over and removing the odd sprig here and there that wasn't quite fitting in. And before you know it, the whole job was done. I couldn't believe it. Faster than you can say "I hate buffalo grass", this stupid task that I'd been pointlessly agonizing over for like two months was behind me. Wow.
So anyway, boo-yah! Bring on the trees!
11/11/08 - Meanwhile, back in the paint booth


C&NW didn't actually have any Erie-Built "B" units, but I'm not about to let that stop me from putting one into service over here in fantasy-land.
11/17/08 - More adventures in paint
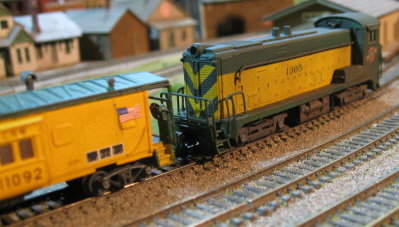

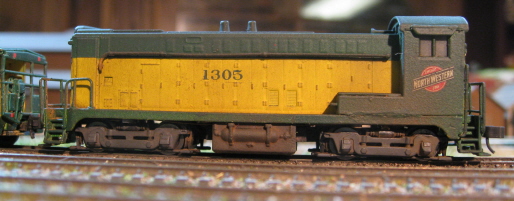
C&NW never had a VO-1000 that looked like this. But, hey, that's their problem.
11/17/08 - Planked over some ties

Upon further review, I decided I didn't like the look of the track on my carfloat apron. I don't know why this never occurred to me before, but it seems fairly unlikely that said apron rails would be laid on actual ties. And after revisiting the original Kootenay article, my suspicions were indeed confirmed - nary a tie in sight.
My initial idea was to retrofit a second layer of planking over the entire structure (ala the carfloat). Unfortunately, removing the tie-ends in situ was a bear that I was not in the mood to hunt. Further complicating matters was the fact that one of the tracks is actually curved. Still, I did go ahead and fabricate five different puzzle pieces out of Evergreen V-groove. Unfortunately, once placed, said pieces looked a bit too Picasso-esque for my tastes. So, I opted instead to keep things simple and just planked over the ties between the rails. And I actually think that that wound up looking pretty good. And hell, I bet if I spent a few days googling "carfloat apron", I could probably come up with at least one that looked this (and if you buy that, I have some mutual funds that you might also be interested in...)
Cutting the curved insert was a bit of challenge. However, after a bunch of "getting me nowhere" attempts, I had a bright idea. I grabbed a section of curve (same radius as the one on the apron), taped it to a sheet of Evergreen styrene, and then sprayed the whole thing with some brown paint. And voila, a template! All I had to do then was cut along the non-painted lines in order to get a perfect insert. Unfortunately, that whole deal probably used up my bright idea quotient for the foreseeable future. IE, prepare for much thrashing and flailing in the weeks to come...
Oh, and you may have noticed my poop-covered pilings. Yep, I painted those bad boys back in July. And if Neal of Neal's N-Gauging Trains would ever get off his ass and finish my seagulls (back-ordered since July), I might just be able to put some biological reality to all that crap. In the mean time, I guess I can proudly aver that I am not the only procrastinator in this hobby...
11/17/08 - Tree decisions

Well, I went down the "caulk and repaint the trunks" road with a couple of the JTT trees. And unfortunately, I can't say that I'm all that impressed with the results. Even without the "barber pole" trunks, they still look pretty fakey and pre-fab to me. Conversely, I can see all sorts of possibilities with the much more realistic looking Hekis (vis'a'vis trimming them into different shapes and sizes). So, at this point I think I'm going to make the Hekis my bread and butter.
I guess as I start slogging through the whole process of planting trees, I'll probably get a better aesthetic feel for things. And adding a handful of more intensely realistic (IE, more expensive) "highlight" trees later on is certainly a possibility. But in any case, I feel like I at least have a plan of attack now. So, Heki Ho!
11/18/08 - Another trip to fantasy paint-land
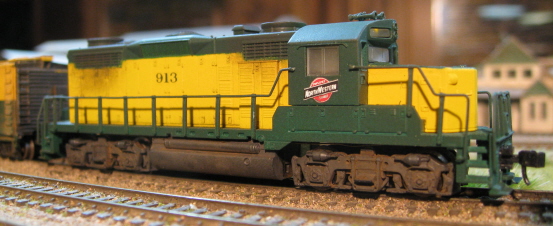
No, C&NW didn't have any GP-20's either... My apologies to rivet-counters everywhere!
(And I swear, I only have one more of these weirdo paint projects to get out of my system)
11/19/08 - Toys! Whee!


I decided that given Slackjaw's small size, one wouldn't necessarily expect to find a lot of bumper-to-bumper traffic. So, I did my best to restrain myself (the ridiculous expense also helping in that regard). Still, it's hard to resist going overboard with the toys, and I probably have a couple-three more than I really need. And I'll tell ya, it never ceases to amaze me how quickly even a tiny little layout like this one can swallow up $400 worth of cars of trucks. Yikes.
Whilst shopping for "old" cars, I started out by amassing all the usual ready-to-run suspects from Woodland Scenics and Classic Metal Works. I also purchased about a dozen NuComp Miniatures resin kit cars, figuring I'd use them to augment my RTR fleet. Not so much as a money saving thing (although that was a contributing factor), but rather to simply get a wider variety of models (since most of the CMW models from the 30s, 40s and 50s were run a few years back and are generally hard to find now).
However, once I actually got the NuComp kits in hand and started calculating the effort involved (vis-�-vis assembly and paint), I decided the end-results probably weren't going to justify the sweat. Frankly, my assumption (based on my past experiences with resin kits) was that they were going to look pretty awful parked next to my RTR cars. So, I sold the NuComps (unopened) and spent a few days hunting down the various out-of-print CMW cars on eBay instead. And yeah, lots of money was spent. But frankly, I think it was worth it. Those RTR cars are damned nice looking, and there's just no getting around that.
Still, it wasn't all "let's burn money like Bill Gates on a bender". I did wind up saving a few pennies by purchasing a 4-pack of Ertl "Dick Tracy" cars (no, I'm not kidding). They're actually quite decent looking 30's-style sedans and coupes, and can generally be had for cheap. And once you remove the goofy "Dick Tracy" graphics, they blend in with their more expensive counterparts just fine -
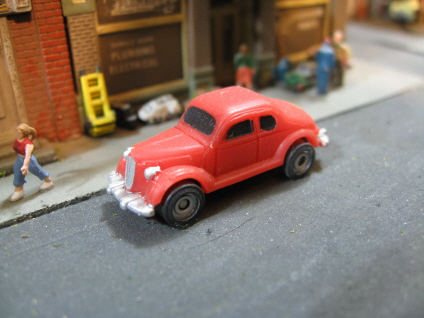
I did get a decent tip re resin car kits, and maybe I'll be able to make use of it some day - to get realistic looking windows, paint the whole car (windows and all) and then use a #2 pencil to color in the windows. I've seen actual pictures of the end results, and it looks great - just like glass windows and a darkened interior.
As for the cars I did wind up purchasing... Since I don't generally like the "just rolled off the showroom floor" look you get with these things (as delivered), I went ahead and sprayed them all with flat finish. Then (for a bit of variety), I Bragdonized about half of them to one degree or other. As far as placement goes, I just dip the wheels in FTG and plop 'em down. Era-wise, my vehicle selection is pretty much all over the map. Still, I did manage to stick to my plan of keeping things pre-1960 (for the most part).
I have to say, I'm really falling in love with these new "Scenic Accents" vehicle/figure sets from Woodland Scenics. They're kind of spendy, but they really add life to a scene -


11/25/08 - Here come the trees!
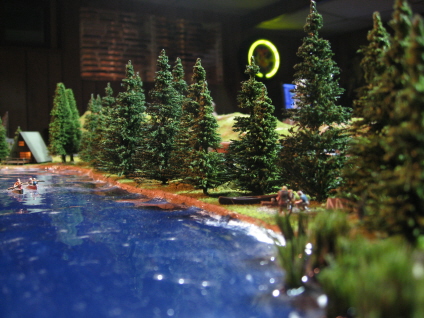
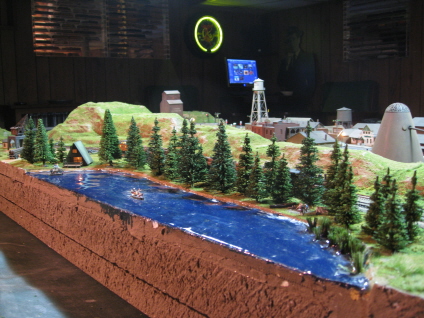
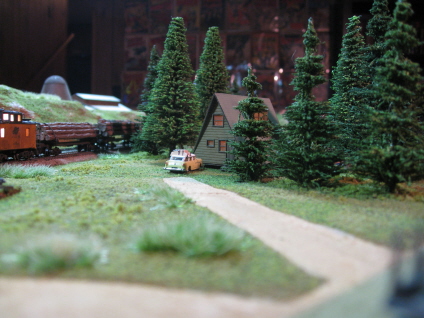
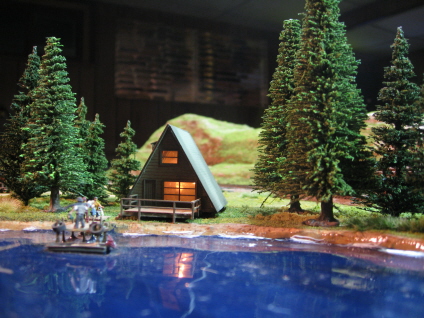

Wow, I am totally sold on these Heki Pines. I thought I'd experiment with placing a few trees along the backside lakeshore, and before I knew it I'd burned through an entire box. And as I'm buzzing along, I'm thinking "hell, I don't need to trim or otherwise modify these things, they look great right out of the box!" And it's a darned good thing too, because that whole box wound up covering, what, about five percent of the layout? Wow, that's a lot of boxes of trees I'm ultimately going to have to place. But no worries, finishing up the rest of the layout is going to be a breeze.
At this point I'm thinking I might just go 100% Heki on the whole deal. My original concern was that my forest would look way too generic if I went with a single brand of tree. But these Hekis are just irregular enough (both in size and shape), that you don't really need anything else to provide variety. Thank you, Heki!
For now, I'm just sticking them into the foam base without any sort of adhesive. They seem fairly sturdy without the additional assistance, and I can more easily rearrange things if I wind up with the odd tree that's not fitting in with its neighbors. Once I'm happy with everything, I imagine I'll use a bit of FTG on the trunks to fix things more firmly in place. Or not... we'll see, I guess.
11/25/08 - Oops, I ran out of trees

Well, I burned through my second (and last) box of Hekis in about 10 seconds. Wow, this is fun (and easy). Now I get to twiddle my thumbs while I await my next shipment to arrive (and wow, only $14 for a box of thirty from BLW).
In the meantime, I went ahead and added a bit of small town splendor to the "residential district" by erecting a cheapie Model Power white picket fence and planting a triumverate of Woodland Scenics do-it-yourself deciduous shade trees. The trees are of the "twist up the prefab plastic trunk, slop on some Hob-E-Tac glue, and then dip the whole thing in clump foliage" ilk -
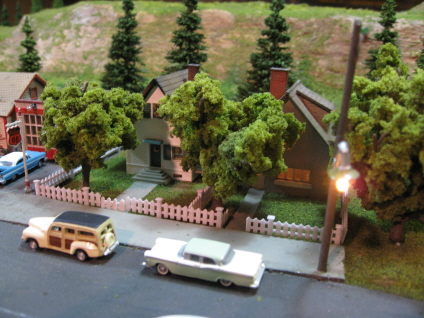

For the trees, I started by prepainting the trunks with Floquil "Roof Brown" (to make them look less plastic-y). On the foliage front, the trick is to wait a good twenty minutes for the Hob-E-Tac to get good and tacky before sticking on the greenery. Once everything dries, I give the trees a good shake to dislodge all the stuff that's eventually going to fall off anyway (saving the Slackjawians future raking). And lastly, I hit any shiny/gluey spots on the trunks and branches with a dusting of Bragdon brown.
So that's that. I guess while I'm waiting for Mr. Postman to deliver my trees, I might as well go ahead and do something about getting some wires strung up on those telephone poles...
11/29/08 - Oops, I ran out of trees (again)
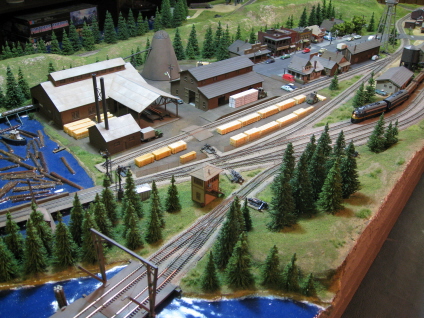

Wow, when it comes to estimating the number of trees one might need for one's layout, pick a ridiculously high number... then multiply it by four... then double it. Sheez! I ordered up another four boxes of Hekis (120 trees), figuring that would probably be enough to finish off the layout. Shyeah, right! At this point, I'd say "a third of the way there" would be an optomistic assessment. Frankly, I don't know how you guys building room-sized, tree-infested layouts do it. The trees alone must take years!
Anyway, the good news is that I did get past my last "what the heck do I do here" conundrum. Namely, what to do about that tall, skinny ridgeline down the center of the layout. My initial fear was that if I stuck trees up there, they were going to stick out like a lot of sore thumbs. Conversely, I also feared that if I didn't put trees up there, the whole danged ridge was going to become the very avatar of sore thumbitude. Fortunately, I got a very sensible suggestion from a guy over on the Atlas Forum (Dave Foxx). His idea was to plant trees right up the sides of the ridge (or at least in the places that weren't entirely vertical), using tall trees on the bottom, medium-sized trees up the sides, and short trees on top. And wow, did that ever work out great! Not only do the trees on top of the ridge not look out of place, they actually look completely at home up there. Fortunately, I built a lot of undulation into that ridge, so even though the trees on top are (for the most part) all the same height, they have a very natural looking up-and-down flow to them. So, whew, another potential mental roadblock blasted into smithereens.
Along the way, I've also been figuring out (or re-remembering) a few other handy conventions vis'a'vis tree placement. First off, trees look best in discernable clumps (even in an overall "forest" setting). And (for whatever reason), said clumps look best with odd numbers of trees. I have no idea what that's all about, but I've been told that it has something to do with the fact that odd numbers of things make the perception area of the brain happier (um, OK, sure).
The other thing I've discovered is that these clumps of trees tend to look best with the trees crammed right up next to each other. Which means I'm probably going to have to go back and shoehorn a few more trees into some of my earlier groupings (where I left a bit too much open space). IE, more money for Mr. Heki.
Lastly (and maybe this is just me), but I've also noticed that on the macro level, trees tend to look more natural when flowing from short to medium to tall and then back again (rather than a hodgepodge of different sizes). It just seems to lend an overall flow to the entire forest (and once again stimulating that "happy response" in the perception center of the brain). Fortunately, I haven't been going nuts trying to make every single tree placement "perfect" (having already learned that lesson with the buffalo grass). Basically I've been going with the "anywhere and everywhere" theory, figuring I'll be able to tweak things later on when all the trees are actually in place.
I have to say, I am totally geeked about the way these trees are bringing this layout to life. Having never really been a big "tree guy" before, I guess I had no idea what to expect. But wow, they make all the difference in the world. And even better, I can actually see the light at the end of the tunnel vis'a'vis layout construction. At this point I'm thinking I should be able to wrap up this whole shebang by Christmas.
11/29/08 - A better idea for lumber stacks (and only five months too late)
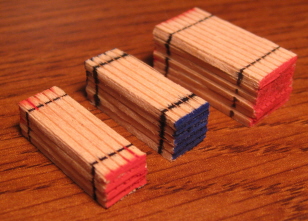
Since I find myself in "waiting for more trees" mode yet again, I decided to putter around with a bit of detailing instead - namely, adding a few stacks of finished lumber to the transfer building truck loading dock. However, I was entirely not in the mood to tackle assembling said stacks one bloody stick at a time (ala last June). Fortunately, I came up with a much easier way to go about it (one of those "what the hell was a thinking?" moments). For these stacks, I simply took a sheet of pre-scribed balsa wood, cut it into strips and glued the strips together. Voila, instant lumber stack. And whereas my first one-stick-at-a-time stack took me about an hour to put together, I think these three wound up taking about two minutes total.
Once assembled, it was just a matter of painting the ends and drawing on some "ties" with a black pen. Just that simple. Honestly, what the hell was I thinking back in June?!
12/01/08 - Whipped up a portable photo backdrop
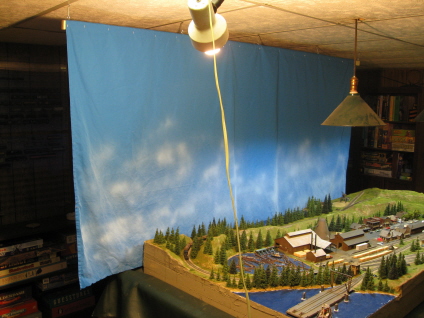
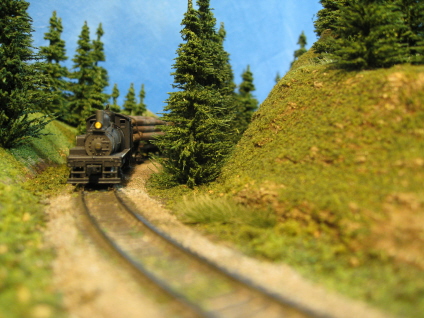
I decided I was tired of looking at my grungy rec room walls in all of my web photographs. However, since most of my layouts are of the "360 degree view" ilk, I also decided that I needed something simple and easily relocatable. And since my tree-purchasing bills are quickly sending me to the poor house, I also decided I needed something cheap. So, I bought the cheapest blue bedsheet I could find, stapled it to the cheapest 1 X 2 I could find, screwed in the cheapest eye/hook hardware I could find (for suspending it from the ceiling), and painted it with the cheapest white spraypaint I could find.
The whole rig wound up costing about twenty bucks. And hey, it actually works.
12/08/08 - I am a lineman for the county 
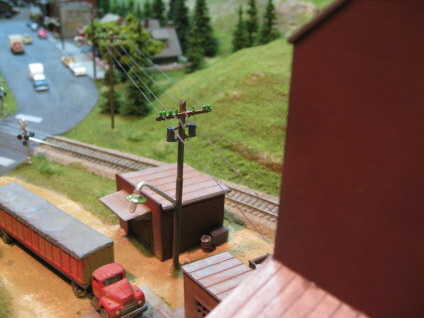
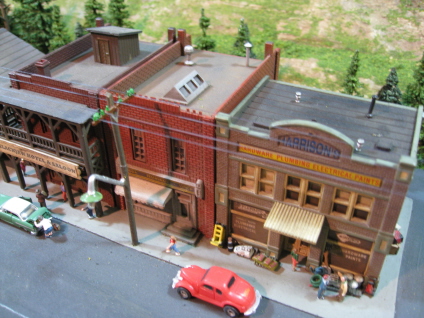
When it comes to model railroads, I've always had this odd obsession with utility poles. I'm not sure what the deal is there. Maybe too much Glen Campbell in my formative years, or maybe I've simply gotten bored and impatient with other modelers' uninspired efforts vis'a'vis their poles (no wires, etc). Anyway, whatever the case, I always feel compelled to raise the bar on my detailing of said poles with each successive layout.
For the poles on Shay, I decided to start out by going with four wires per (as opposed to my usual two). And given the nigh invisiblility of my chosen wire (Berkshire Junction EZ-Line), I guess one can never have too many wires (at least in terms of observability).
Using FTG to fix the wires to the insulators still seems like the easiest way to go about things (especially since anything harsher causes the EZ-Line to go all bizarre and crinkly on you). Unfortunately, the support arms do wind up looking a bit more globby with each successive wire. Not a big deal when viewed in person, but a bit of an eyesore in the "close-up photography" arena. Ah well, that's mediocrity for ya.
Now, one thing that's always bothered me about utility poles on model railroads is their basic disconnectedness from everything else. Most people don't model wires at all. And those that do don't generally bother to connect them up to anything beyond the poles themselves. This sort of reality disconnect is just the kind of thing that drives obsessive people (like me) crazy. So, this time around I decided to take a whack at actually having at least a couple of my poles looking like they were delivering electricity to the world at large.


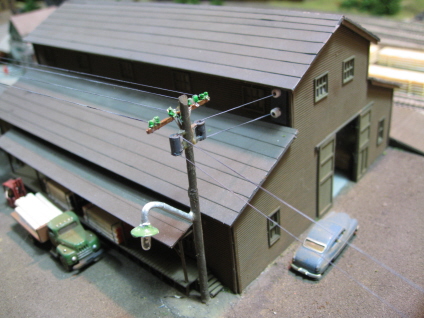
I decided to start out by doing a bit of research, and actually went so far as to photograph a few "real world" utility poles. And what I discovered was, wow, they're complex. IE, that wasn't going to happen.


So, I decided to take a few mediocre modeler short-cuts instead. Basically, I figured all I really needed was a few transformer-looking thingies on the end poles that, in turn, had some wires running into a couple of buildings.
For transformers, I used... transformers! Brilliant, eh? Seriously, I took some old "trainset style" telephone poles I had laying around from my less inspired days (Bachmann, or maybe Model Power), clipped off their transformers (along with their support arms), Dremeled holes through said transformers for wires, and then superglued them to the poles. For the building side, I took some leftover Con-Cor "electrical substation" insulators, glued them to some generic pieces of styrene, and then similarly Dremeled holes through them. Then the fun part - I threaded lengths of EZ-Line through a needle, fed it through all of the various holes, and then glued the assemblies to the buildings in question.
So yeah, probably not my finest hour. But certainly good enough for mediocre modeler purposes. Next layout I'll do better, I promise.
Meanwhile, I continue to wait for my next batch of Hekis (now back-ordered). And yeah, it's looking my original "done by Xmas" estimate is pretty much out the window at this point. I suppose I'd better go file for an extension with the NMRA or something. Bloody bureaucrats and their red tape!
12/12/08 - Roiling the waters

I was looking at Kootenay Lake when I realized that I'd added turbulance around everything in the water except for the actual carfloat. So, I pulled out the white paint and dry-brushed some on.
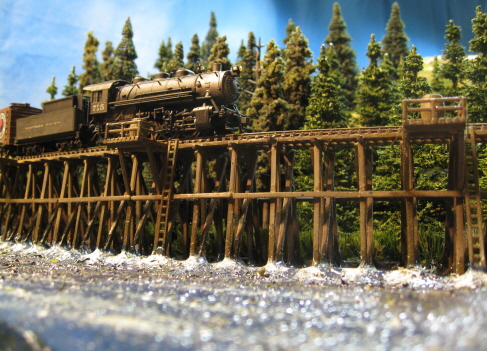
And since I was in turbulence mode anyway, I figured it was about time I did something about the trestle as well. Back when I'd originally poured the RW, it wound up riding up the supports a bit and settling somewhat lower everyplace else - IE, it serendipitously wound up looking like waves were crashing up against the timbers. Well, where there are waves there is turbulence, so I dry-brushed the sticky-uppy RW with a bit of white paint -

That actually wound up looking pretty good. But then I thought, well, if there are waves hitting the trestle, then there should be waves rolling in across the lake. So, I dry-brushed those on as well. Fortunately I had all that long-since-painted-over Water FX already in place, so the waves came to life pretty quickly. And I don't know why dry-brushing waves never occurred to me before. It seems like kind of a no-brainer now.
In addition to the dry-brushing, I also used my finger to smear and elongate the waves, with the end-result being quite a bit more subtle and diffuse than any of my earlier "too much paint" experiments. No, not quite ready for any magazine covers, but definitely an improvement over my previous attempts at painting waves.
12/12/08 - Unable to continue planting trees, I decide to cut some down instead
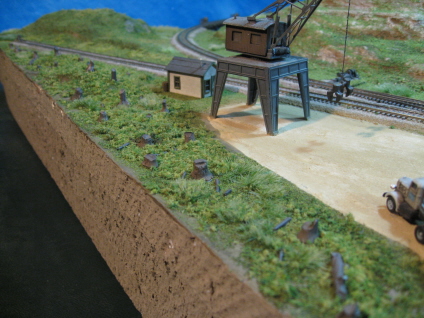
As pretty as all that tree-infested scenery is shaping up to be, I figured it just wouldn't be a logging layout if I didn't have at least one stump-strewn clear-cut. So, I picked up a couple of packages of Woodland Scenics stumps (the white metal ones) and had at it.
Based on my observations, "real world" clear-cuts generally resemble a war zone - patches of bare earth amongst the weeds, tangled underbrush, bits and pieces of mangled trees, etc. So, that's what I shot for here.
For the stumps, I simply sprayed them with Floquil "Roof Brown", hit them with some Bragdon brown, and then FTG'd them in place. I did leave out the really big ones though, as they wound up looking a bit out of place. Next, I chopped up a couple of WS pine tree armatures and scattered the detritus hither and yon. Lastly, I added a chaotic blend of various flavors of WS coarse and clump turf as well as generous helpings of buffalo grass.

I think this all turned out pretty well. In fact, my tree-cutting bloodlust is now such that I'm tempted to extend the chaos even further. And if I don't get my next shipment of trees pretty soon, I very well might!
12/17/08 - As threatened, one last trip to C&NW fantasy-land

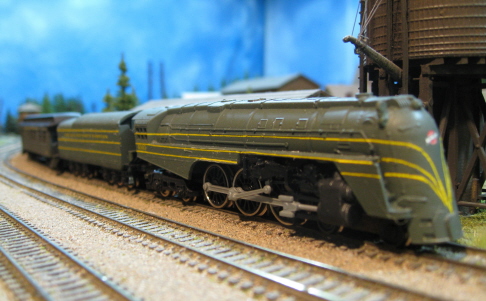
Well, these Con-Cor shovel-nose Hudsons don't look a whole lot like a C&NW E-4, but I wasn't about to let that stop me. And I must say, if I never have to deal with "long, skinny stripe" decals ever again, it'll be too danged soon...

12/19/08 - Decent photos? Trust me, it ain't rocket surgery...

I get a lot of people asking me how I get such nice looking layout photos. And although I'm not Ansel Adams over here (and I sure don't have the most expensive camera in the world), I do know that the secret to decent looking photos begins and ends with light. First of all, turn the danged flash off - the nicest, most professional looking layout in the world is going to look like a toy trainset under flash photography -
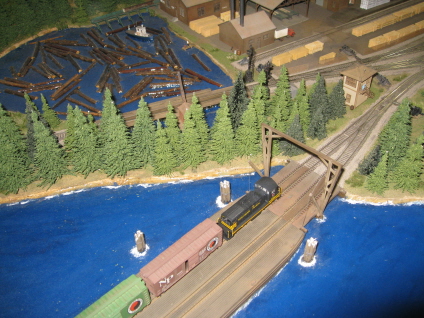
Next, get yourself a bunch of floodlights and pour as much light onto your subject as possible. The more the merrier! Or better still, move the whole thing outside and use that big floodlight in the sky. That's it... that's the ancient Chinese secret. Now, go forth and take some pictures that don't suck!
12/22/08 - Desuckified a Model Power phone booth
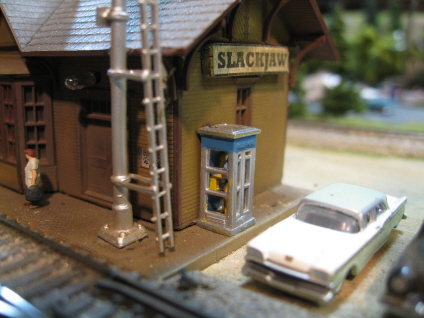
As you've probably noticed, I've been mixing in various bits of detailing between the larger projects. And although I'm not going to sit here and document every little box and barrel, I figure since I did put a bit of actual effort into this telephone booth, I'd go ahead and talk about it.
The booth is actually part of a larger Model Power detail pack ("Park Scenes"). Said pack also includes just all sorts of other handy stuff (trash bins, fire hydrants, mail boxes, park benches and a few "sitting" people). The booth is nicely detailed (including an actual phone on the inside). Unfortunately, Model Power (as is their wont) decided to make it virtually useless by painting it bright yellow. And although I've lived with the yellow in the past, I decided this time I'd do something about it.
After a bit of Googling, I learned that the formerly ubiquitous "aluminum and glass" phone booth has been around since at least the 1950s. So, that's the direction I headed. First, I removed the back and repainted the interior (Floquil "Bright Silver"). And since I had the wall off anyway, I went ahead and stuck a phone-using human in there. Once I'd gotten everything put back together, I then painted the rest of the booth silver and then added a blue stripe around the top (Floquil "GN Sky Blue").
No, not a huge project. But hey, even the small doses of reality help. As for all the rest of the detailing, I guess all of that will ultimately be revealed in the final photo gallery. So, keep your pants on (please).
12/22/08 - More trees

Yeah, I keep shoveling 'em on and Shay keeps swallowing 'em up. It never ceases to amaze me how small of an area 100 closely packed trees actually covers...
Anyway, as it turns out I'm going to wind up with a bit of arborial diversity after all. As I was happily plugging away with my Hekis, I got to thinking that having the occasional dead tree mixed in with the live ones would look pretty cool. And the quickest and easiest way to make dead trees that I could think of was to use WS pine tree armatures (sans foliage). But then, I further surmised that if I was going to have dead trees of the WS ilk, I'd better have a few live ones as well. And although I've never been a huge fan of WS's do-it-yourself pine trees (honestly, whatever it is they look like it, it sure ain't pine), I figured they were at least good enough to provide cheap (if not particularly easy) filler amongst the Hekis -
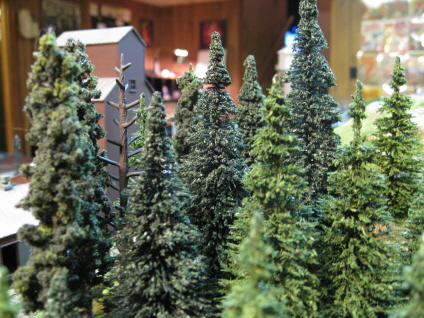
And since I've been burning through my bulk orders of Hekis faster than BLW can ship them, I also wound up mixing in some Busch "Tannen zum Stecken, mit feinem nadelflock" courtesy of YOLHS (that's "Flocked Fir Trees" for you non-Teutonic types). These are basically the same deal as the Hekis - just a little flimsier, a little less flocky, a little less sparse, and a little darker in color.
So, there ya go. I wound up with a bit of variety after all. And so far so good - I think things are shaping up quite nicely -

Part 2 - Base construction, tracklaying & wiring (and more buildings)
Part 3 - Roads, lighting and scenery (and yet more buildings)
Part 5 - Trees, detailing, and the end of the line