11/22/07 - Finished my first building, Model Power's "Gantry Crane"
This is one of those kits that's been around for decades. I know Atlas imported this thing at some point, but I think it actually originated from a German company back in the 1970s (probably Heljan). Anyway, I think it's well past time they retired the molds. There aren't a lot of parts to this kit, but pretty much all of the ones I got were riddled with flash. And those skinny boom pieces were an absolute disaster - all warped, cracked and broken. Yikes!
Anyway, I started by fixing the boom as best I could (adding a couple of additional support pieces in the process). Next, I sprayed the little shack thingy with Floquil "Roof Brown", everything else with Testors "Gunship Gray", and then glued it all together.
I immediately decided I really hated the look of that big bay window on the front of the shack. And I wasn't too thrilled with their simplistic "cable" scheme either- basically a string hanging from the end of the boom and not connected to anything else. So, to address both gripes, I decided to leave off the bay window and add a homebrew winch in its place. For that, I simply nipped myself a short piece of sprue (leaving two nubs on it for legs), and painted it with Floquil "Grimy Black". Once the paint dried, I coiled the supplied string around the "winch", and then ran it up and through the boom.
The tiny little hook they give you for the business end of the "cable" didn't look like it was up to the task of lifting logs, so I decided to build my own log grabber. For that, I nicked a couple of claws from my son's nigh infinite supply of Legos and glued a support bar between them. I then painted the whole assembly with Grimy Black and tied it to the end of the string.
At this point I decided I needed to do something about that string. I liked the look of the claw rig, but what I didn't like was the fact that it tended to spin around at will, positioning itself pretty much wherever it felt like. What I wanted was something that I could position over a log truck for time immemorial and have it look like it was about ready to grab a clawful of logs. So, to stiffen the string, I tried applying a thin coating of super glue. This wound up working great- the line stiffened up like wire, and the glue basically vanished.
Once all that was done, I brushed on a layer of "weatherwash" (India Ink added to a bottle of rubbing alcohol), and then brushed on various shades of Bragdon Enterprises "weathering powder".
I've been doing a little reading up on logging railroads, and oddly enough cranes very much like this one were in common use back in the day (albeit without the elaborate superstructure). So, not a bad choice at all for this particular layout.
So, that's it. Building #1 is done - and only 16 more to go...
11/22/07 - Finished my second building, American Model Builders's "Miner's Shack"
Well, I guess shouldn't say I "finished" this building, since I wasn't the one who actually built it. This was given to me as a gift a while ago and I've been trying to find a place for it on one of my layouts ever since. And as I was building the gantry crane, it dawned on me that the shack would make a nice companion piece for it (giving the logging crews someplace to grab a cup of coffee and warm up). I'm not a huge fan of wood kits, but I do like the way this one looks.
So, that's it. Building #2 is done - and only 15 more to go...
11/25/07 - "Finished" a couple more buildings - Cornerstone's "Golden Valley Depot & Freight House"
It's kind of embarrassing adding these Cornerstone "pre-built" structures to my layout- I mean, talk about taking the coward's way out. But I tell ya, they're damned fine looking buildings, and exactly the kind of small passenger/freight facilities that I needed for my little town. And Kudos to Walthers- these are very high quality (damned near justifying the hefty price tag). They're put together perfectly, and the paint is just outstanding - way better than I could have done myself.
I didn't have to do too much to prep these for installation. Although, I did decide to go ahead and remove most of the garish stickers from the passenger depot (stickers advertising various businesses that I just ain't going to have in my town). I just peeled 'em off and then cleaned up the residue using Goo-Gone. Then it was just a matter of brushing on some weatherwash, followed up by some Bragdon powder.
So, onward and upward- only 13 more to go...
11/25/07 - Finished Cornerstone's "Farmers Coop Grain Elevator"
Boy do I love these Cornerstone structures. So easy to put together, yet so impressive looking once assembled. For this one I started by spraying all of the walls with Floquil "Tuscan", all of the roof sections with Floquil "Bright Silver", the elevator base with Floquil "Concrete", and the storage shed base with Floquil "Rail Brown". Next, I handbrushed the doors and window frames with Floquil "SP Lark Dark Gray". I did consider going white on the trim (which probably would have looked better), but I always have a hell of a time keeping that runny white paint "inside the lines". So, I whimped out and went with the gray instead. Next, I painted the door tracks Grimy Black and the scale Floquil "Roof Brown" (for the wooden portions) and Grimy Black (for the wheel tracks). Once all the paint dried, I then glued everything together.
To finish things off, I brushed on a layer of weatherwash, applied the decal (with the help of some Solvaset), sprayed the whole thing with Flat Finish, and then once that dried, brushed on a healthy dose of Bragdon powder.
On an unrelated note, I have to say I really like the look one gets photographing this stuff in the light of day. When taking pictures in my basement, it doesn't seem to matter how many 100 watt bulbs I point at my subjects, they still wind up looking dark and dingy. I tell ya, there's just no substitute for Mr. Sun.
Anyway, 12 more to go (pant, pant)...
11/29/07 - Finished Cornerstone's "Mountain Lumber Company"
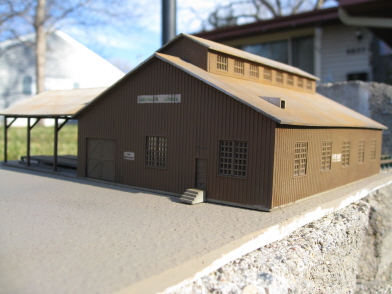

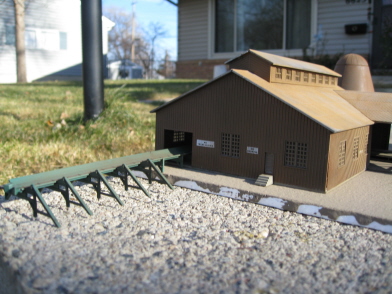
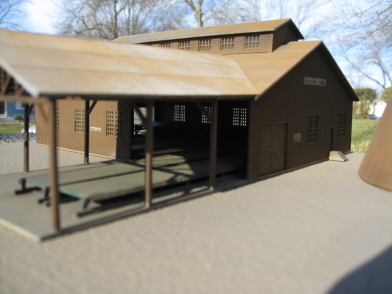
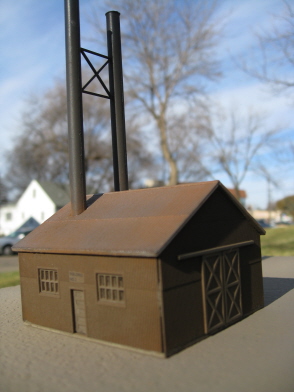
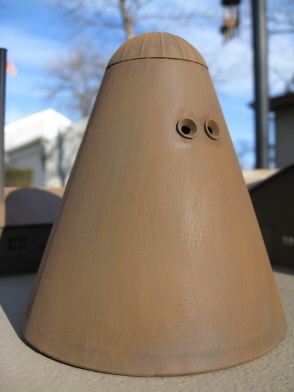
I started by spraying the walls and shed supports with Tamiya "Red Brown", the bases and steps with Floquil "Concrete", the roof with Floquil "Bright Silver", the smokestacks and sorting table supports with Floquil "Grimy Black", the conveyor and sorting tables with Floquil "Dark Green", and the conveyor walkway with Floquil "Roof Brown". Next, I glued in all the windows and doors (leaving them their stock brown color), and then glued everything together.
It's a bit of a challenge getting all of the various roof sections into place (and not leave a bunch of gaps and seams all over the place)- particularly on the sorting shed. I simply couldn't get the three shed support pieces to fit into the designated notches on the two shed roof pieces without leaving huge gaps where the shed joins the main building. And after much finagling, I finally just said screw it and let the roof go where it wanted to go and stopped worrying about getting the supports into the damned notches.
The kit supplies three sections for the conveyor assembly, and once I'd put those together, I decided it looked way too big for my needs. So, I took it apart and reassembled it, this time leaving off the center section. I'd say the end result turned out just about perfect.
Once I got everything put together, I brushed the conveyor belt with Grimy Black and the large door on the boiler house with Model Master "Sienna" (basically trying to match the stock color of the other doors and windows). Next, I brushed everything with weatherwash, applied a few decals, sprayed on a layer of flat finish and then finished up with various shades of Bragdon powder.
At this point I haven't done anything with the sawdust pipe that's supposed to run from the mill to the slash burner. I really have no idea how all these buildings are going to be situated on my layout, so I figure it's best to just leave things flexible for now.
I have to say, this is quite an impressive set of buildings. And once finished, the entire complex turned out to be quite a bit larger than I was expecting. In fact, at this point I'm wondering if I'm even going to need to add two more buildings to the complex (as originally planned). For sure I'll want the transfer building, but I'm no longer convinced I'm going to need that Model Power "Valley Lumber Yard" building. Oh well, I guess I'll just have to keep building and see where it takes me.
11 more to go (or is it 10? who knows)
12/01/07 - Finished Cornerstone's "City Water Tower"
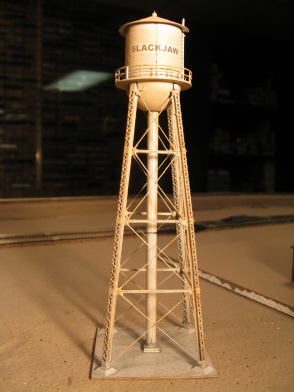
You'd think this'd be an easy kit to put together. I mean, hell, it's just a water tower. But damn, it took me a couple of days to get this crazy thing assembled. And I'll tell ya, the instructions are just not particularly helpful. First of all, when putting the tank on the walkway, ignore the misinformation provided in the instructions. Just find the little nub inside the tank and line it up with the little slot on the walkway. Next, do not try assembling the legs and horizontal crossmembers the way the instructions want you to - it just don't work. Instead, assemble the legs, base, pipe and tank and then glue on the crossmembers. It's a million times easier when the legs are firmly in place (and correctly spaced and angled).
The real challenge with this kit are the little X-shaped supports. The damned things are metal and require the use of CA (and if you've read any of my previous layout blogs, you know just how much I love working with metal and CA). For these, I decided to use gel-style superglue, just to give me something gooey to work with. And despite the gooiness, I discovered that it's pretty much pointless trying to do a whole bunch of these at once, as they tend to just fall off if you look at them wrong. What I ultimately wound up doing was laying the tower on its side and then sticking on all four "/" pins on the face-up side (one for each level), and then letting that glue dry for an hour or so. Then I'd repeat the procedure for the remaining three sides, getting all of the "/" supports in place. Then when that all firmed up, I'd repeat the whole operation for all the "\" supports (and thus explaining why it took me a couple of days to finish this thing).
Once assembled, I sprayed the whole thing with Tamiya "USAF Light Gray", brushed on a layer of weatherwash, stuck on a couple of laser-printed decals (and my apologies to the future denizens of what has now been dubbed "Slackjaw"), sprayed on some flat finish and then finished things off with some Bragdon powder.
So, a nice looking building, but I'm not looking forward to ever putting together another one. Here's hoping Walthers comes out with a pre-built version of this baby by the time I get to my next layout. I'll be the first one in line to buy it.
Anyway, 10 more to go...
12/01/07 - Another foray into wussy land (IE, more pre-builts).
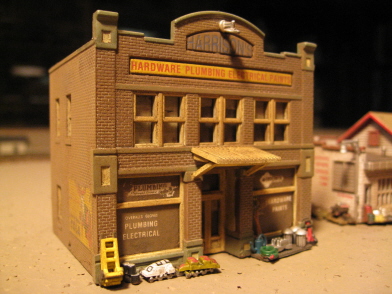
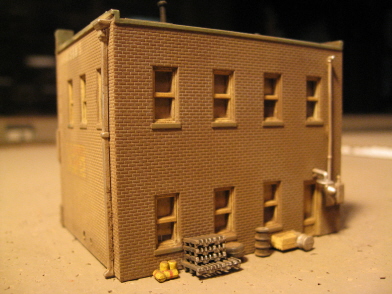
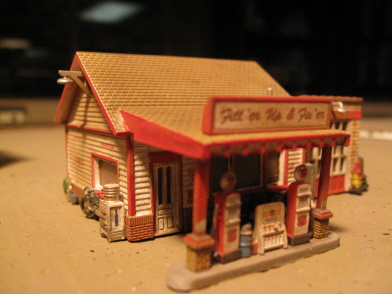
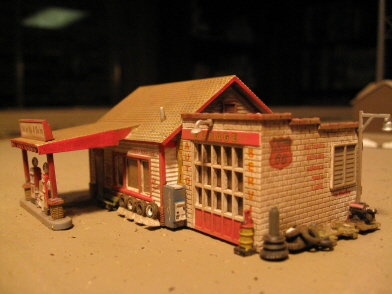
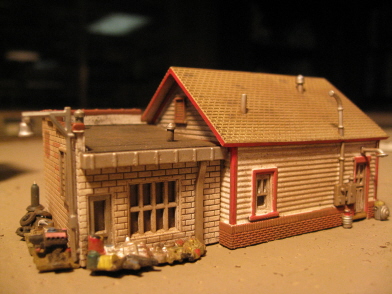
These Woodland Scenics built-ups ("Fill'er Up & Fix'er and Harrison Hardware) are nice looking little buildings, but I wish they hadn't gone all "George Selios" on them. I mean, I like detailing as much as the next guy, but it would've been nice if they'd simply provided all this junk ala carte (or at least made it easier to remove). All of the various blobs of detailing are glued into holes in the walls, making it difficult to rearrange and/or out-and-out remove any of it.
I did pull the crud off the sides of Harrison Hardware, since it'll ultimately need to live between other buildings in my future town. As for the rest of the stuff, I guess I'll just leave it be for now and see how I feel about it once I start actually putting my town together.
Not much effort required here - just some weatherwash, followed by a coating of flat finish and then some Bragdon power.
8 more to go... (wow, things really move fast when you let factory workers assemble, paint and detail your buildings for you).
12/07/07 - Finished Life-Like's "Rural Post Office" kit
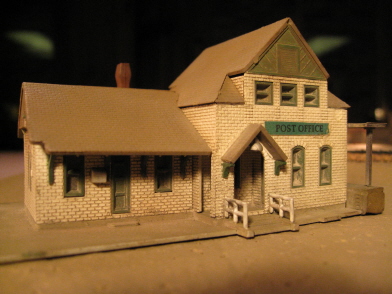
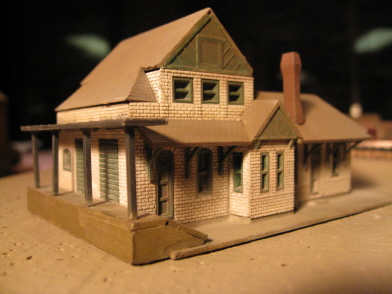
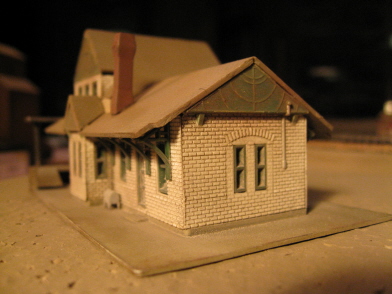
This is a pretty interesting little structure, and surprisingly detailed and intricate for a Life-Like kit. I was expecting something much more simplistic- more along the lines of the "four walls and a roof" kits you see from the likes of Bachmann and Model Power. So, kind of a pleasant surprise here.
I decided that the stock colors were acceptable, so I didn't wind up doing a whole lot of painting on this one. I did spray the base with Floquil Concrete, the loading dock with Rail Brown, the loading dock overhang/supports with Grimy Black and the stairway handrails with Testor's "Flat White". I also brushed the wood trim with Floquil "Dark Green" (to more or less match the window and door inserts), the chimney with Floquil "Boxcar Red", and the doorway light fixture and the wall fixture with Bright Silver.
Assembly is pretty straightforward, although getting all the various roof sections to line up was a bit of a challenge (as always seems to be the case). I think I wound up with more gaps than I'd care to cop to, but overall I think it went together pretty well. Once assembled, I did the usual weatherwash, decal, flat finish and Bragdon dance.
This is another one of those kits that comes with a big, elaborate base. And although I normally just leave those off, this one comes with all kind of steps and landings molded into it, so I wound up keeping it. I'll probably wind up trimming off some of the excess later on, but I'll figure that all out when I get to the point where I'm actually laying out my town.
7 more to go...
12/09/07 - Finished Model Power's "Star Journal" kit

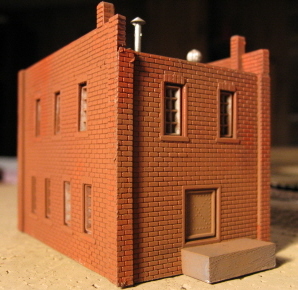
Sorry, I accidentally blew away my original "front view" picture, so here's one from the far distant future (just try to ignore all the stuff that you don't know about yet). Now, back to our story already in progress...
Wow, speaking of "four walls and roof"... that's just about all there is to this thing. Although having said that, I do think the front window and awning are pretty cool looking.
Once again, not much effort here. I painted the roof Grimy Black, the awning Flat White and the facade trim pieces and skylight USAF Gray (leaving the walls and window inserts in their stock colors). I left off the Lionel-esque clock tower and two-thirds of the fancy shmantzy facade trim pieces. I also left off the elaborate base (although I did snap off the steps - gluing them to front of the building). I also decided to forego the giant wooden loading ramp provided for the rear of the building, replacing it instead with a simple concrete loading dock. Lastly, I added a couple of Cornerstone Modular roof widgets.
To finish things off, I brushed on some weatherwash, added a couple of generic "cafe" decals (from my Gold Medal Models "Downtown Business" assortment), sprayed the whole thing with flat finish and then brushed on some Bragdon powder.
6 more to go...
12/12/07 - Um... oops?
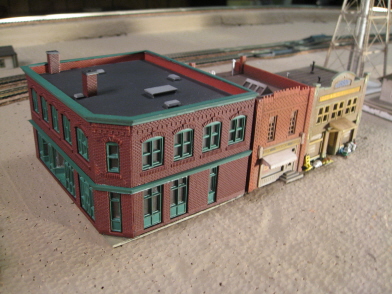
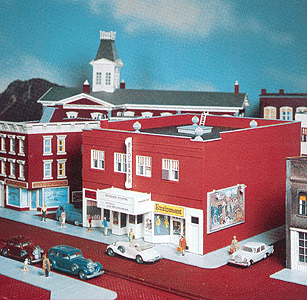
Hmm, I've suddenly come to the startling realization that designing a tiny little logging community isn't as easy as simply buying a few random buildings, plunking them down next to each other and then hoping that they somehow magically turn into a convincing looking "really-small-town". Yes, the buildings I've acquired for Slackjaw so far (Gas Station, Hardware Store, Cafe and Post Office) do seem to work well together. Better still, they also seem to have that basic pre-1940 really-small-town feel to them. However, the last two buildings on my schedule (Heljan Bank Block and Heljan Movie Theater) have turned out to be rather drastically out of step with the rest of the "so-far" Slackjaw vibe.
I just finished putting together Bank Block and was muchly surprised by its overall hugeousity. Blimey, the thing is bigger than my hardware store and cafe put together. Worse still, era-wise it looks completely out of place when parked alongside the other two buildings. And although I have yet to pop open the Movie Theater box, I can only assume that the same problems are going to apply there. Not that I was actually considering putting a movie theater in this town (I haven't gone completely off the rails over here). But even transmorgrified into something else, it's now painfully obvious that it won't work as a Slackjaw-type building.
So clearly, I need to rethink the Heljans. And now that I've reached the point where I'm actually having to expend a little bit of brainage thinking about structure choices, I'm starting to wonder if it wouldn't have made more sense to go with all wooden structures from the get-go (as opposed to the brick and mortar structures found in the Kootenay plan). Prototypically speaking, a town of this size and era probably wouldn't have a whole lot of brick buildings in it.
Unfortunately, I have this well documented phobia regarding lasercut wood structures and, as a consequence, they do tend to live way down at the bottom of my "maybe I should include this on my layout" list. Plus, as I was trying to translate the Kootenay "List O' Buildings" to disinclude stuff I've already used, I was basically following their lead - IE, all brick buildings. So, I guess ultimately Model Railroader is to blame for all of my current woes. The bastards!
Anyway, I don't think this constitutes a disaster (not yet, anyway). Despite their distinct lack of woodousity, I actually like the buildings
I have so far. It's just these last two that are screwing me up. So, I think what I'm going to do is save the
Heljans for some future layout and go ahead and replace them with structures more in keeping with my tiny town. And rather than
further embarrass myself by flip-flopping yet again, I think I'll just keep those choices to myself until such time as I actually
finish and like them 
12/17/07 - Finished Model Power's "Railroad Hotel" kit

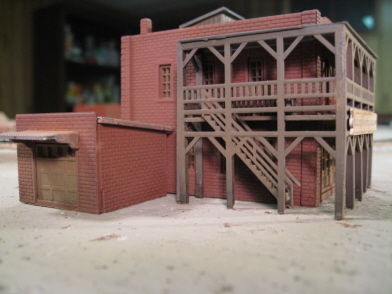

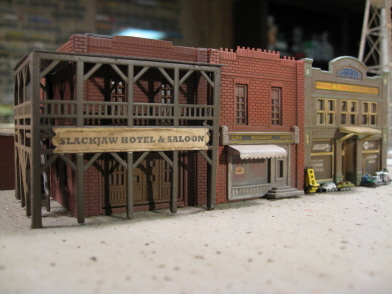
Well, no question about it, this is one thoroughly bizarre looking little building. Still, aesthetically speaking, it does seem to fit in pretty well with the rest of the nascent Slackjaw. Better still, a run-down saloon/hotel (no doubt featuring a couple of lumberjack-friendly gals) did seem like a no-brainer addition to this particular community.
Oddly enough (or maybe not), the main building turned out to be virtually identical to the one from the Star Journal kit (the front door and window inserts being pretty much the only differences). However, I think the rooftop shack along with that wild and wacky external stairway/walkway assembly do a pretty good job of disguising the whole "clone" factor. I also went ahead and actually painted this one in different colors to further camoflage the fact that the two are basically the same building.
Once again, I started out by chucking the elaborate base. And seeing as how I already have a way-more-than-adequate city water tower, I also chucked the supplied rooftop water tank. Lastly, I sanded the little pointy accents off of the top of the front of the building just to further differentiate it from the (nee Journal) Cafe.
For paint, I sprayed the walls with Floquil Tuscan, the door and window inserts with Floquil Rail Brown, the hotel roof sections with Floquil Grimy Black, the shed roof sections with Floquil Bright Silver, the rooftop shack walls and the external "stair/walkway" thing with Floquil Roof Brown, and the big sign with Testor's Flat White. The only handbrushing I had to do was Rail Brown on the rooftop shack door and Grimy Black on the tops of the chimneys.
I took the easy way out on the front sign. I simply printed it on regular old laser printer paper, cut it out and then glued it on (IE, it's not a decal). And at this point, I can't say that I'm real pleased with how the whole thing turned out. Once weathered, the edges of the paper became a bit obvious, and I may decide to revisit the whole thing later on (depending on just how much it starts to bug me over the coming weeks and months).
The rest of the procedure was as usual- weatherwash, flat finish, and Bragdon powder.
So, at this point I have one more "town" building I need to put together. And yikes, it's laser-cut wood, so things could get pretty ugly around here pretty quickly...
12/25/07 - Finished American Model Builder's "Ellington Mercantile" kit
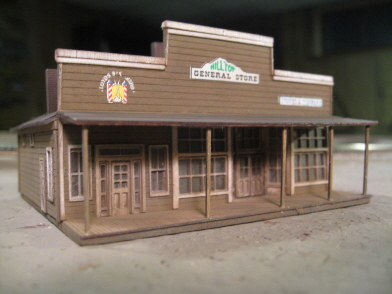
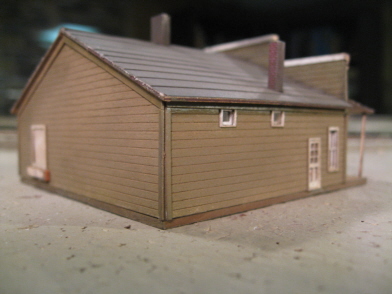
It's been many years since I last assembled a "lasercut wood" kit, and now I remember why- these things are really hard to put together (at least as compared to plastic kits). What you get are a few large pieces of wood for the base, the walls and the roof, several sheets of smaller, peel-and-stick wooden pieces (windows, doors, trim, etc), a sheet of clear plastic window glazing, a couple of sheets of peel-and-stick roofing material and a couple of white-metal chimneys.
The large wooden pieces aren't too difficult to deal with - basically you glue them together using your favorite brand of wood glue and then spray them with your favorite brand of enamel paint (I went with Floquil "Rail Brown"). The individual pieces are cut very precisely and I didn't have any serious problems getting things lined up and assembled. Rather, it was all the fiddly little bits of trim and whatnot that I found annoyingly time-consuming. The instructions recommend painting all of said trim pieces all at once (while still attached to the main sheets). So, I went ahead and sprayed mine with Testor's "Flat White". Then I started slogging through the exceedingly painstaking process of getting them all installed. The windows and doors are especially fun, each being comprised of at least four tiny little pieces. And that recessed main doorway was definitely the topper - seventeen individual pieces to fit together prior to installation!
Once I managed to get everything put together, got the roofing "shingles" (painted Grimy Black) stuck on, and the provided chimneys (painted with Floquil "Tuscan") stuck through the roof, I decided to go back and brush over some of the white trim with brown - basically limiting the white to the front of the building and the door and window frames on the sides and back. Next, I stuck on a few Woodland Scenics "press-on" decals ("barber shop" for the partition on the left side of the building and "general store" over the main section). I then finished up with a light dusting of Bragdon powder.
Overall, I think it turned out pretty decent looking (albeit not without its minor flaws). The instructions are pretty easy to follow, although it did take a bit of trial and error to figure out the best way to go about putting this stuff together. My next one should look better, but since it wound up taking me just over a week to construct this one building, I'm quite thrilled that I only talked myself into doing a couple of these things.
So, that should just about do it for my town buildings. I think I wound up with a really nice assortment that work well together. I've tried shuffling them around in various different combinations, and although I haven't made any final decisions yet in that regard, I'm quite happy with my options. I think Slackjaw is going to look great!
12/30/07 - Finished American Model Builder's "Transfer Building" kit
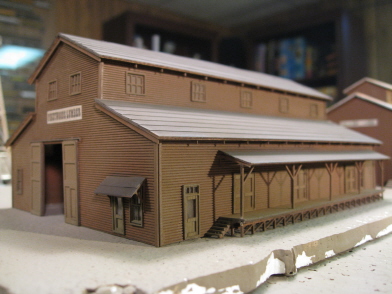

Another very nice looking AMB wooden kit - and this one didn't take nearly as long as Ellington to put together. Although larger, it's a bit simpler. Plus, already having one AMB kit under my belt, I had a better idea of what was in store for me this time around. So, things went a bit more smoothly. I tell ya, I may just get over my woodkitophobia after all.
For colors, I sprayed the walls Tamiya "Red Brown" and the doors, windows and trim Floquil "Rail Brown" (to match the Mountain Lumber buildings). Additionally, I sprayed the structural pieces of the loading dock Red Brown and the dock itself (and the steps) Rail Brown. And once again, Grimy Black for the roof.
Back when I was working on Mountain Lumber, I managed to ruin the decal sheet by spilling a bunch of lacquer thinner on it. Consequently, I wound up having to make my own "Pineywoods Lumber" decal for this building. No big deal, though - I simply created the graphics using Microsoft Word, and then printed it up on my laser printer (using Micromark decal paper). Once printed, I sprayed the paper with a coating of flat finish, cut out the decal, stuck it to the building, and then finished it off with a bit of Solvaset. Once that all dried, I added a dusting of Bragdon decrepitude to the whole thing.
One thing to keep in mind if you're building this kit- you will need every square inch of the provided roofing material, so don't mess around thinking you can waste any of it. Since I wound up with a bunch of leftover roofing strips after finishing Ellington, I assumed the same would apply here. However, after carelessly screwing up a couple of pieces, I actually wound up a couple of pieces short. Fortunately, I'd saved the excess from Ellington and was able to successfully complete the roofing on this kit. Whew!
This kit fits in very comfortably with the Mountain Lumber buildings. And at this point I'm pretty much convinced that I'm not going to need any more buildings for the lumber complex. So, it looks like I have just one more "for sure" structure to build (the log dump), after which I'll be able to start mocking things up and see what else (if anything) I might need in the way of additional buildings.
I have to say, this layout is progressing much more slowly than any of my previous efforts. However, I must also admit than I'm rather enjoying the more languid pace. Prior to starting in on Shay Stadium, I built myself a portable little layout that I've been using for locomotive testing purposes (as well as for simply running trains around for fun). And having that little bare-bones layout has made all the difference, as I don't feel any great need to rush things along on Shay in order to get to the train running stage.
01/05/08 - Finished Republic Locomotive Works' "McCabe Log Dump" kit
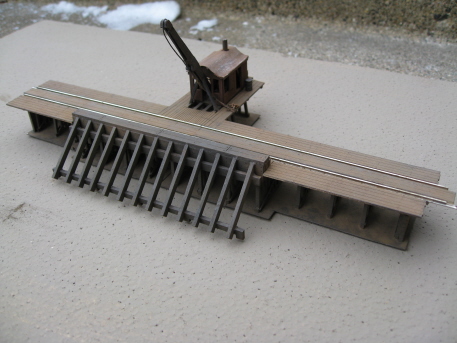



Oh my gawd, what a pain in the ass this turned out to be... Apparantly RLW took the schematics for the HO scale version of this kit, downsized them for N scale, said "good enough" and then fired up the old basswood laser zapper. However, translating everything from HO to N wasn't a one-for-one proposition, what with many parts being changed (or excluded entirely) from the N scale kit. OK, well, fair enough, but RLW didn't bother to write a new set of instructions!
So jeez, I'm plowing along through this thing and suddenly I can't find half the parts they're talking about. Worse still, the ones I'm actually finding simply don't fit together the way the instructions claim they're supposed to. Eventually I fired an email off to RLW and got a reply informing me that the instructions are indeed for the HO kit and not the N kit. So at this point I'm not so much assembling a kit as I'm basically kitbashing one from parts that more or less form a log dump. Gah!
So anyway, bitch, bitch, bitch. Truth be told, once I figured out that the instructions were basically out to get me, I stopped stressing and simply got on with the task at hand. I mean, if you just apply a bit of logic, it doesn't exactly take a rocket surgeon to put this thing together. Still, if I'd known the instructions were useless from the get-go, I probably would've done a few things differently. But oh well, I guess I can't complain too much. Ultimately, I think it turned out pretty nice.
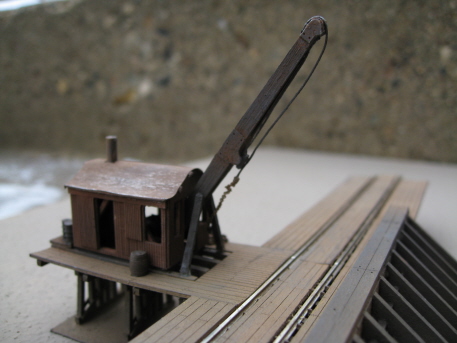
For base coloring, I started out with a generous helping of weatherwash. I then followed that up with Floquil "Roof Brown" for all the support timbers, "Rail Brown" for the deck and Grimy Black for the boom, winch and boiler. However, the actual end colors are mainly the results of Bragdon powder (which, for whatever reason, works especially great on wood). I brushed black on the support timbers, brown on the decks and maroon on the shack (and in fact, I didn't wind up using any paint on the shack at all).
The little sheet of corrugated tinfoil they give you for the shack roof took a bit of finagling. As supplied, it's simply way too bright and shiny. Worse still, it repels all attempts to weatherwash and/or Bragdonize it. So, my bright idea was to spray it with gray paint. Yikes, big mistake - suddenly all that very fine corrugation vanished in a sea of paint. So, before the paint started to dry, I grabbed a brush and wiped most of it off. And lo, once dry, I had a perfect base for the Bragdon. So, I then slathered on various shades (mainly black and rust), and wound up with a very convincing looking rusty metal roof.
As for the rails, well, there was simply no way I was going to try my hand at handlaying them (cuz, y'know, I want to actually be able to run trains over this thing someday). So instead, I went with a couple of straight sections of Atlas Code-55 track. The first thing I did was sand the ends off all the ties (down to practically nothing). Next, I glued the ties from the kit to the trestle joists (leaving off every other one). Next, I removed every other tie from the straights. This allowed me to then snug the straights into place on the trestle (with the Atlas ties fitting nicely between the RLW ties). The decking then glued into place inside and outside the rails more or less perfectly (although I did have to sand down the sections between the rails slightly to get a decent fit).
So, that about does it for buildings. I guess now I need to go stock up on track and see if there's actually a layout hidden away in all of this.
Part 2 - Base construction, tracklaying & wiring (and more buildings)
Part 3 - Roads, lighting and scenery (and yet more buildings)
Part 4 - Scenery, detailing (and yet more lighting)
Part 5 - Trees, detailing, and the end of the line